
Clutter No More: 35+Hacks For Organizing And Maximizing Closet Space
Whether it’s because of a busy work schedule or the bad habit of over-accumulation, only a few can proudly say they own immaculate closets. Most of us have items and clothing placed on shelves and hangers haphazardly, and we often end up rummaging through the contents in search of something to wear or use. Don’t despair; you can transform your closet into a functional and efficient space with a few innovative ideas, and even double your storage!
Organization doesn’t have to be a daunting task. By implementing a few concepts, you can maximize your closet’s potential and create a functional area. The key is customizing solutions to your needs, utilizing vertical space effectively, and maintaining a routine. It also pays to know what to let go and what to keep. With these brilliant hacks, you can reduce clutter and say goodbye to eyesores.
1. Make an inventory
Effective closet organization is essential for maintaining a tidy and efficient living space. A crucial step in achieving this is creating an inventory of your clothes. By cataloging your clothing items, you gain a comprehensive understanding of what you own, allowing you to make informed storage and organization decisions.
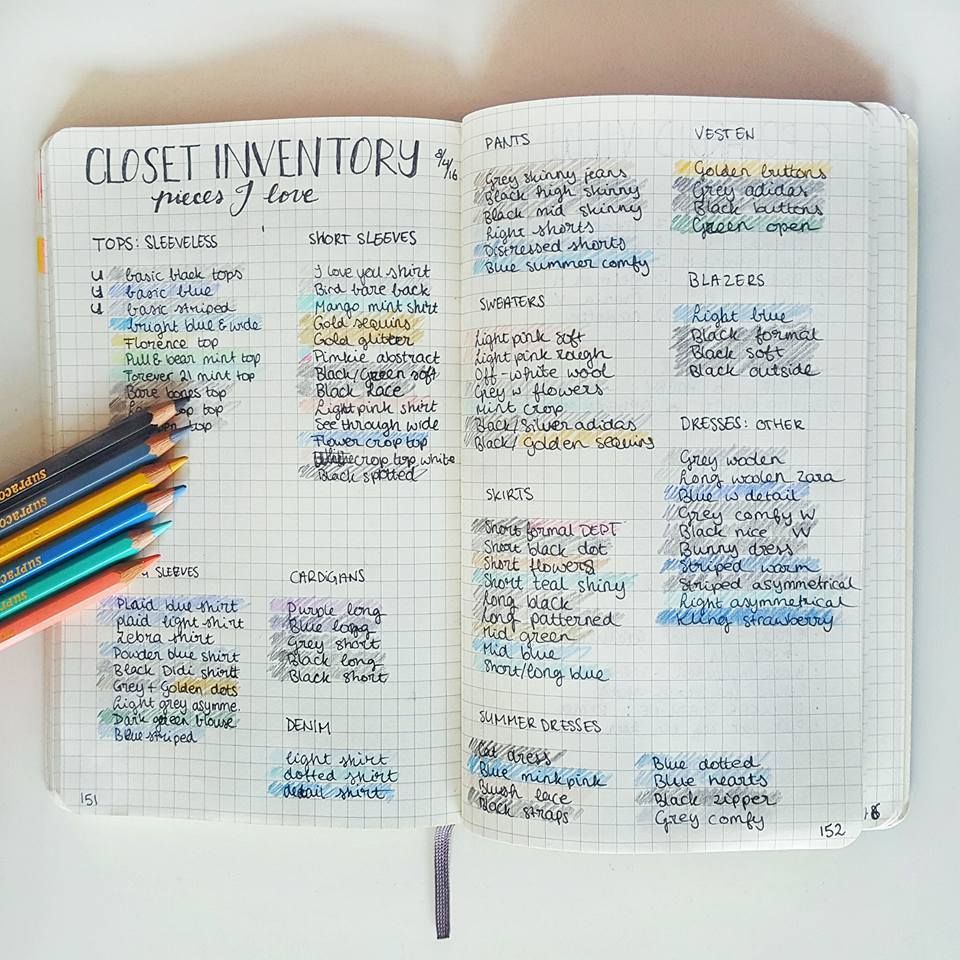
Creating an inventory of your clothes involves systematically listing and categorizing each item in your wardrobe. This process provides a clear snapshot of the types and quantities of clothes you own. It allows you to assess the overall size of your collection and identify any redundancies or gaps.
2. Separate seasonal clothes
One effective strategy for optimizing closet space and maintaining an organized wardrobe is to separate and store seasonal clothes. With the changing seasons, it’s crucial to have a structure that allows easy access to appropriate clothing while maximizing space. Begin by removing out-of-season clothing.
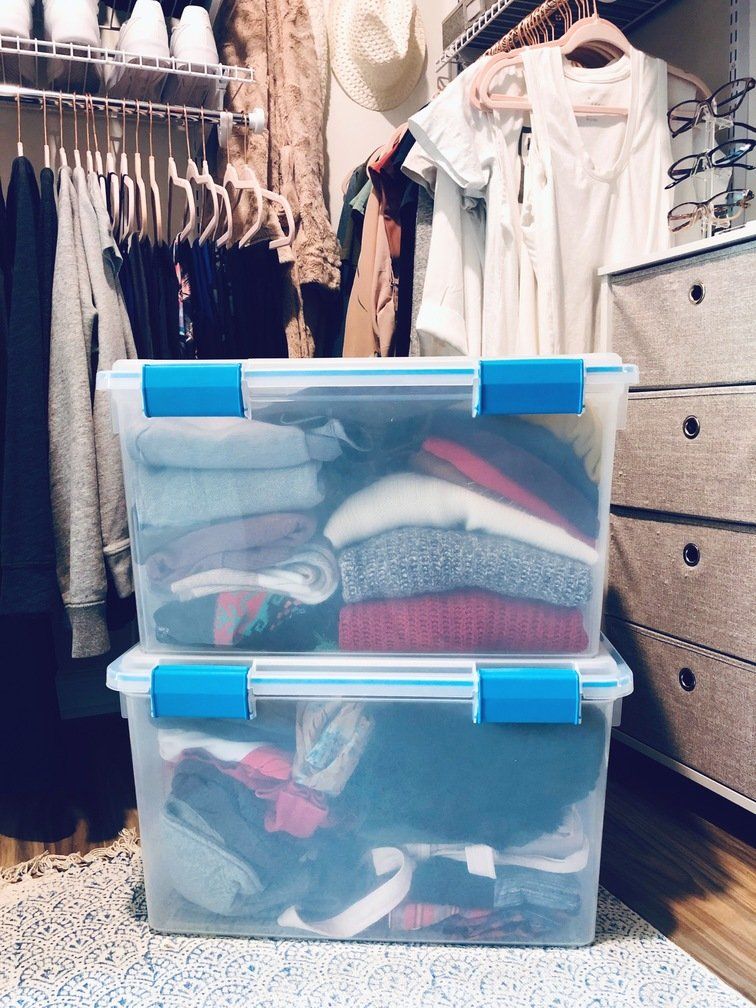
Categorize your clothes into warm-weather items (such as summer dresses, shorts, and swimsuits) and cold-weather items (such as coats, sweaters, and boots). This will help determine the space required for each season, immediately frees up space, and reduces visual clutter.
3. Donate unused clothes
Many of us have cupboards full of clothes we no longer wear or need. These unused garments take up valuable space and contribute to clutter. Instead of just stashing them away, donate them. Start by separating the clothes required from unwanted ones.
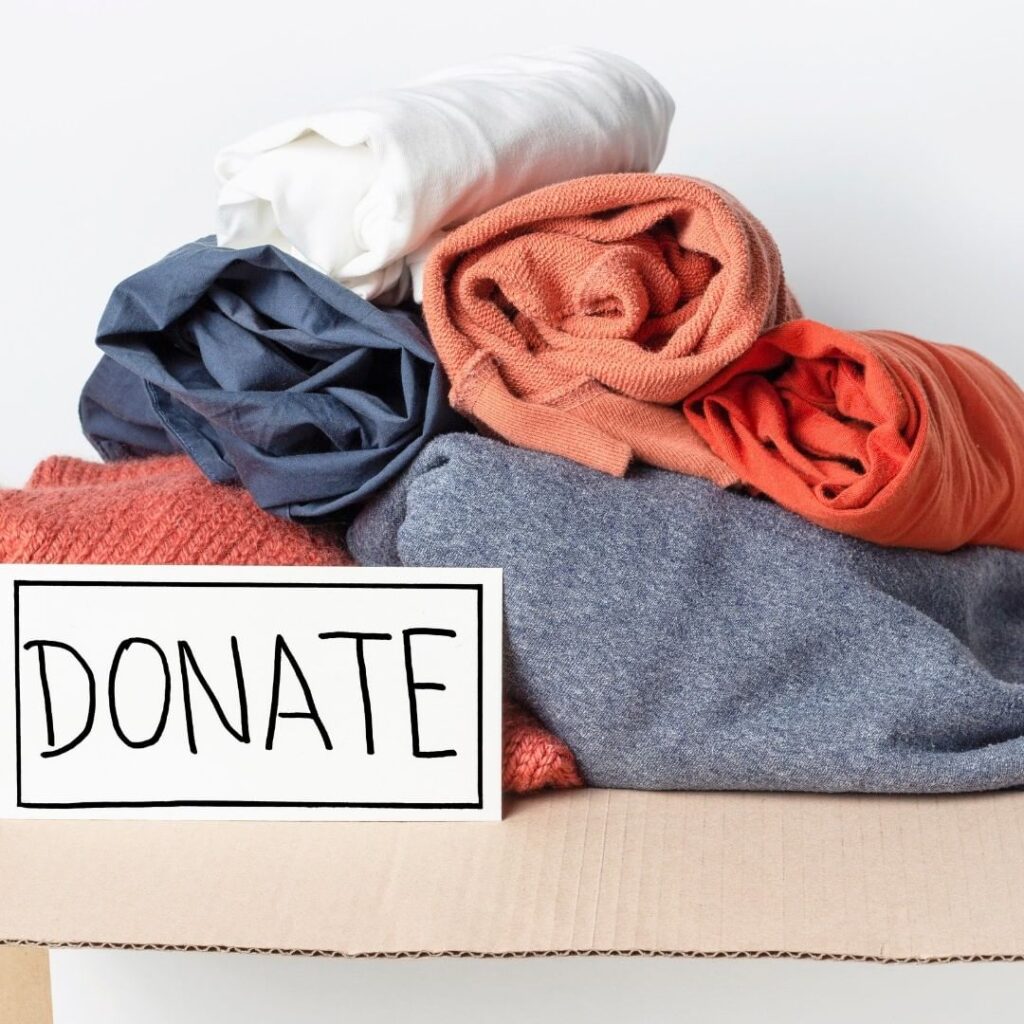
Donating unused clothes helps in decluttering our homes, allows us to give back to the community, and make a positive impact on others’ lives. By donating, we extend the lifespan of our clothes, keeping them out of landfills and reducing the need for new clothing production.
4. Keep footwear aside
Footwear often poses a challenge when organizing and maximizing closet space. Shoes can quickly accumulate and take up valuable real estate. However, with some clever strategies, it is possible to save space while maintaining a well-organized and easily accessible shoe collection.
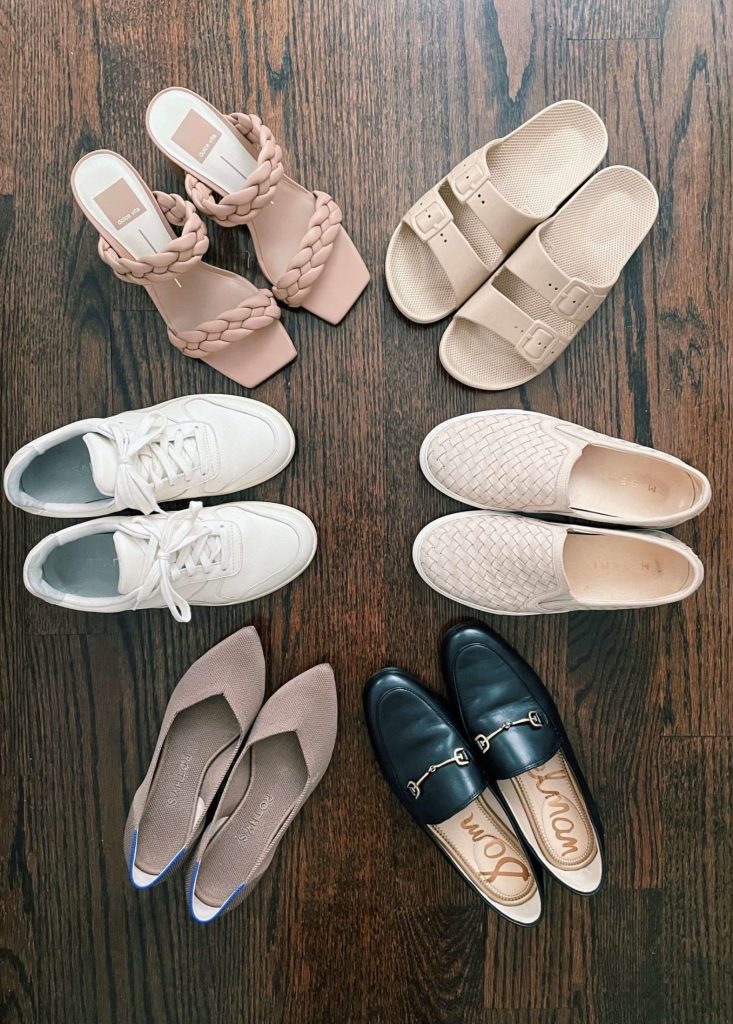
Assess your shoe collection before implementing a space-saving storage solution. Take inventory of your footwear, including sneakers, boots, heels, flats, sandals, and flip-flops. Categorize your collection into two; worn often and seasonally or for special occasions. Seasonal footwear can be stored in clear plastic boxes and stacked.
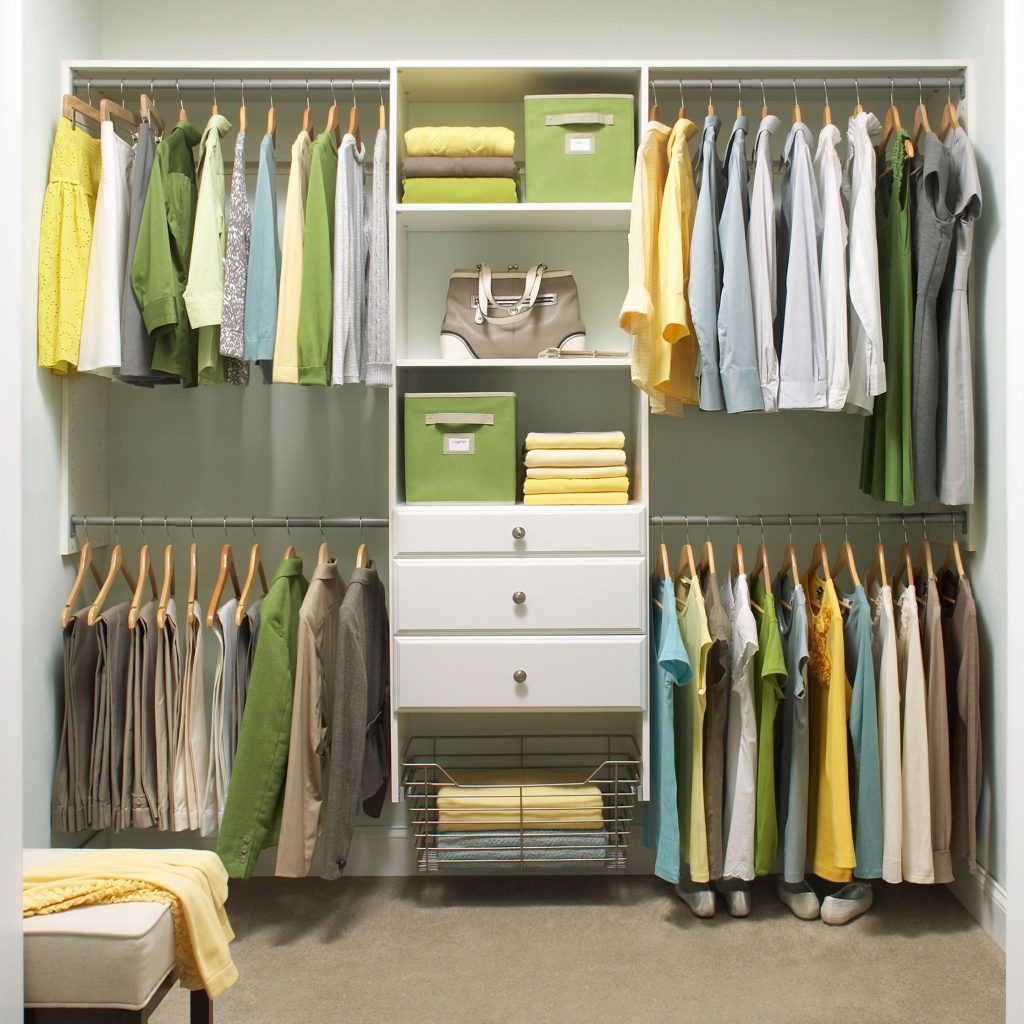
5. Add extra shelves
One effective strategy for maximizing closet storage is to incorporate extra shelves. Additional shelving units create valuable vertical storage space, allowing the optimum organization of your clothes, accessories, and other items. Extra shelves provide a fantastic opportunity to utilize vertical space.
With vertical storage, you can make the most of the available closet height, increase storage potential, and improve overall organization. Another advantage of incorporating extra shelves is the chance for customization, which guarantees something that suits your needs and requirements.
6. Put more hooks
Hooks are simple yet highly effective. Adding hooks can create additional hanging space for various items, such as clothing, accessories, and everyday essentials. Hooks offer versatility, convenience, and easy accessibility, making them an ideal tool for clever closet organization.

Hooks allow you to utilize previously unused wall space in your closet. The walls provide a vertical storage area that can be efficiently used for hanging items, keeping them visible and easily accessible. You free up valuable floor and shelf space, creating a clutter-free environment.
7. Use PVC pipes for storage
PVC pipes are versatile and readily available materials that can be used creatively for closet organization. With their cylindrical shape and customizable dimensions, PVC pipes offer a unique storage solution that maximizes space utilization and keeps your closet well-organized.

PVC pipes can be transformed into functional shoe racks for your footwear. Cut the PVC pipes into lengths that can accommodate the size of your shoes. Arrange the pipes horizontally and secure them in place, either on a shelf or directly on the floor.
8. Use S-hooks and chains
S-hooks and chains are a clever and versatile solution for closet organization, allowing you to maximize vertical empty space. Evaluate the available space and identify areas where you can utilize S-hooks and chains. This could be behind the door, on the walls, or even from the ceiling.
Cut the chains to the desired length using pliers. The size will be based on the height and spacing you want between the hanging items. Ensure that the chains are long enough to reach from the hooks to your desired hanging level.
9. Construct a built-in ironing board in the closet
Installing a built-in ironing board in your closet is an efficient way to save space and have a convenient ironing station where you need it. Cut a piece of plywood or a similar suitable mounting surface to the appropriate size based on your measurements.
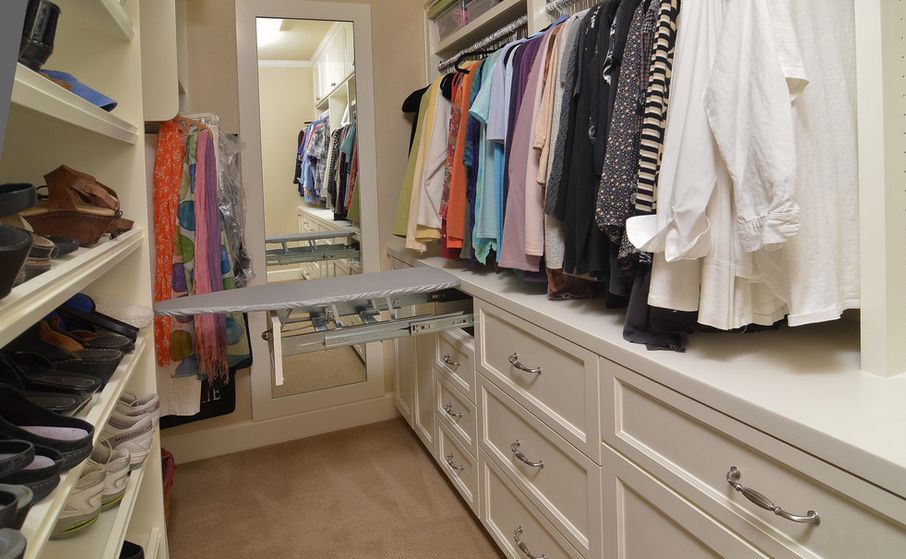
Position the ironing board kit on the mounting surface, aligning it with the hinges. Secure the ironing board to the surface using the provided screws or any additional hardware with the kit. Make sure the ironing board is attached correctly and can fold up and down smoothly.
10. Behind-the-door storage idea
Behind-the-door storage is a fantastic organizational idea; it utilizes unused space and gives easy access to regularly used items. You can store and organize your shoes, keeping them visible and accessible. These pockets are also great for small items like belts, scarves, or accessories.
Install a hanging jewelry organizer with clear pockets or hooks behind the door for a convenient and organized solution for your jewelry collection. Now you don’t have to spend a long time looking for your necklaces, bracelets, earrings, and other accessories.
11. Use soda can tabs to make double cloth hangers
An innovative and cost-effective solution for maximizing space is to use soda can tabs to create double-cloth hangers. This DIY project allows you to hang multiple garments on a hanger, doubling your hanging capacity. Take a wire hanger and straighten it using pliers.
Position two soda can tabs horizontally, with the pull tabs facing the same direction. Slide them onto the wire hanger, one on each side, with the rounded edges facing outward. The hanger wire should go through the holes in the soda can tabs.
12. Use shoe boxes as drawer organizers
Using shoe boxes is a practical and budget-friendly solution for tidying your drawers and maximizing storage space. Shoe boxes can be repurposed to create compartments, helping you efficiently sort and organize small items, such as socks, scarves, accessories, and underwear.
Measure the height and depth of your drawer to determine the appropriate size for the shoe box organizers. Use sharp scissors, and cut down the shoe boxes to the desired height. Cover the shoe boxes with wrapping or decorative contact paper for a more visually appealing look.
13. Hang and fold clothes properly
Effective closet organization goes beyond having enough storage space. It also involves employing proper hanging and folding techniques to maximize your closet’s capacity and keep your clothes easily accessible. By mastering these techniques, you can create a neat and efficient wardrobe that saves you time and frustration.
Invest in similar hangers to create a visually cohesive and organized look. Choose hangers that suit your clothing, such as slim hangers for tops and wide hangers for jackets and coats. Hang delicate or easily wrinkled items, such as blouses or dresses, on padded or velvet hangers.
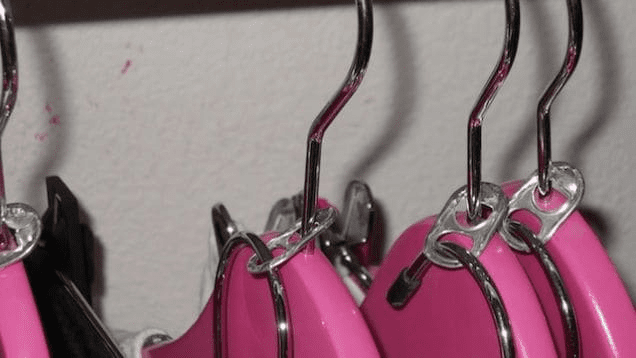
14. Make hangers for footwear
Creating hangers for footwear is a clever way to increase your closet space and keep your shoes organized and easily accessible. Select sturdy wire hangers strong enough to support the weight of your shoes. Plastic-coated or wooden hangers are recommended to prevent any damage to your footwear.
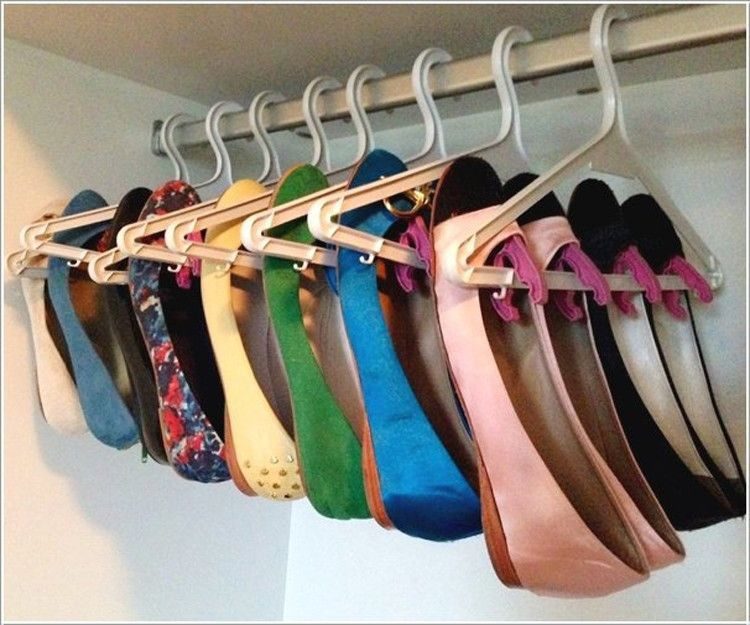
Using pliers, straighten the hangers as much as possible, removing any bends or curves. Cut the insulation or noodle into shorter lengths, approximately 6 to 8 inches each. The length of the hangers is based on the size of your shoes. Hang the footwear hangers in your closet using the hooks.
15. Use shower curtain rings to organize scarves
Using shower curtain rings to organize scarves is a clever and practical solution that keeps them easily accessible and neatly organized. A few varieties of shower rings are available, but it’s best to use those with clips for this project.
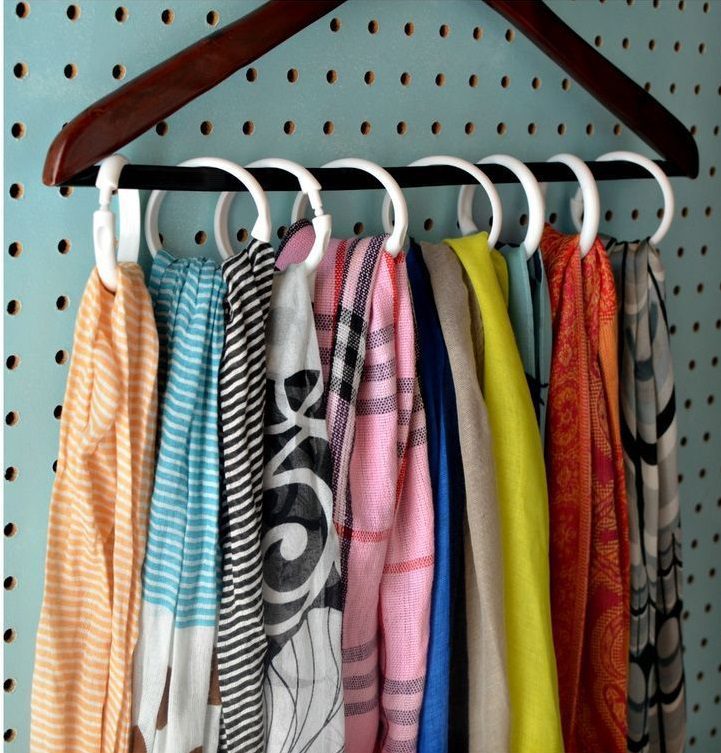
Collect all your scarves to determine the number of shower curtain rings needed for your organizer. If your rings do not have clips, you can loop the scarves directly through the rings. Adjust the scarf so it’s secure and won’t slip off.
16. DIY corkboard storage
Creating a DIY corkboard storage system is a fantastic way to utilize wall space and keep small items easily accessible. Corkboards are versatile and can be used to pin notes, jewelry, accessories, and other lightweight items that easily get lost.
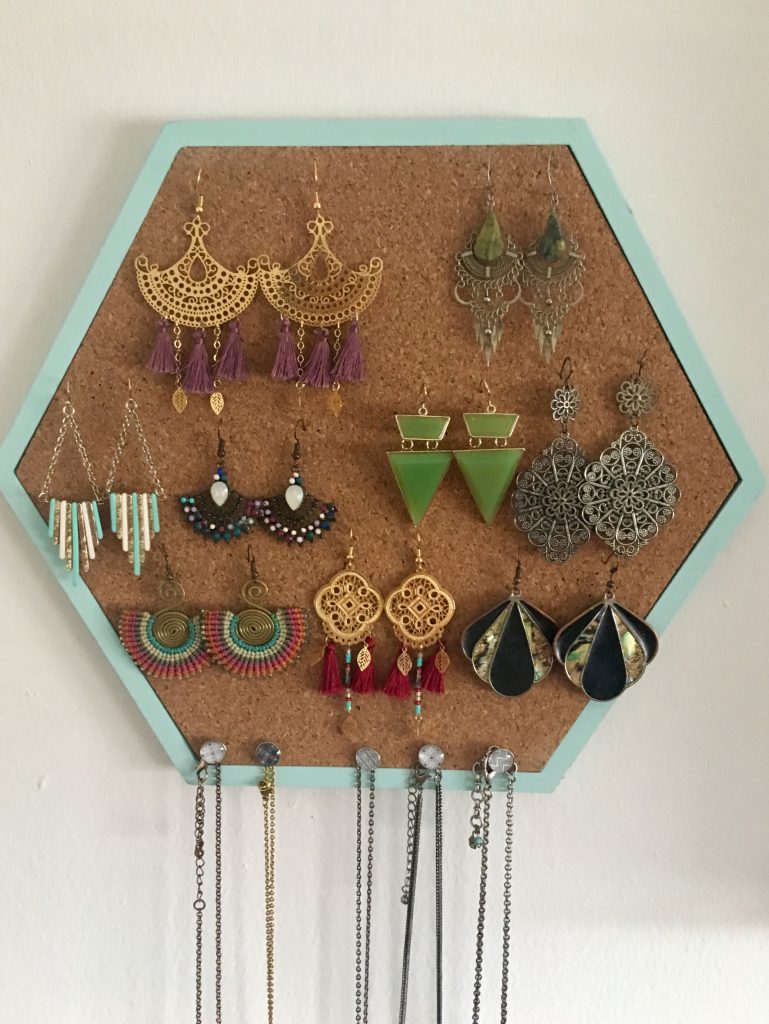
Decide on the method of attachment based on the type of corkboard you have and the surface of your closet wall. You can use adhesives to secure the corkboard directly onto the wall. Alternatively, you can attach the corkboard to a frame and then hang it on the wall.
17. Add a closet door shelf
Adding a closet door shelf is a great way to use the often-underutilized area behind your closet door. It provides an additional surface for organizing and displaying small items. Take into account any door handles or other obstructions that may affect the placement of the shelf.
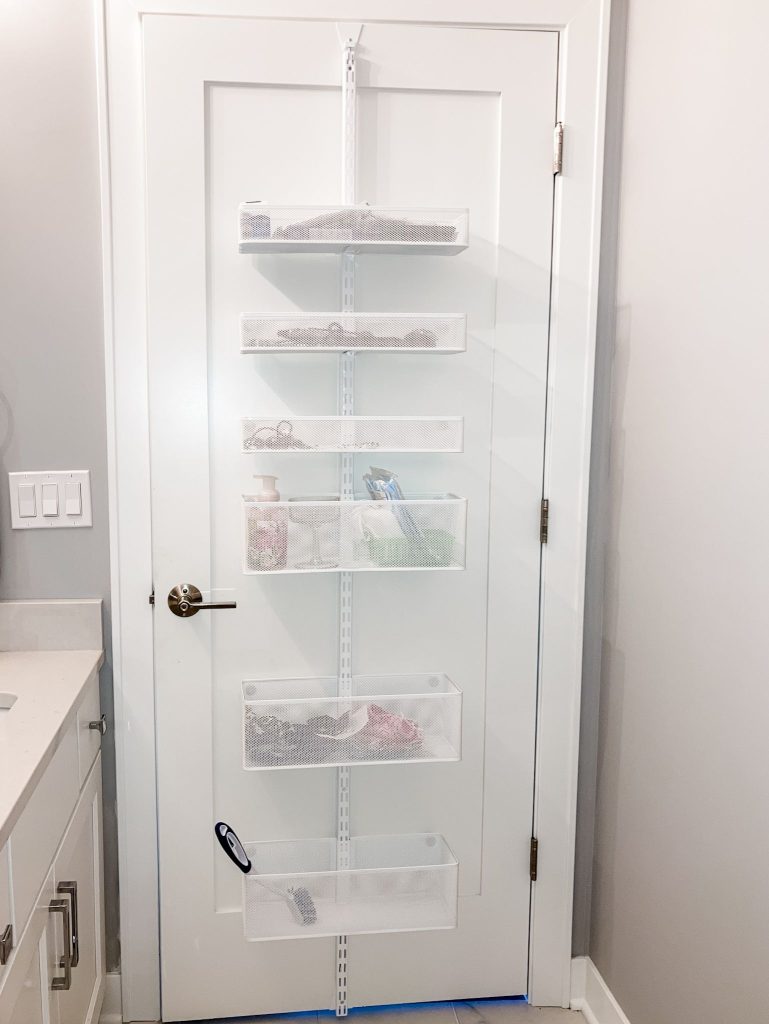
Use baskets, bins, or small containers to store and categorize items. You can also display decorative items or use them as a mini-bookshelf for small books, paperbacks, or magazines. Get imaginative and make the most of this additional storage space.
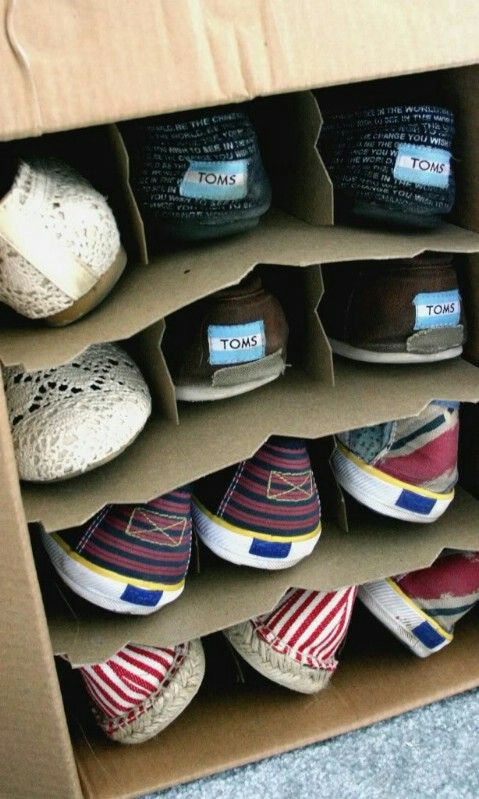
18. Wine box shoe organization
Wine box shoe organization is a creative and eco-friendly way to repurpose wine boxes. It lets you neatly organize and protect your shoes while adding a unique touch to your closet or entryway. Look for boxes with dividers, which provide individual compartments.
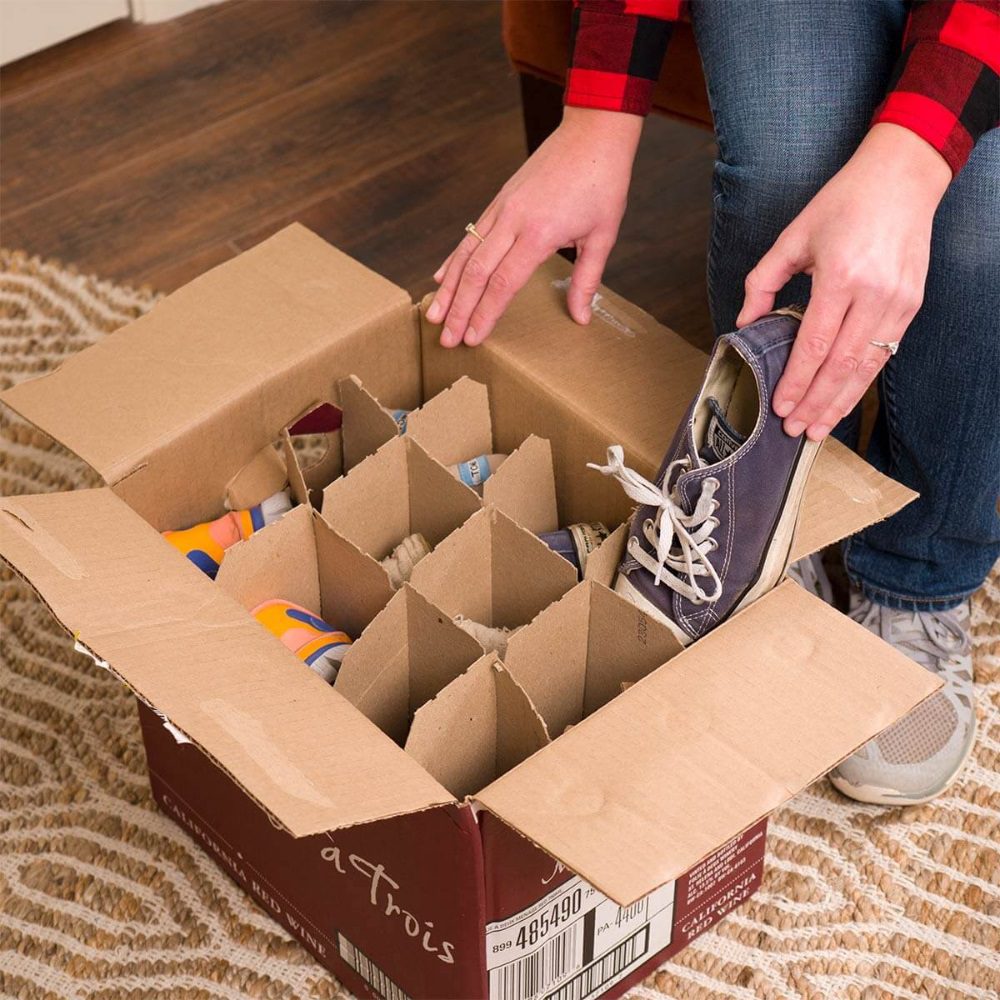
Place each pair of shoes in its designated compartment within the wine boxes. Ensure they are correctly aligned and fit comfortably within the compartments. You can organize footwear by color, frequency of use, or type to make them easier to find.
19. Add a sliding pants rack
A sliding pants rack is an excellent addition to closets of any size. After ensuring the rack is straight and level, fasten it in place securely with a screwdriver. Remove any existing items or clothing that might obstruct the installation process.
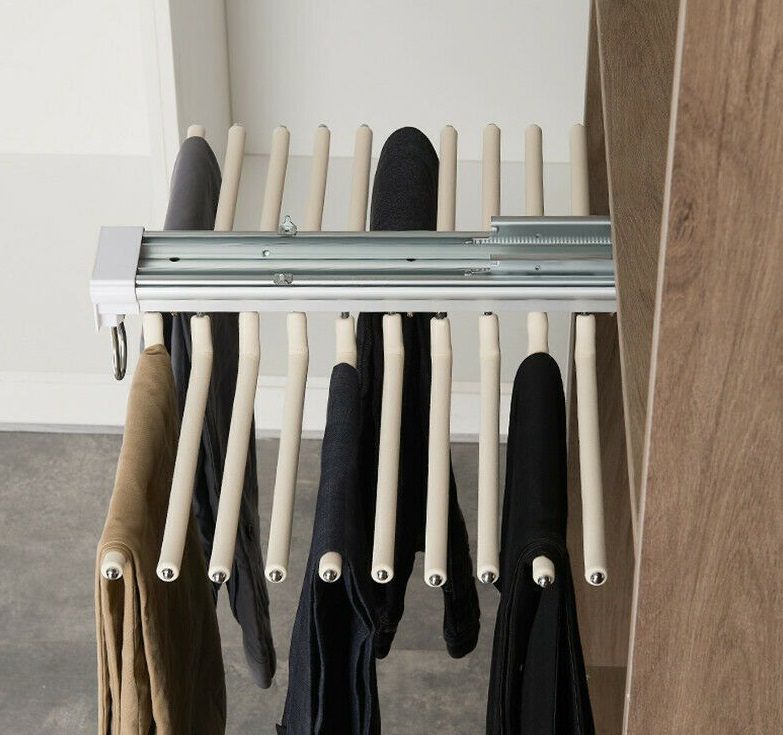
After installing the sliding pants rack, test its sliding functionality. Slide the rack back and forth along the track to ensure it moves smoothly without obstructions or difficulties. Adjust the positioning or alignment as needed to ensure a frictionless operation.
20. Put a second rod below the first rod
Adding a second rod below the first in your cupboard is a great way to maximize your hanging space and create a more functional closet. Evaluate the area in your closet to determine if there is enough vertical clearance to add a second rod below the existing one.
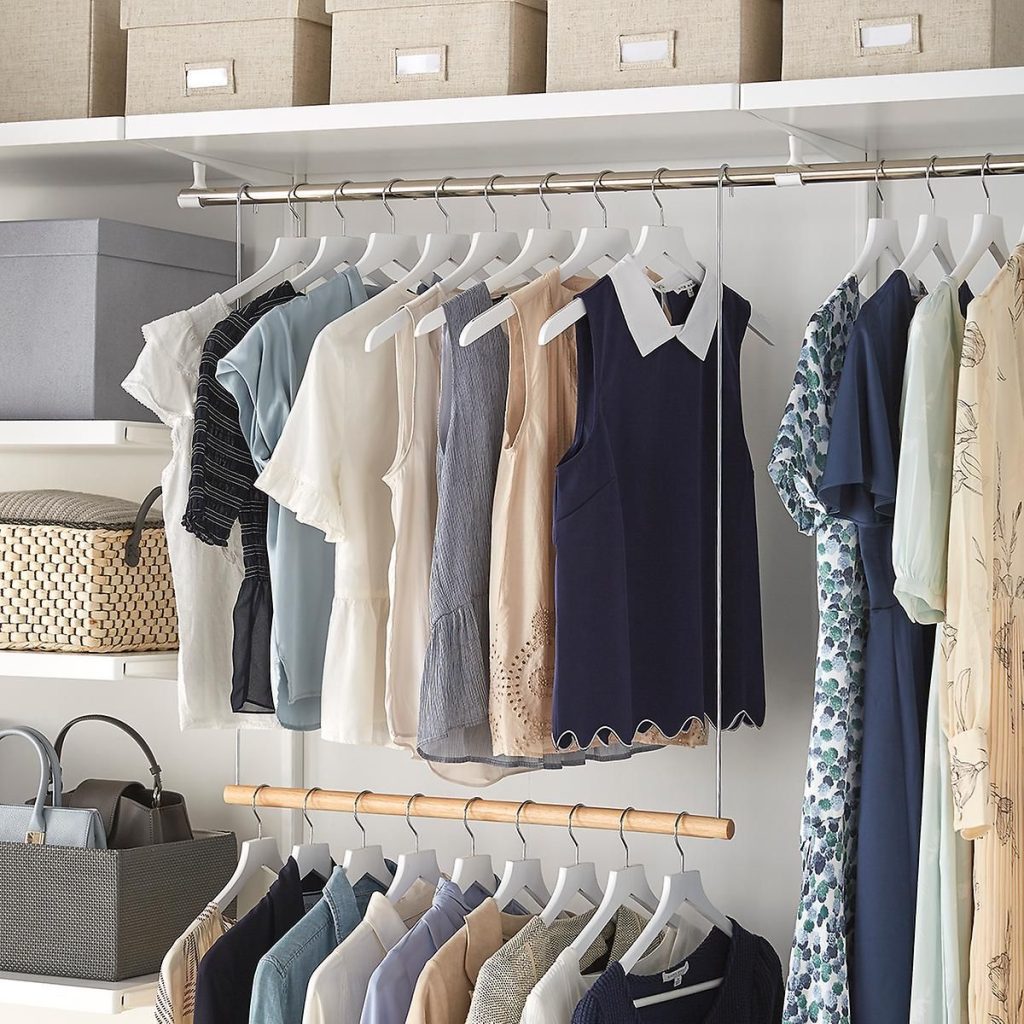
Ensure the lower rod will not interfere with your closet’s shelves, drawers, or other storage components. Measure the size of your closet to determine the length of the second rod needed. Purchase a matching rod to maintain a consistent look.
21. Organize your shoes with tension rods
Tension rods are adjustable rods installed horizontally in closets that create additional storage for shoes. Position the first tension rod horizontally at the desired height. Twist the rod to adjust the length to fit snugly between the closet walls or designated area.
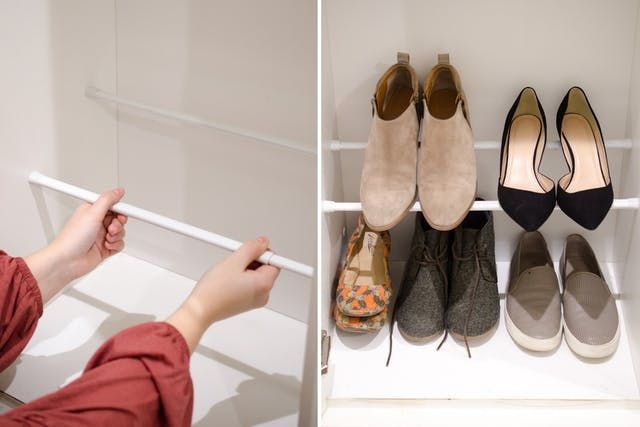
Start organizing your shoes on the tension rods. Place each pair on the rods, allowing them to rest against the closet walls. Place the shoes toe-to-heel or side-by-side, depending on the space available and your preference. Avoid overcrowding the rods to prevent damage.
22. Use towel racks and s-hooks to organize jewelry
Using towel racks and S-hooks to organize jewelry is a practical and space-efficient solution that keeps your jewelry easily accessible and tangle-free. This method allows you to hang and display your jewelry, making choosing and coordinating accessories convenient.
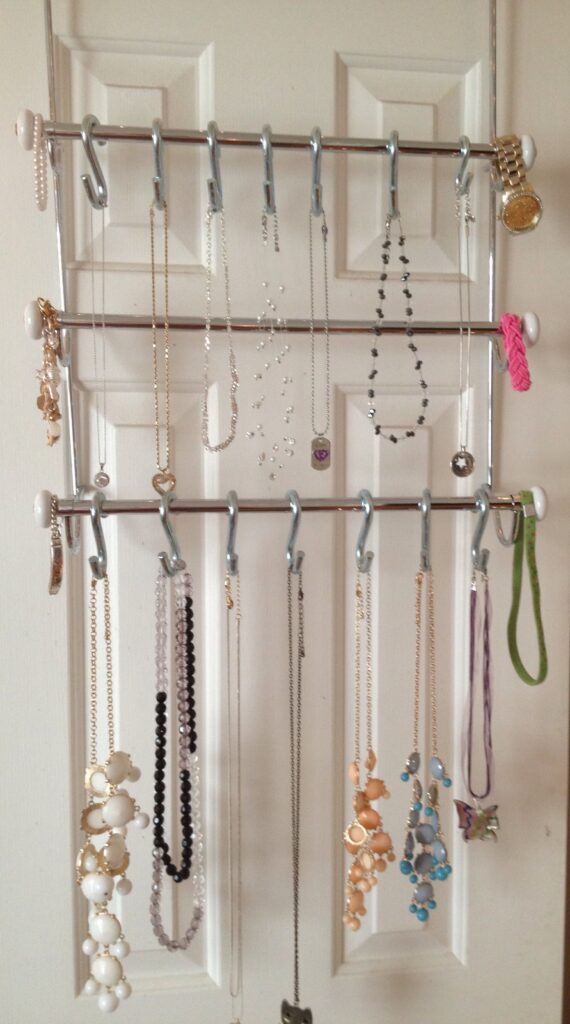
Decide where you want to install the towel racks. Consider a wall space near your dressing area or inside your closet. Pick a space that’s accessible and with enough room for the towel racks. Ensure they are level and properly mounted to support the weight of your jewelry.
23. Use shoe boxes as DIY dividers
Not only do shoe boxes cost nothing, but they can also be repurposed to create compartments and sections within your wardrobe, helping you keep different items separated and neatly arranged. Use adhesive to keep the shoe box dividers in place.
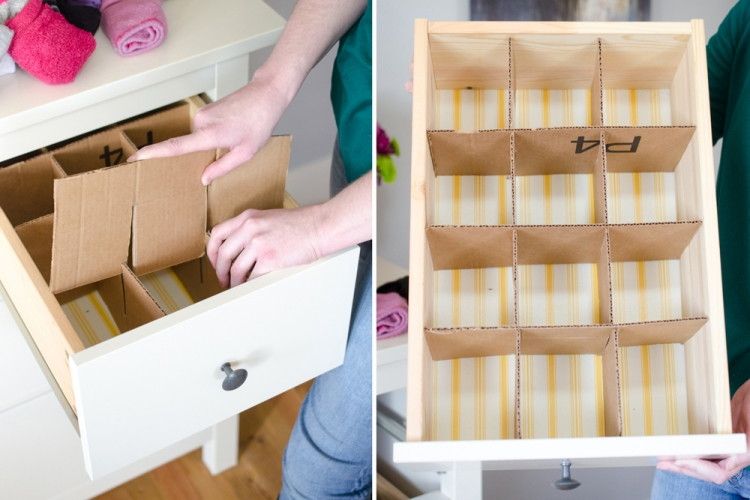
Position the covered shoe boxes and arrange them to create divisions for different items. For example, you can utilize one to store belts, another for socks, and another for scarves. Adjust the position and number of boxes based on the available space and your specific needs.
24. Use coat racks to organize shoe storage
Select coat racks that are suitable for shoe storage. Opt for racks with sturdy hooks or hangers that can support the weight of shoes. Consider the design and style of the coat racks to ensure they match your aesthetic preferences.
Once the coat racks are installed, arrange your shoes on the hooks or hangers. You can hang shoes with laces or straps, such as sneakers or heels, directly. For shoes without laces, consider using shoe storage accessories like shoe boxes or bins placed on the shelves or under the coat racks.
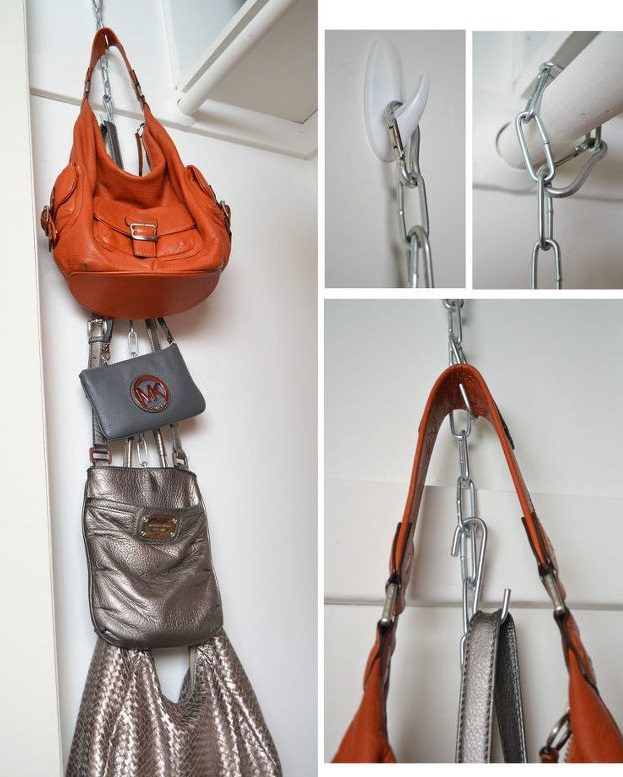
25. Create bag hangers with shower curtain hooks
Using shower curtain hooks to create bag hangers is an efficient and practical approach to keeping your bags organized and within easy reach. Select a sturdy rod or bar that can support the weight of your bags. Ensure they are long enough to accommodate the number of purses you want to hang.
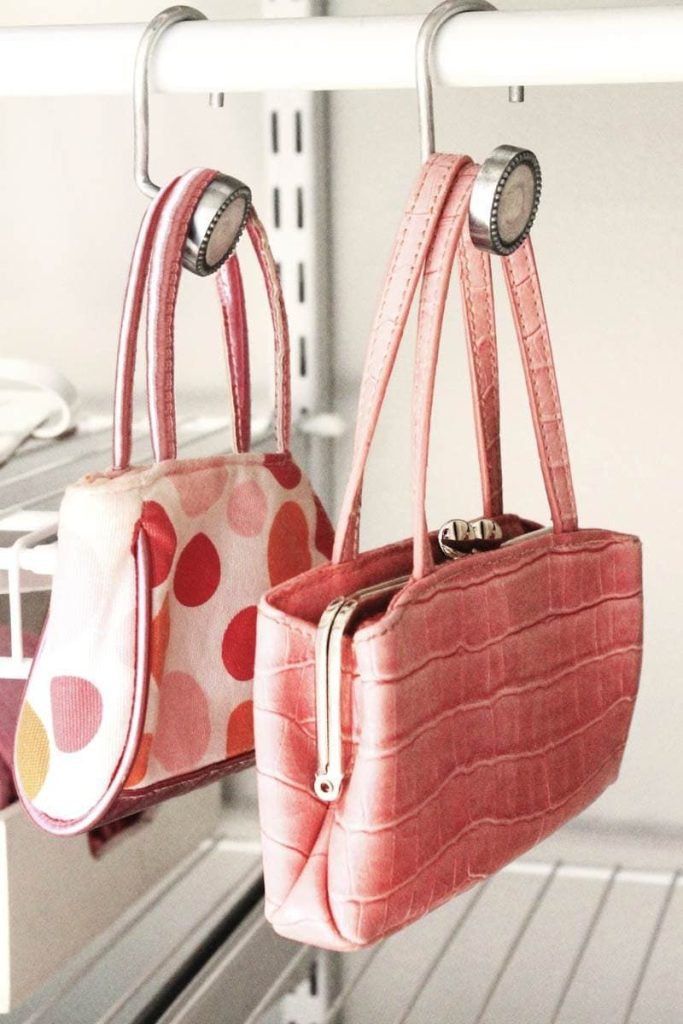
Open the shower curtain hooks by sliding the closed loop part outwards. Insert the hook onto the rod or bar, ensuring it is securely placed. Place your bags onto the shower curtain hooks, sliding the handles or straps through the opened loop of each hook.
26. Use drawer tags to identify the inside items
Evaluate the drawers you want to organize and determine which would benefit from tags or labels. Consider the contents of each and decide which needs clear identification. Select tags or labels that suit the size and style of your drawers.
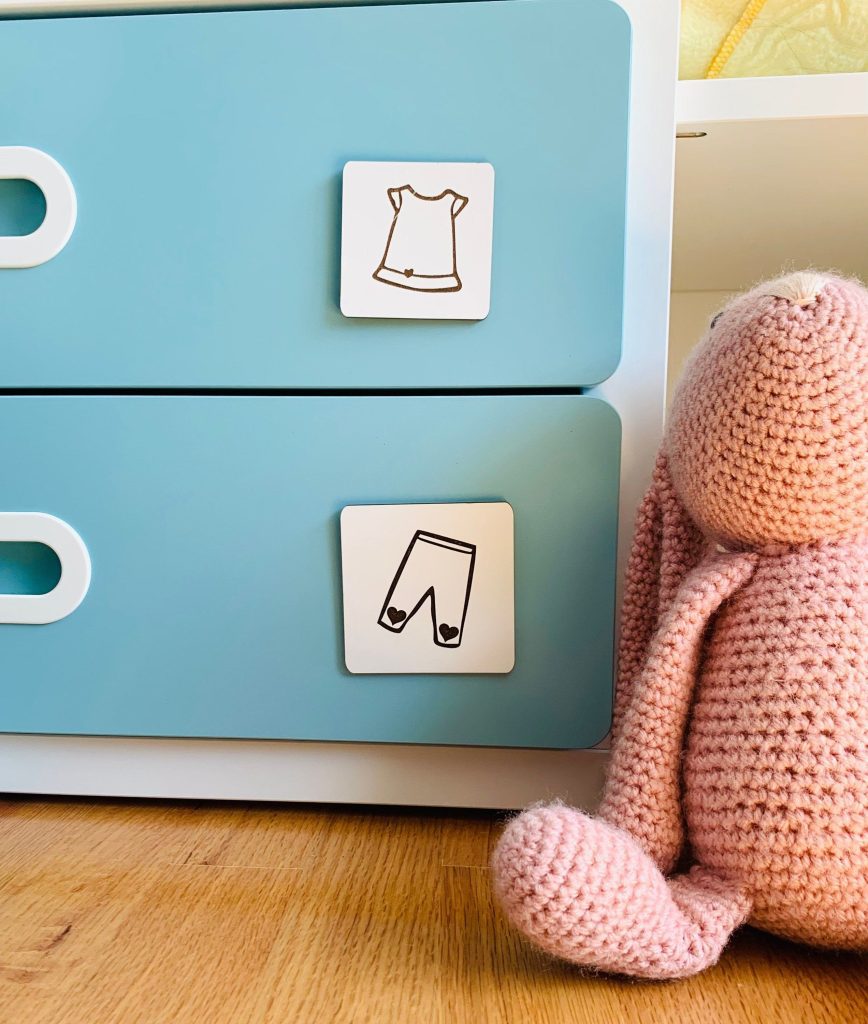
Decide on a labeling system that works best for you. You can create labels based on categories (e.g., socks, underwear, t-shirts) or specific items (e.g., jeans, sweaters, accessories). Choose an intuitive system that aligns with how you naturally group your belongings.
27. Use pants hangers to organize your boots
Organizing your boots can be challenging, especially keeping them upright and preventing them from getting damaged or creased. Luckily, using pants hangers is a clever and effective solution for boot organization. Start by collecting boots that need sorting.
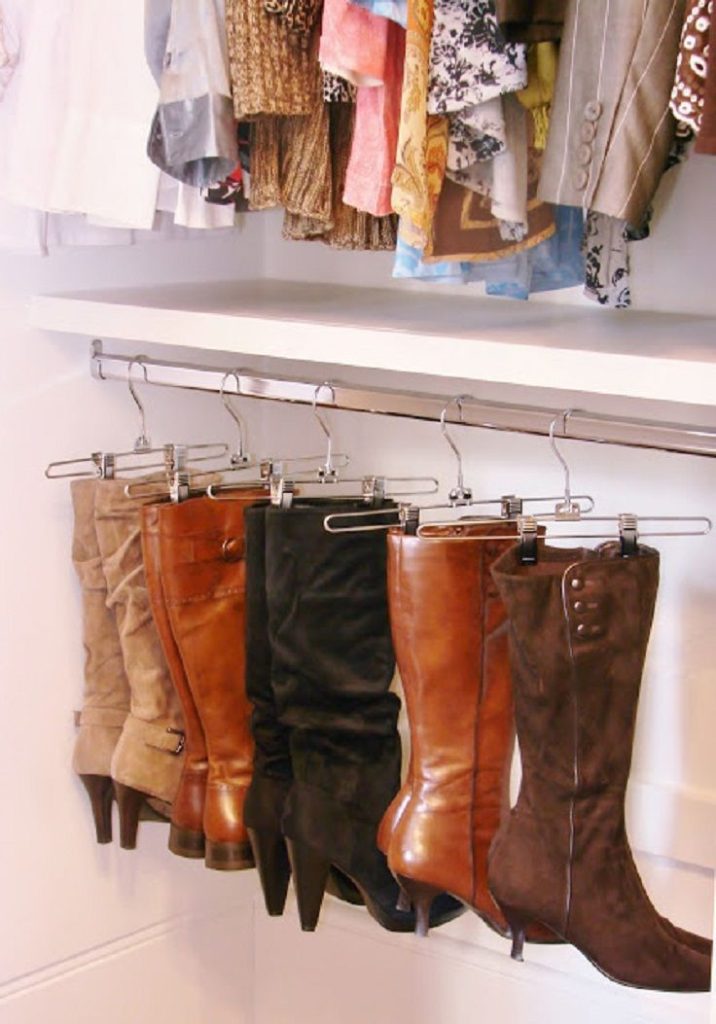
Place one boot on each side of the pants hanger. Use the clips or clamps to secure the boots in place safely and securely without causing any damage. You can arrange them by color or season or whichever way you prefer.
28. Use a hat hanger with curtain rings and a hanger
Collect curtain rings with clips and a suitable hanger. Ensure that the hanger is strong enough to hold the weight of your hat without bending or breaking. Open the curtain rings and slide them onto the horizontal bar of the hanger. Space them out evenly along the length of the bar.
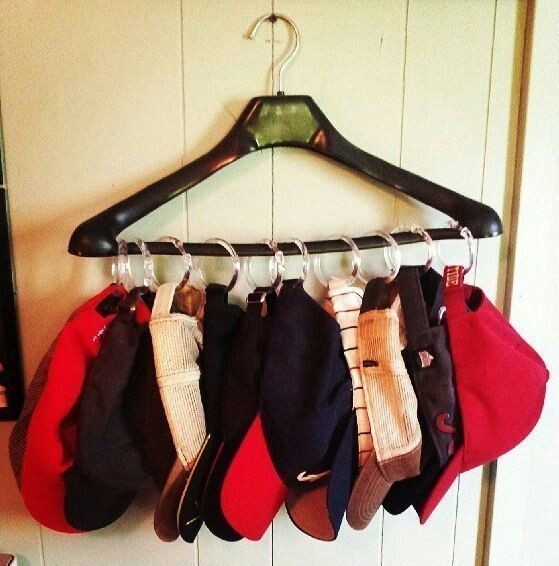
Take each hat and place it over one of the curtain rings. Position the ring to hold the hat securely but not distort its shape. Use the clips on the curtain rings to secure the hats in place. Adjust the position and angle as desired.
29. Add a storage go-round for the corner unit
A storage-go-round, lazy Susan, or rotating organizer, is a fantastic addition to corner units. It maximizes the usability of these often underutilized spaces, making items easier to reach. This prevents taking out things just to get what’s stored at the back.
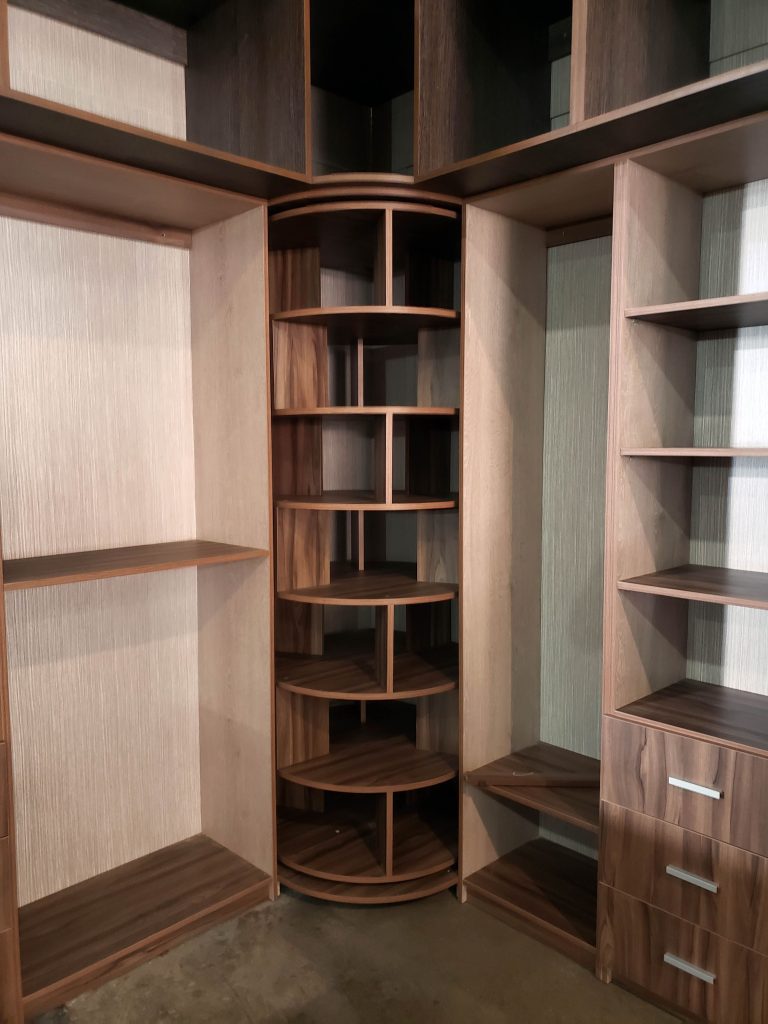
Once the storage-go-round is installed, you can begin sorting and arranging things. Utilize the rotating feature to access items quickly from all angles. You can store frequently used kitchen supplies, spices, toiletries, craft materials, or any other small things you often reach for.
30. Simple but useful scarf organization
Organizing scarves can make them less of an eyesore and prevent them from getting tangled or wrinkled. It also makes finding them quicker. Hang a series of S-hooks on a closet rod or a decorative hook on the wall and drape one scarf on each hook.
Hang a fabric organizer with pockets on the back of your closet door or a wall. Store a folded or rolled scarf in each pocket. This method is suitable if you have countless scarves and want to keep them separated and neatly displayed.
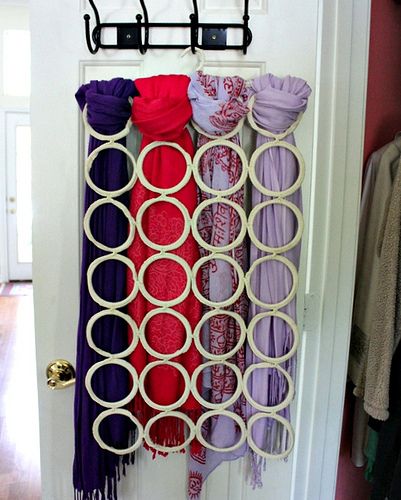
31. Inexpensive scarves organizer from shower curtain rings
A sturdy hanger with a horizontal bar works best for this project. If desired, you can spray paint the hanger to add a touch of color. Take the shower curtain rings and open them. Slide one ring onto the horizontal bar of the hanger and close it securely.

Drape each scarf through one of the shower curtain rings. You can fold or roll the scarves to your liking, ensuring they are visible and accessible. Find a suitable place to hang your scarf holders, such as in your closet or a wall hook.
32. Store sheets in their own pillowcases
Collect the sheets and matching pillowcases. This could include fitted sheets, flat sheets, and pillowcases in a set. Take one of the pillowcases and open it up. Carefully insert the folded sheets into the pillowcase, ensuring they fit comfortably without being too tightly packed.
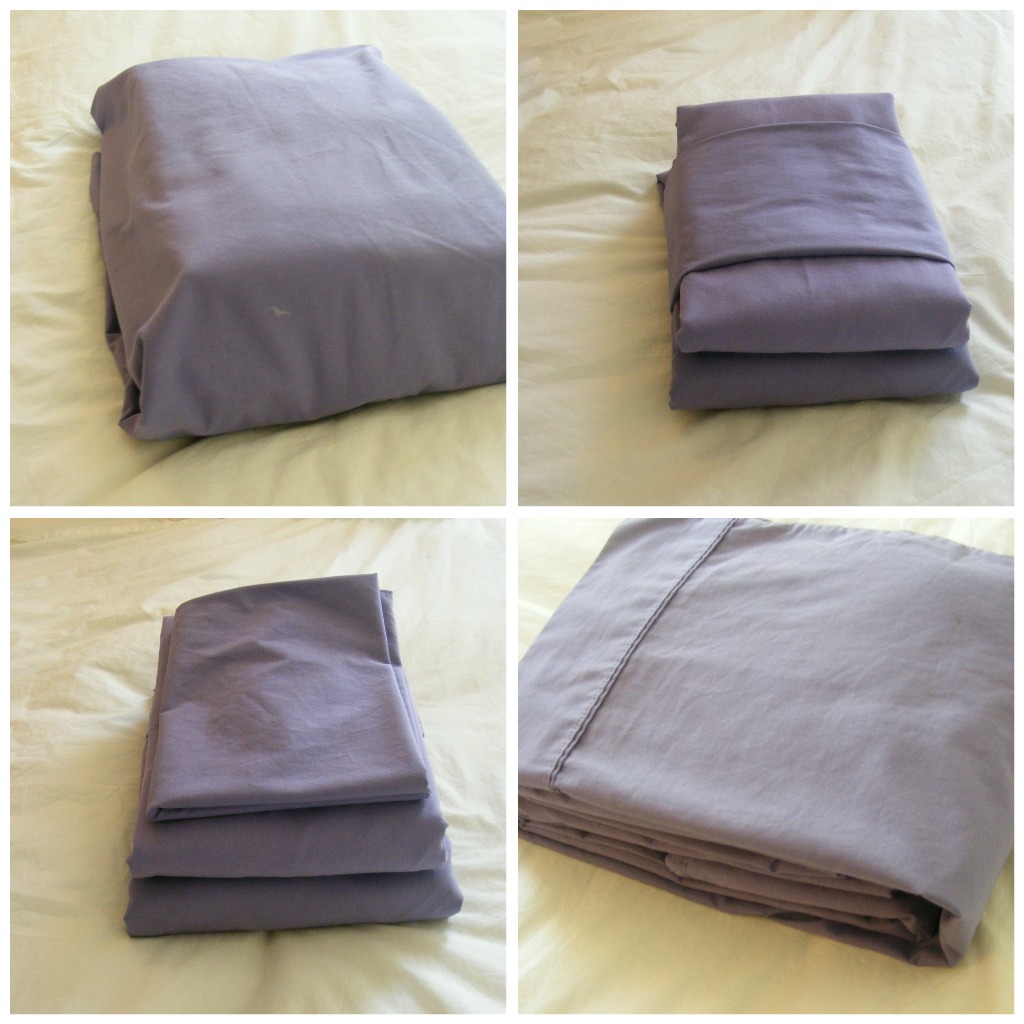
Consider labeling or identifying the pillowcases to make it easier to find specific sheet sets. You can use labels, tags, or colored ribbons to indicate the size, color, or pattern of the sheets stored. This process will save you time when finding a particular set.
33. Curtain rings tank top space saver
An excellent space-saving solution for tank tops is using curtain rings. This method lets you hang and reach for your tank tops while keeping them wrinkle-free. Take the curtain rings with the attached tank tops and slide them onto the hanger or closet rod.
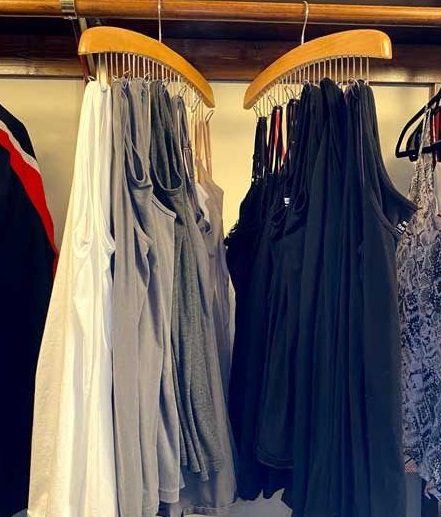
Adjust the spacing between the tank tops on the hanger or closet rod to optimize space and prevent overcrowding. Ensure enough space for every tank top to hang freely without overlapping. Hang the tank tops or place the rod onto the closet rod.
34. Use hooks for your purses in your closet
Determine where you can install the hooks in your closet. A few areas you can consider are the closet wall or the back of the closet door. Select hooks that are strong enough to support the weight of your purses.
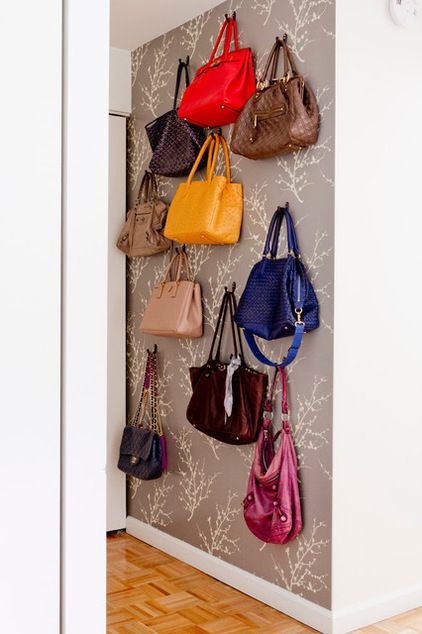
Decide on the placement of the hooks. Consider the length and design of your purses, ensuring enough space between each hook to comfortably accommodate all the bags. Remember to regularly check the hooks to ensure the stability of your purse organization.
35. Install shelving for purses
Evaluate your closet or where you plan to install the purse shelving. Calculate the space’s width, height, and depth to determine the dimensions of the shelving unit. Consider the number of purses you have and their sizes to estimate the required space.
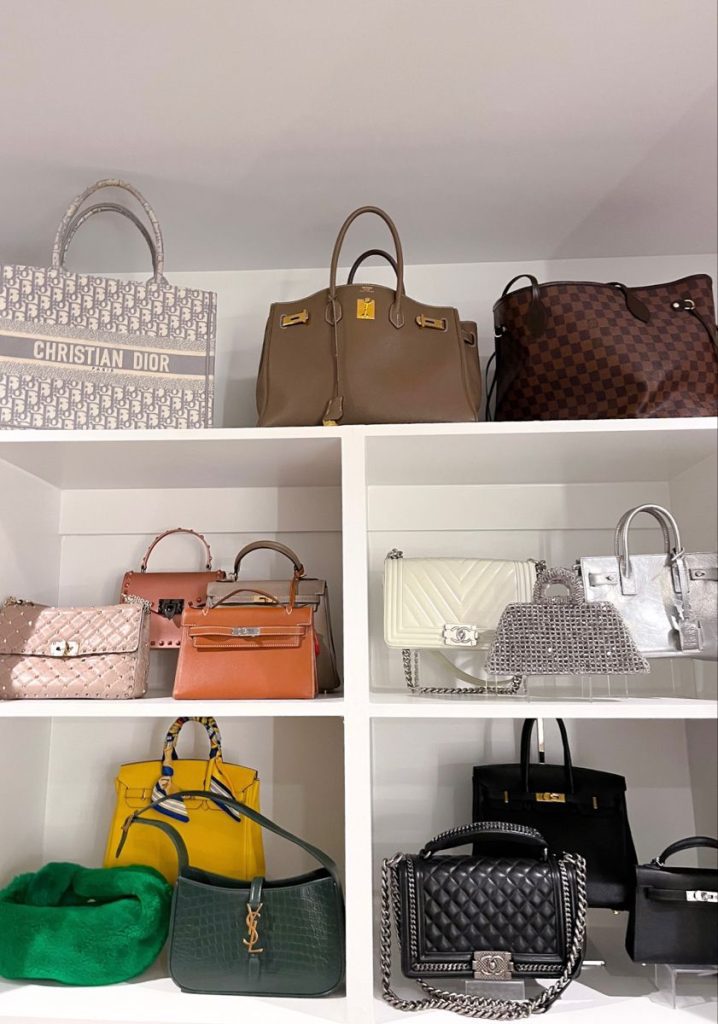
Decide on the ideal placement of the purse shelving within your closet or designated area. Consider factors such as convenience, accessibility, and available space. Typically, installing the shelves above a clothing rod or on a wall adjacent to your clothing storage area works well.
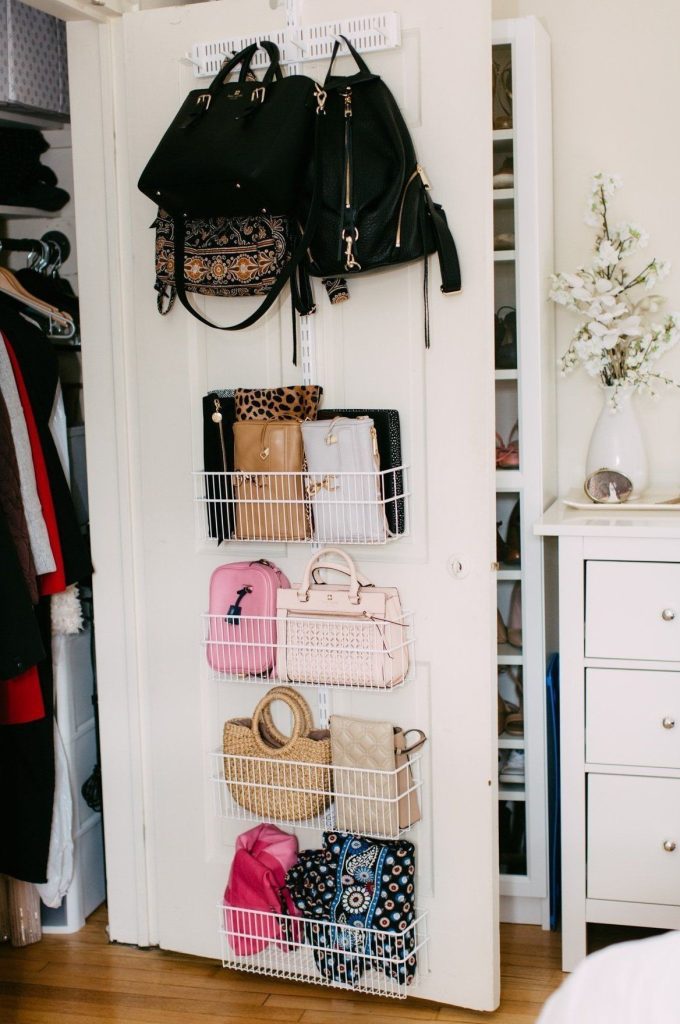
36. Purse rack behind the door
Another practical and space-saving solution for purses is Installing a purse rack behind the door. You can reach for them quickly and utilize the often-overlooked space behind the door. Examine the space to determine the best placement for the purse rack.
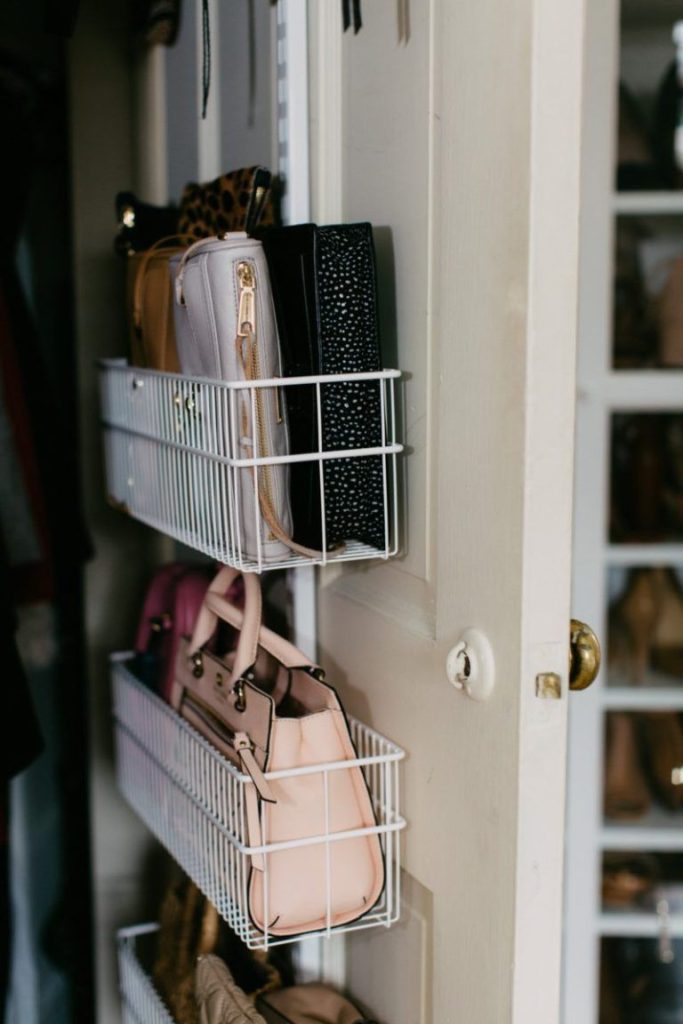
Once the purse rack is installed, hang your purses on the hooks or place them in the pockets of the organizer. Ensure that each purse is securely hung or stored to prevent them from falling or getting tangled. Arrange your bags on the rack according to your preference.
37. Use a drawer divider to organize lingerie
Start by emptying and cleaning the drawer. Consider the different types of lingerie you have, such as bras, panties, stockings, and camisoles. Select drawer dividers or organizers suitable for your drawer size and can be adjusted to create different-sized compartments.
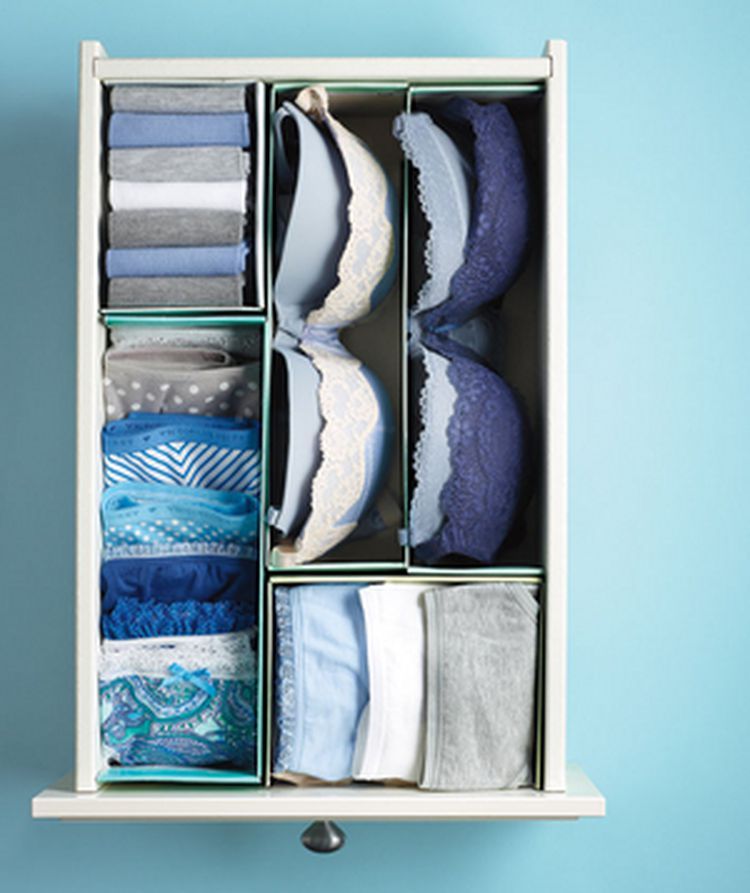
Place each folded or rolled lingerie item into its designated compartment. Keep similar items together, such as bras in one section and panties in another. If your dividers have smaller compartments, use them for organizing smaller accessories like lingerie tape, nipple covers, or small lingerie bags.
38. T-shirt drawer organization
Start by emptying out the drawer and giving it a good clean. This will provide a fresh and organized space for your shirts. Sort your T-shirts and declutter any that you no longer use or are in poor condition to free up space.
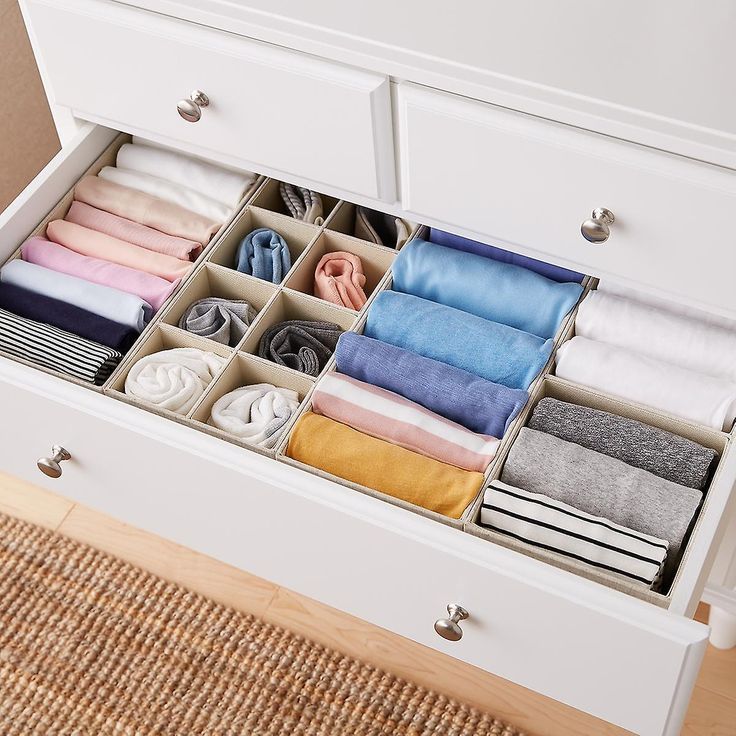
Decide how you want to arrange your T-shirts. You can opt for a rainbow spectrum where you organize them from light to dark or group similar colors together. Alternatively, you can arrange them based on your preference, such as your favorite T-shirts at the front.
39. DIY hanging bra organizer
Choose a sturdy clothes hanger with clips or shower curtain rings to securely hold your bras. Wooden or plastic hangers with clips work best for this purpose. Cut several pieces of ribbon or string, each measuring approximately 12-16 inches long.
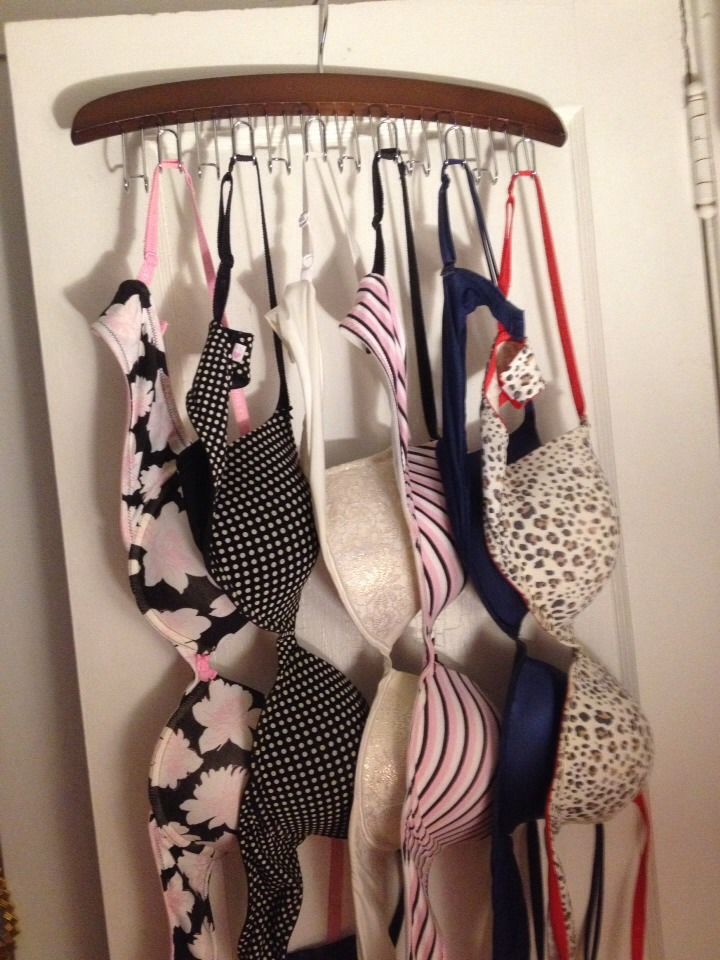
Take a clothespin or binder clip and attach it to the bottom end of each ribbon or string. These will serve as hooks to hold your bras in place. If desired, you can enhance the appearance of your bra organizer by wrapping the hanger with decorative fabric or ribbon.
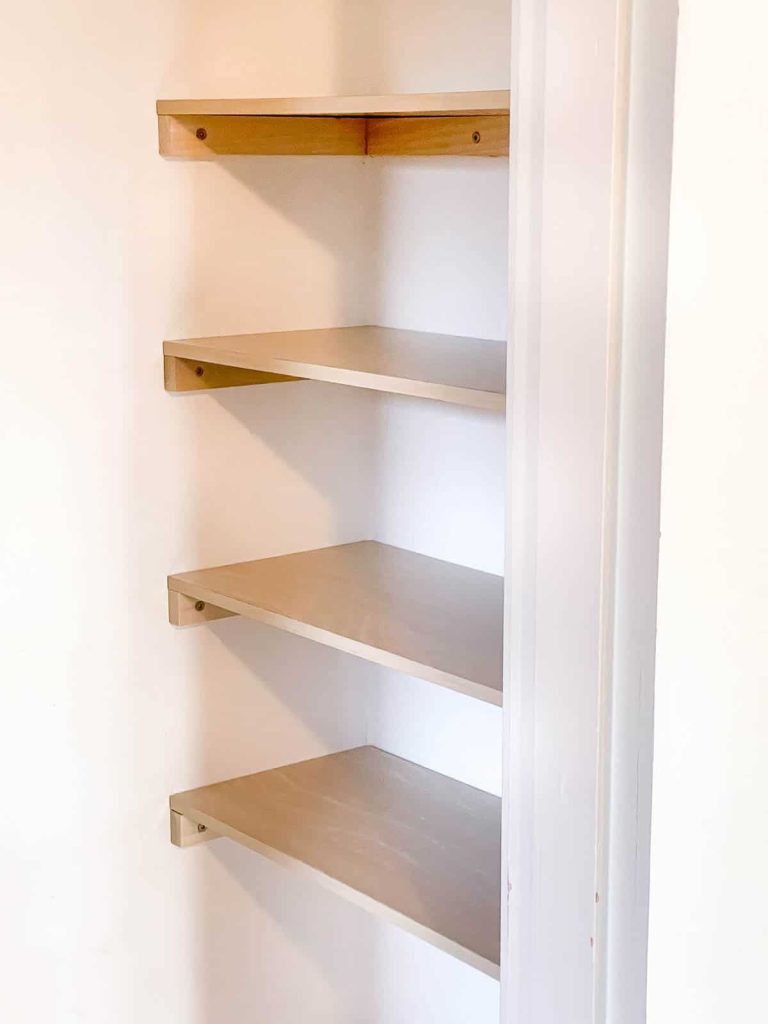
40. Expand closet space with the closet nook shelves
Using closet nook shelves is a smart way to double your space and create additional organization options. Identify a suitable nook or alcove in your closet where you can install the shelves. This could be an unused corner or an area with enough depth and height.
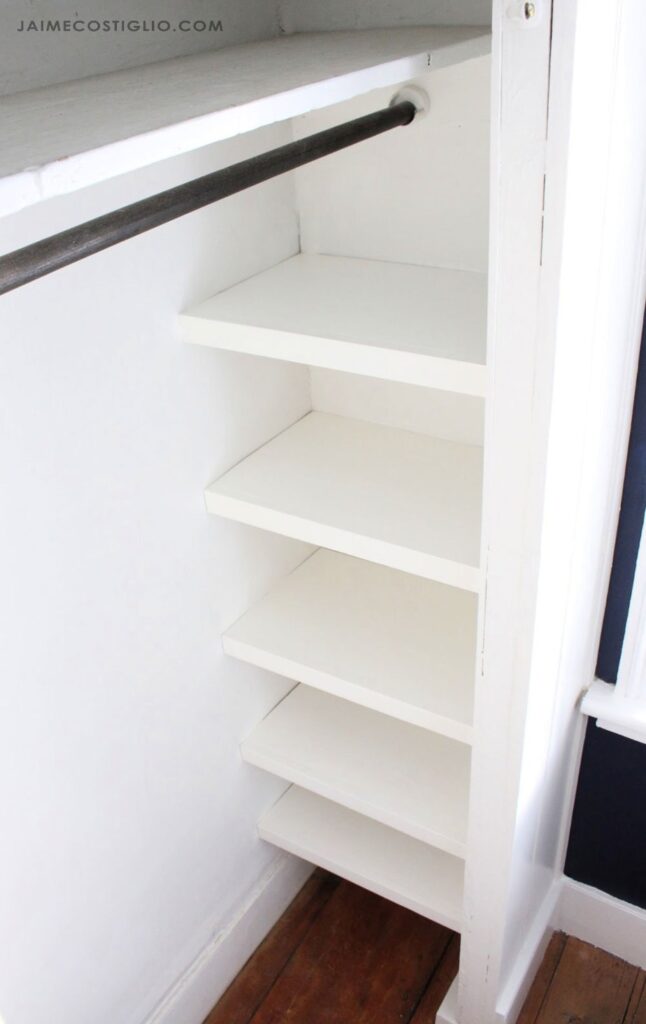
Place the shelves onto the brackets, ensuring they sit level and are aligned with the bracket edges. If using plywood, you may need to screw it onto the brackets for added stability. With the new closet nook shelves, you can now organize things.
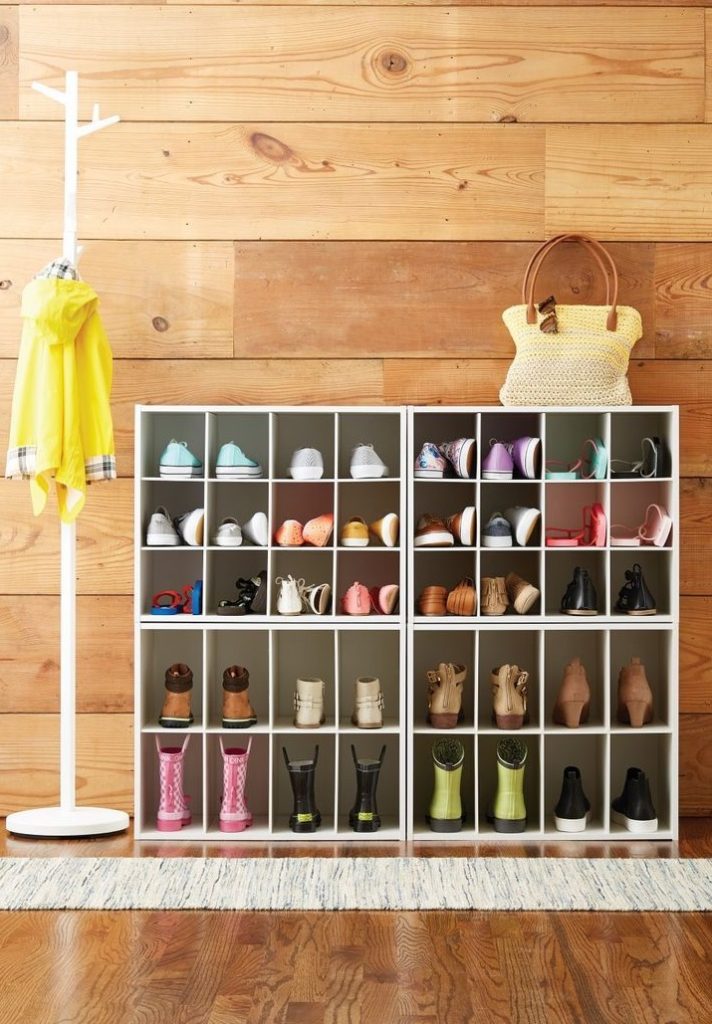
41. Use bookcase as shoe storage
Choose a bookcase or shelving unit that fits the available space in your closet. Consider the bookcase’s height, width, and depth to ensure it can accommodate your shoe collection. If needed, you can also modify the bookcase by adding additional shelves or removing unnecessary ones.
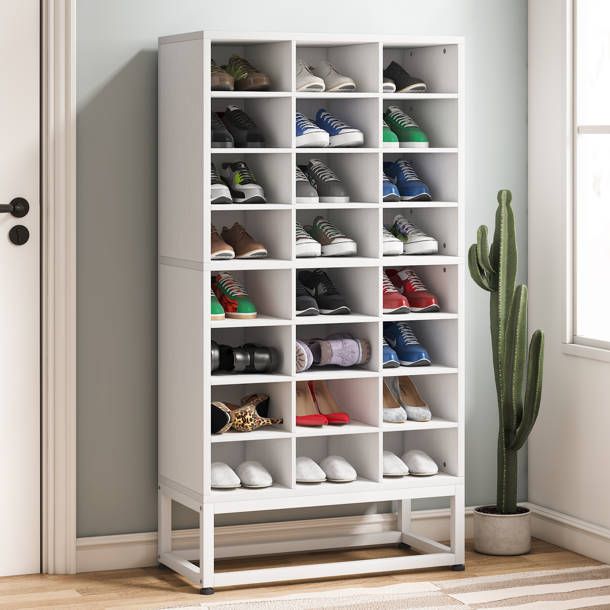
Depending on your bookcase’s design, you can purchase specifically designed shoe racks or shelves for storage, or repurpose what you already have at home. Position the racks or shelves at suitable heights, allowing enough space between each shelf for your footwear.
42. Store the suitcase above the closet door
Select hooks or brackets that are sturdy enough to hold the weight of your suitcases. It’s recommended to use heavy-duty hooks or brackets designed explicitly for hanging items. Install the hooks or brackets using a screwdriver or drill at the marked positions.
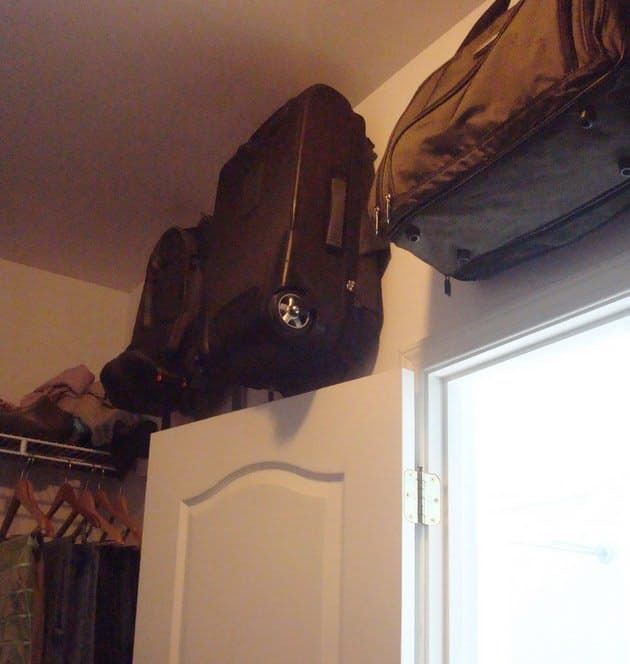
Once the hooks or brackets are installed, check their stability by gently pulling on them. Ensure that they are securely attached and can support the weight of your suitcases. Use a step stool or ladder to safely lift and hang the suitcases onto the hooks or brackets.