
From Dining Room Tables To Lawn Chairs: 35 Easy Ways To Revive And Restore Old Furniture
With time, furniture will become damaged or worn; it’d be such a shame to see our favorite pieces go to waste because of some sun damage or scratches in the finish. In addition, extra costs would incur if you repaired or replaced the old stuff. Fortunately, there are ways for you to bring your sofa and chairs back to life. Maybe you need to refinish the surface, add new details to cover up ugly spots, or repurpose the old furniture. No matter what applies to you, we have 35 tips on how you can improve the condition of your old furniture and turn it into something new installed for you. You can save some money and get a chance to spend it on something fun instead.
1. Distressing the Surface
The first hack we have for you is to embrace imperfections. We are constantly taught to embrace our own imperfections as well as others’; although this is a rather hard thing to do, it would minimize many of our problems.
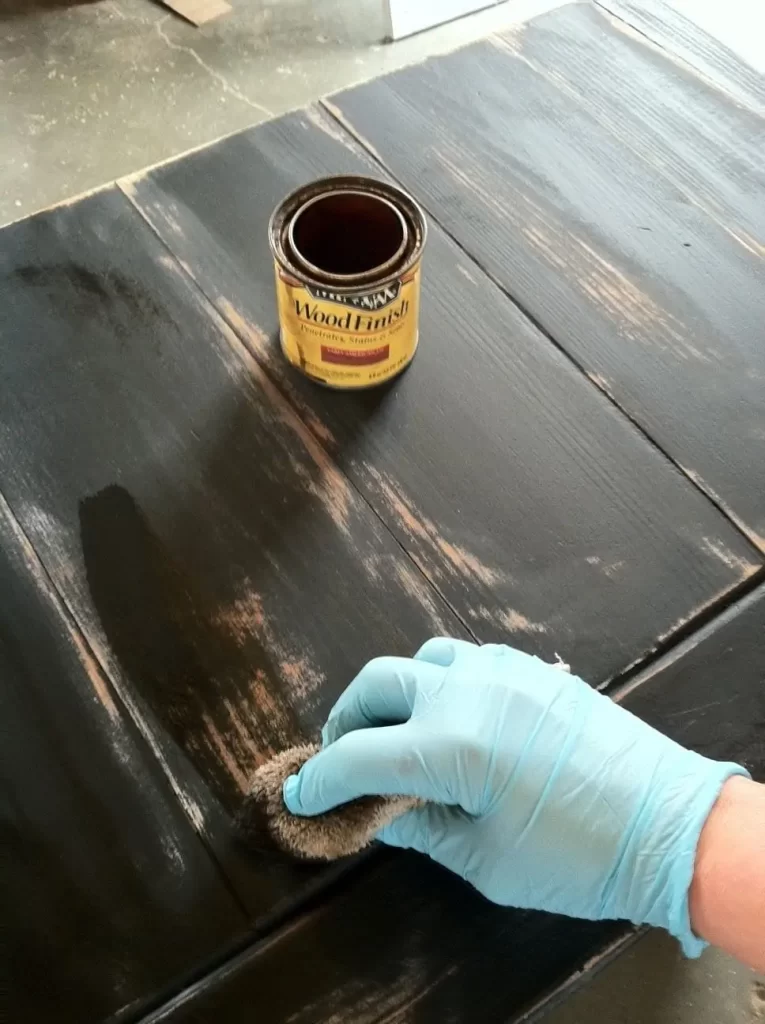
Distressing your furniture is the easiest way to embrace all the scratches and imperfections it has acquired throughout the many years. To do this, paint over your old furniture with any color and scrub it with a sponge or piece of sandpaper.
2. Slipcovers
Moving onto the easiest trick of this article – using slipcovers. As the saying goes, out of sight, out of mind; as you cover up the stains and scratches of your old furniture with slipcovers, you won’t need to worry about them anymore.
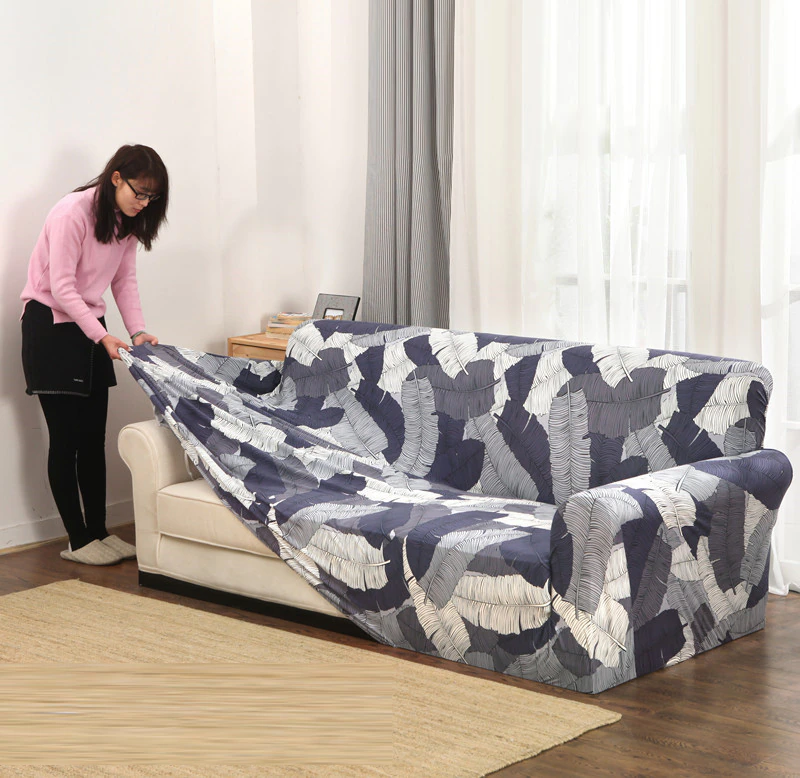
Of course, slipcovers are widely available in furniture stores but, if you’re on a budget and want to test out your sewing skills, you could always make your own slipcover out of old clothes; this way, you’d be able to upcycle while reviving your furniture.
3. Nail Polish
Varnished surfaces are commonly seen in wooden furniture; varnish is effective in intensifying and brightening the appearance of natural grains in wood, not to mention that it protects the surface from atmospheric actions. However, the downside of having varnished furniture is that it corrupts over time.
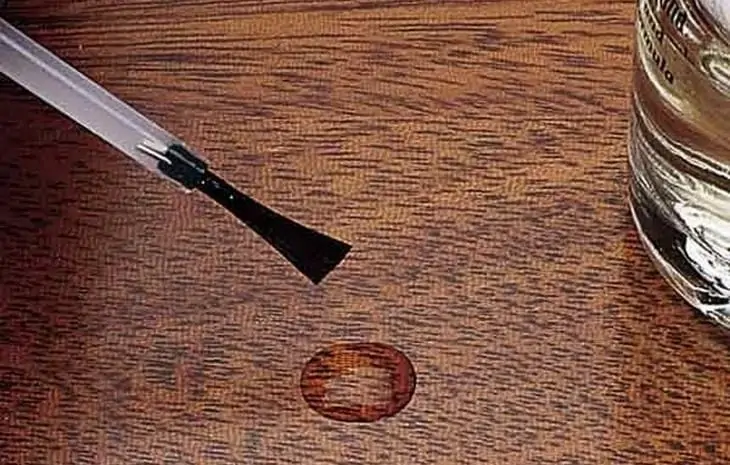
Nail polish has proven to be very trusty in repairing or filling in damaged varnished surfaces. Therefore, fill the damaged surfaces with nail polish and allow it 10 minutes to dry; then, proceed to sand it with sandpaper and finish the job with some wax.
4. Bottle Caps
Speaking of embellishments, we mentioned that they’d make your old furniture look more expensive than before, but this depends on what you use. For example, this table is covered with bottle caps looks more fun than elegant, but maybe that’s what you’re going for.
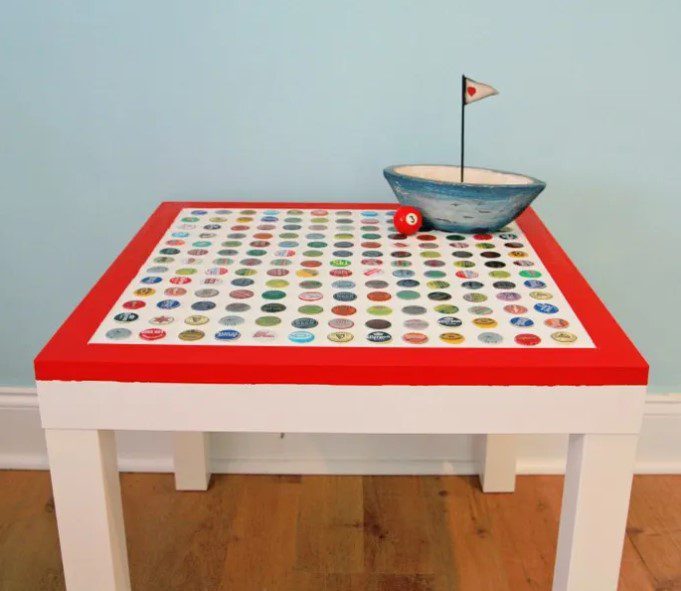
To recreate a fun kid’s table like this one, you’ll need to glue around 200 bottle caps to an old table of yours. So, start collecting bottle caps (which don’t necessarily have to match) and get started on this fun DIY project.
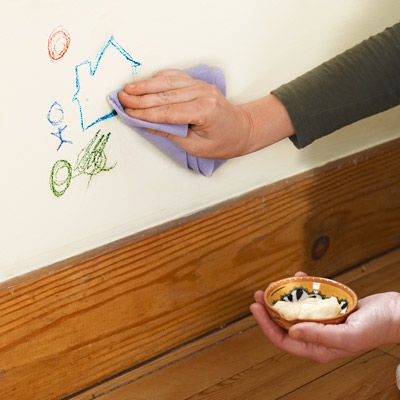
5. Crayons
Crayons are another way to patch up scratches that has proven to be quite effective; because there are so many colors available, you’d be able to mix the colors until you get the perfect match for the wood of your furniture.

Start by grating part of a crayon into a small bowl. Then, place the bowl in a pan of boiling water to melt the wax. After the wax has melted, place it in the scratch using a putty knife, smoothen it out and wait for it to dry.
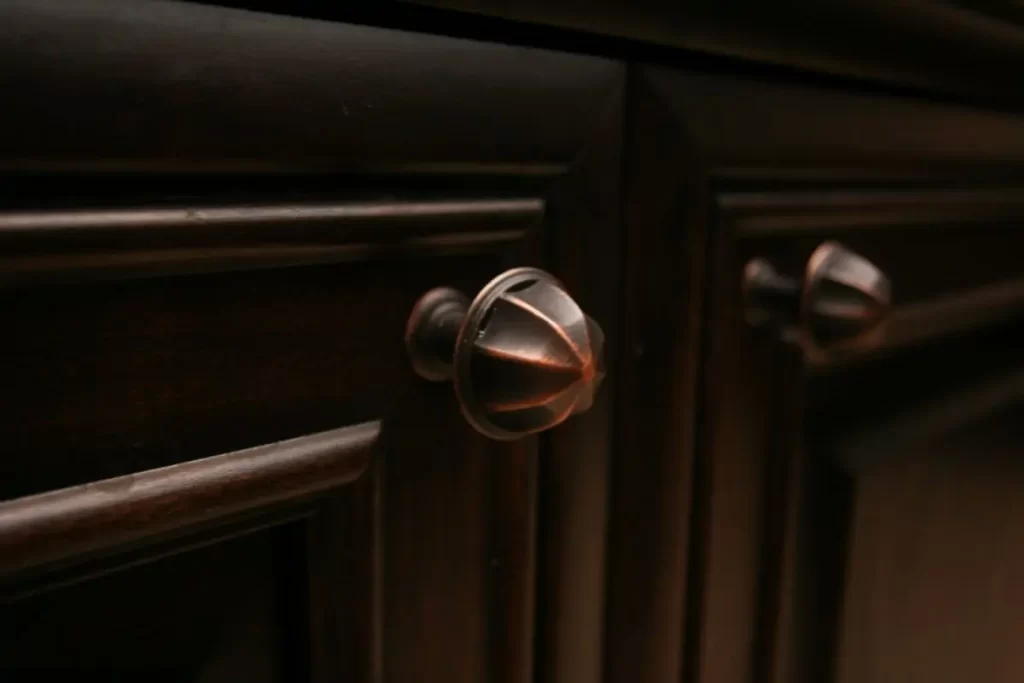
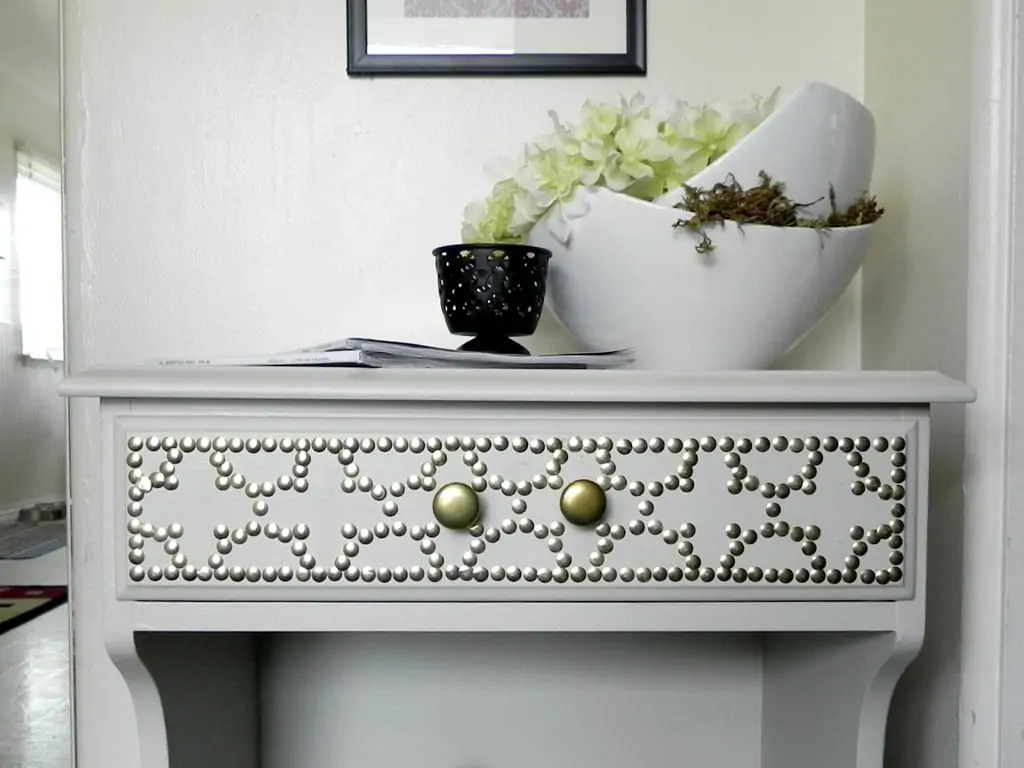
6. Add Details
Similar to adding embellishments to old furniture, small details such as throw pillows and new handles can alter the vibe of a particular piece. Sometimes replacing the entire thing is out of the question, but we can always revamp it!
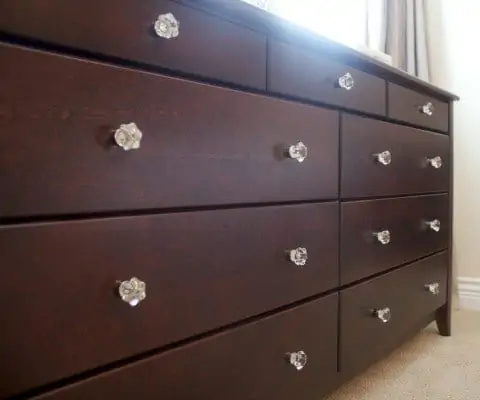
This homeowner switched out his drawer’s ordinary handles with fun knobs that can be easily found in hardware stores; his old wardrobe was instantly elevated and transformed into something new. So, just look around, and you will surely see something that speaks to you.
7. Add Stenciled Art
If you don’t want to spend money on adding little details to your old furniture, why not take some time to create beautiful art that can cover up the stains and scratches? It turns the chair or side table into a decoration piece.
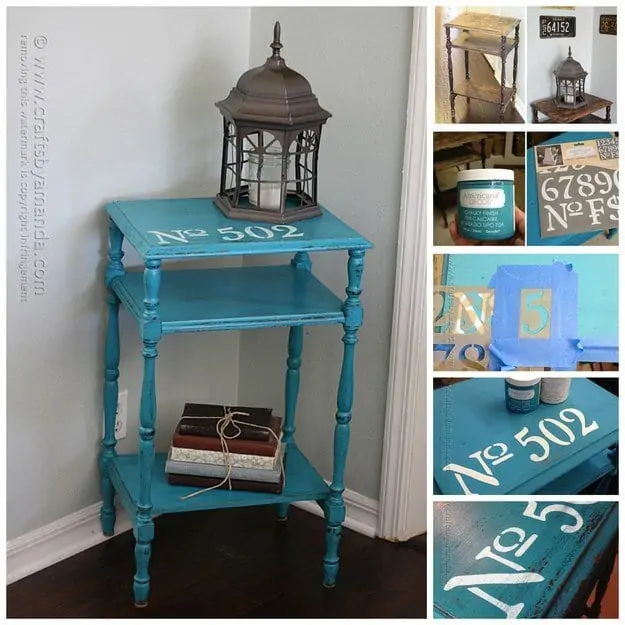
One option is to paint the furniture in chalk-finish paint and use stencils to create designs, transforming that piece of furniture into something new. If you’re not into the rustic vibe you see in the photo, regular old latex paint can do wonders.
8. Tea Bags
One way you could rid your furniture of scratch marks is with, believe it or not, tea bags. Who would’ve thought that other than soothing purposes, tea bags can fix the problems you encounter with furniture scratches? This works best with blemishes on wooden furniture.
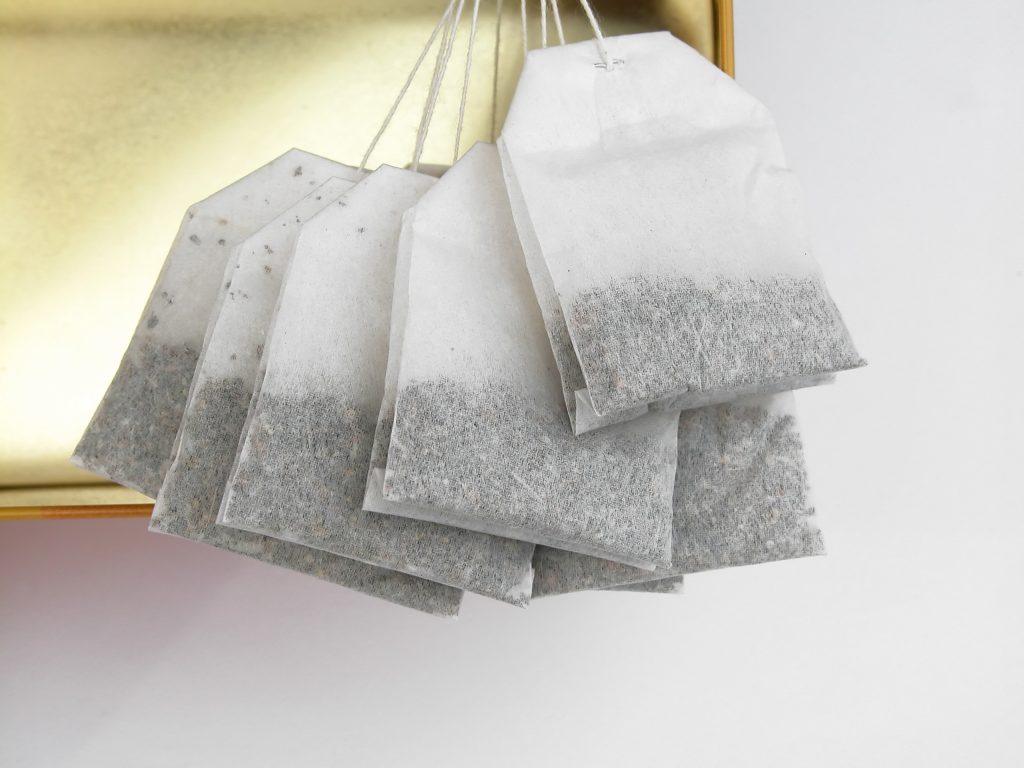
The first step is to, obviously, soak the tea bags in hot water. Then, dip a cotton swab into the tea and apply it to the scratch marks on your furniture and repeat this step until the affected area has darkened significantly, to the extent that the scratches aren’t noticeable.
9. Cross Stitch Rattan Furniture
Rattan furniture is slowly becoming a hot trend in home design; however, rattan furniture is made of rattan vines that easily snap over time. When this happens, you’d think that the rattan furniture would be deemed unusable, when in fact, it can be patched up.
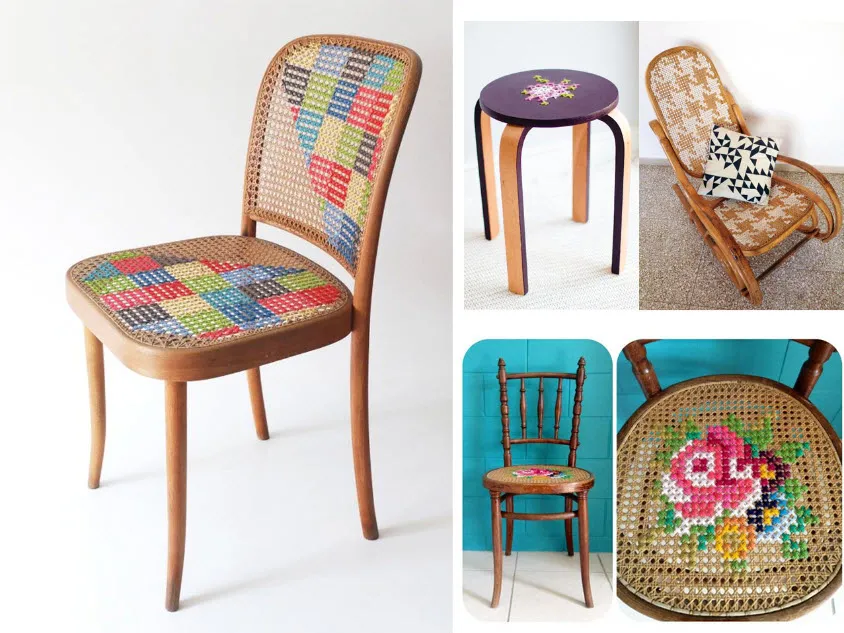
Patching rattan furniture doesn’t necessarily involve using rattan vines; you could ditch ordinary vines altogether and cross stitch with brightly colored yarn. This is a fairly creative take on repairing unraveling wicker or rattan pieces and adding funky vibes. You can do this even if it’s not falling apart!
10. Leather Belts
This is one we never saw coming. You can patch up chairs with leather belts. This trick can be adapted to patching up different types of chairs. Of course, you’d need many belts, though they do not necessarily have to be the same color.
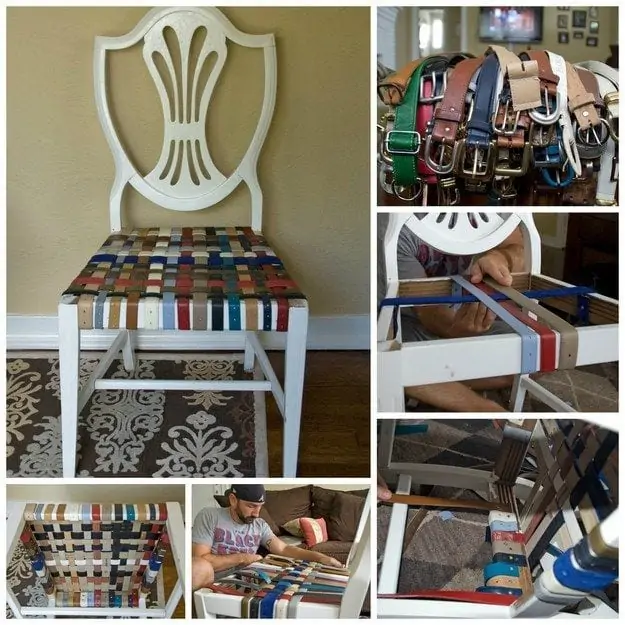
In addition to prolonging old chairs’ lifespan, this is a great way to upcycle leather belts that have gone out of fashion or no longer fit you. That’s what makes this such an environmentally friendly hack. Who doesn’t love to upcycle?
11. Milk Paint
We talked about chalk paint, which gives your furniture a retro vibe. We want to emphasize how much a new coat of paint can do. Whether you choose a new color or touch up the old one, it will give your dresser a new life.
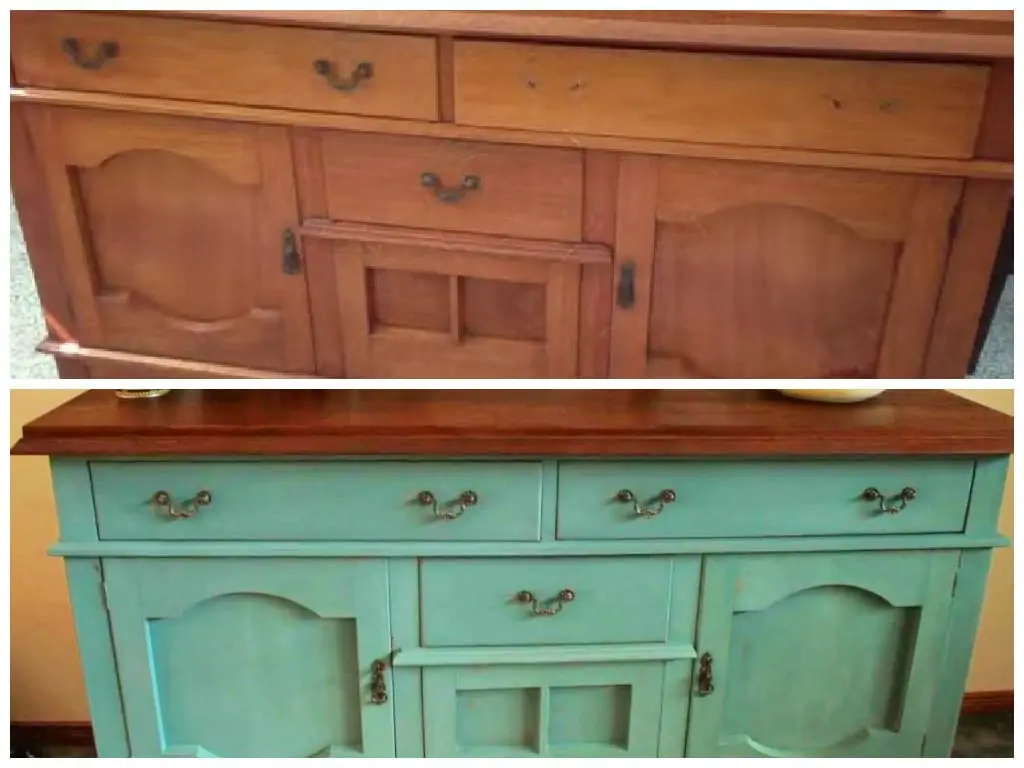
In terms of furniture paint, milk paint is in style right now; this particular type of paint gives off a colorful yet distressed vibe that is unique. Fun fact: milk paint is made from actual milk. We looked it up for you.
12. Bright Paint
Of course, there’s always the option of painting the entire piece of furniture in a bright and vibrant color; bright colors have the ability to brighten up someone’s day and give an object a brand-new look. Think of paint as an outfit for your desk.
If you’re feeling particularly bold, paint your old furniture in neon colors (unlike the salmon pink used here). Don’t forget to complete the look with a polish when you are done painting so that your furniture has a glossy finish.
13. Chalkboard Paint
Still on the paint theme, you could repaint old furniture in chalkboard paint, turning any table into a drawing board. This is perfect if you have kids who love to doodle on furniture, not to mention that you’ll have a space to jot down notes and reminders.
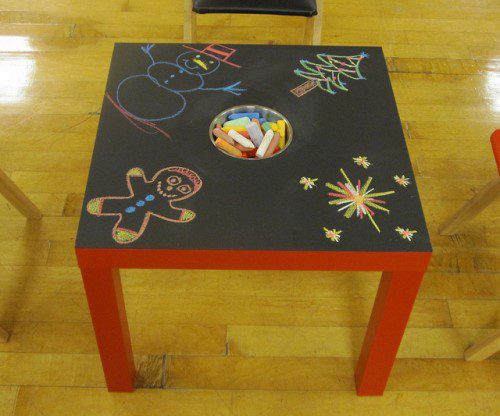
By repainting your furniture in chalkboard paint, you’ll be providing your kids with a creative outlet and, hopefully, prevent them from drawing on the walls. They will have a new canvas every day since all you have to do is wipe the chalk away.
14. Dip Dye
If painting the entire piece does not suit your taste, then you may want to try dip dying only the legs of your old furniture. This method is an unconventional option of hiding a piece of furniture’s chipped legs or simply adding pizazz.
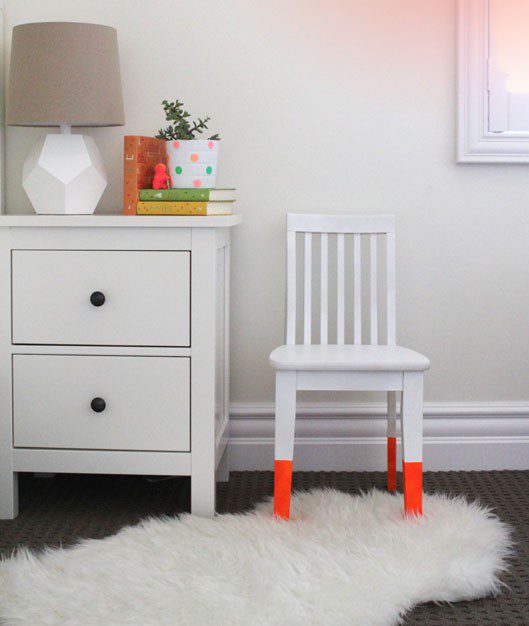
With that, this technique isn’t limited to only old furniture. You can do this with new furniture too. Simply put some painter’s tape a few inches above the end of the furniture’s legs and paint it in whatever color you like; remove the tape when the paint has dried.
15. Whitewash Wooden Furniture
Instead of repainting old furniture, you could try whitewashing it. Whitewashing furniture brightens up an originally dark piece and gives it a rustic, farmhouse look. It adds a layer of white but allows you to see the grain of the wood. It makes a statement that is pretty hard to miss.
One simple way to whitewash wooden furniture is by painting it with a 1:1 ratio mixture of white latex paint and water; you can test the mixture out on an inconspicuous area before painting the entire furniture and adjust the mixt until you’re satisfied with it.
16. Bleach
White plastic furniture looks great when it’s brand-new. Unfortunately, they get stained and look worn out over time, especially pieces that have been sitting in the yard forever. To restore the brightness, look to your old friend, bleach. It’s all you need!
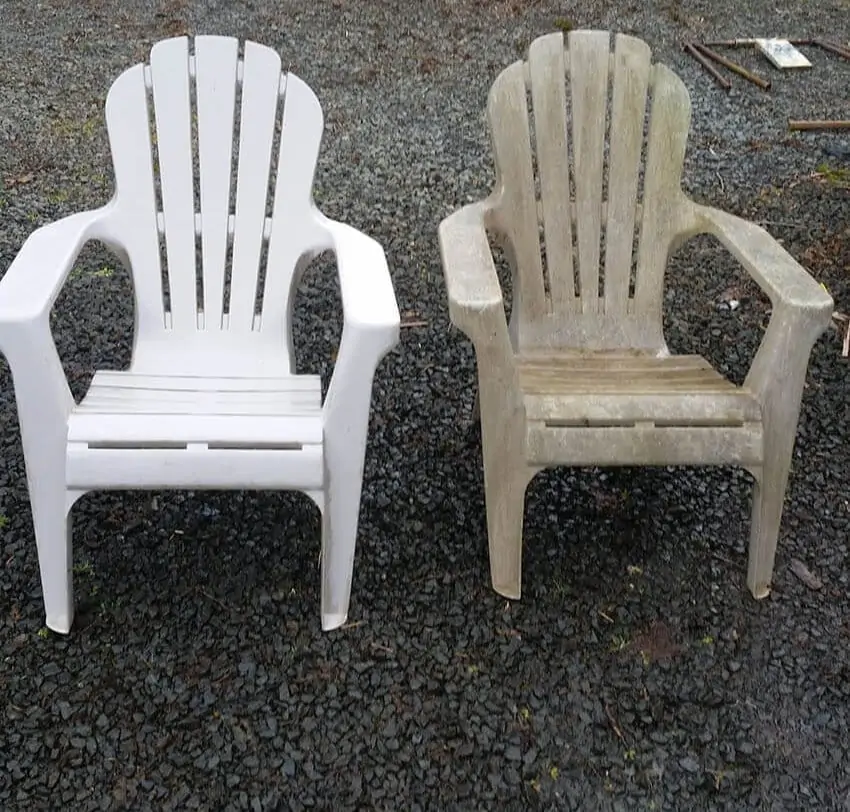
Pour a ¼-cup bleach into a bucket of hot water and scrub the piece of furniture with a scrub brush. Since bleach is pretty harmful to your skin, it is important to wear gloves when working with it. Alternatively, you can use a power washer.
17. Apply Wallpaper to your Furniture
Painting and whitewashing are all pretty permanent changes or improvements to make to your old furniture. If you’re not feeling particularly bold enough for permanent changes, you could try a changeable option like applying wallpaper to the pieces you want to upgrade.
With this hack, you can easily change the look of any piece in your home; all you have to do is wrap the furniture in your favorite wallpaper. When you get bored of how it looks, you can easily swap it with a new design!
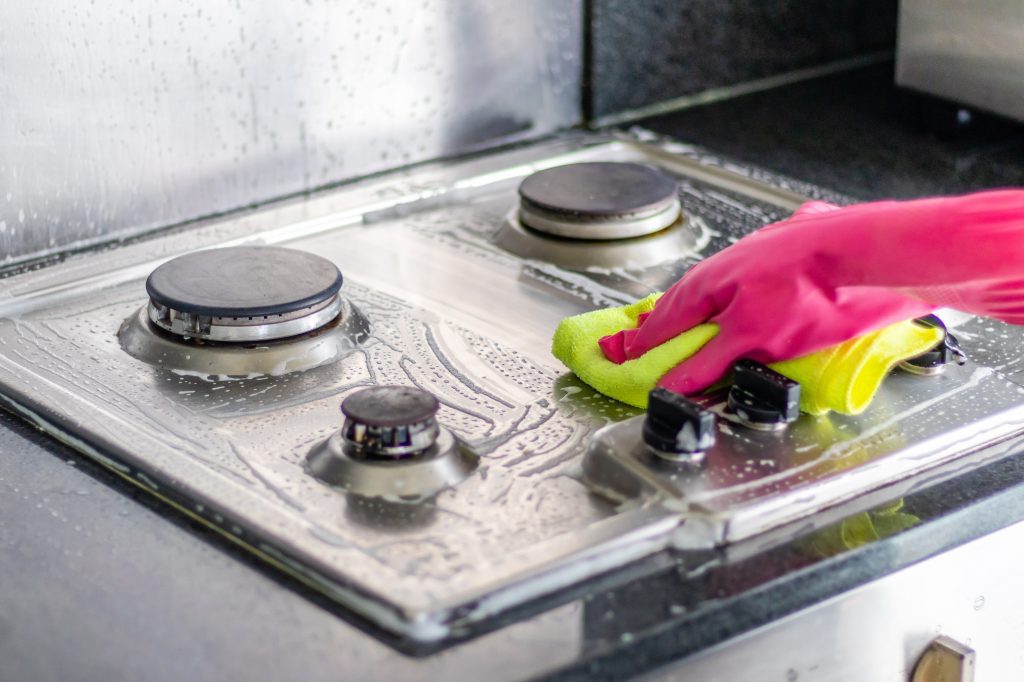
18. Oil Soap and Warm Water
Oil soap and warm water is the perfect pair for ensuring the cleanliness of even delicate furniture pieces. It’s best to clean your old furniture thoroughly before an attempt at repairing it. And using oil soap is the easiest way to get all the grime and dirt off.
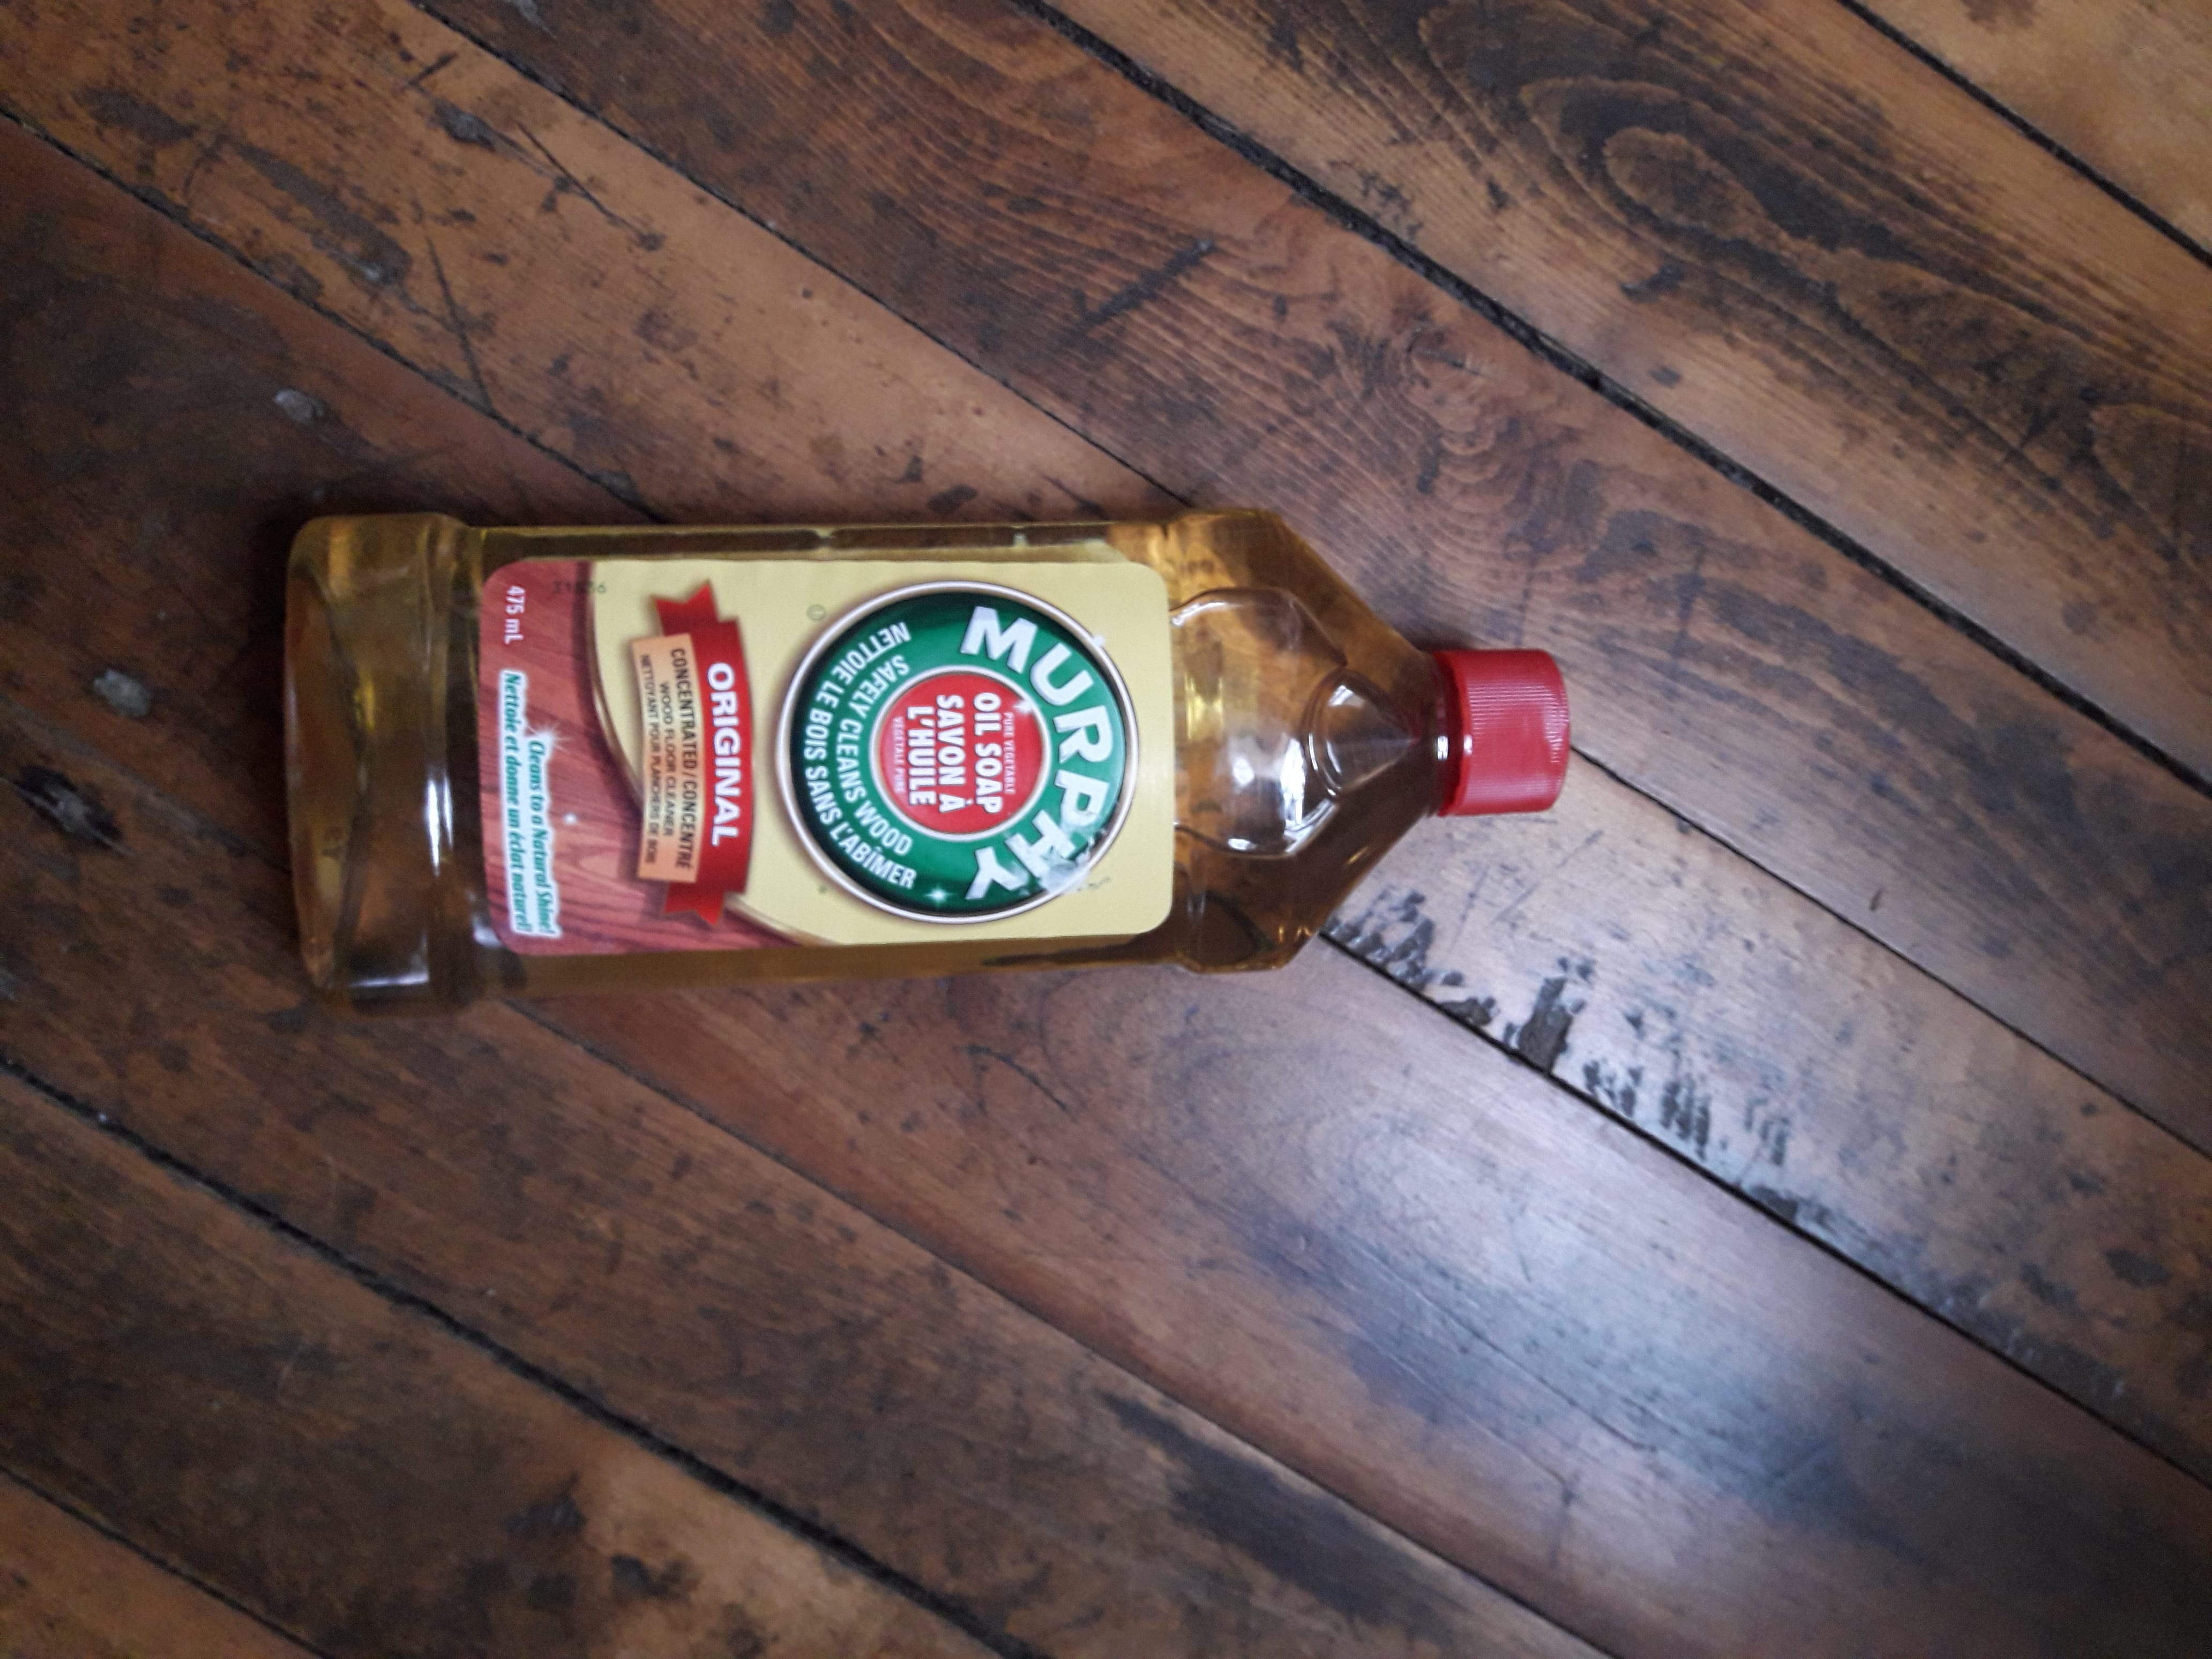
First, wipe the furniture down with a dust mop or microfiber cloth. Then, use a clean rag to wipe it down with our heroes – oil soap and warm water. Finally, allow the furniture to dry before starting your repairs or paint job.
19. Chalk
If you have children who constantly spill food all over your couch, or if you spilled food yourself, you must be wondering how you can get rid of the big stain that was left behind on your beloved sofa. Cheer up; we have a solution!
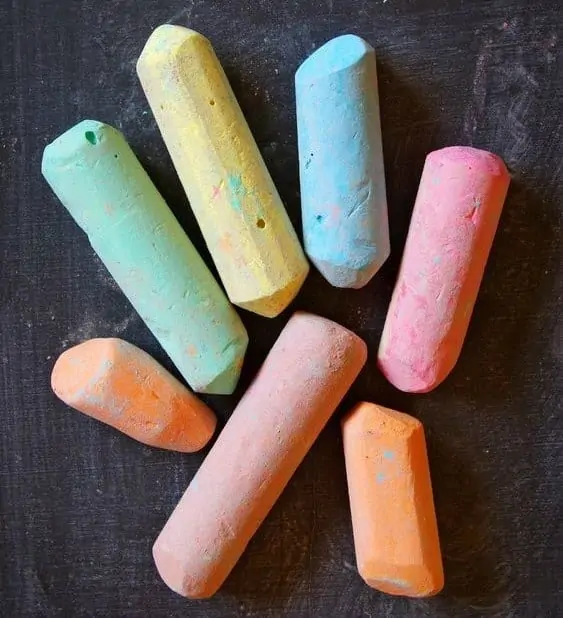
Well, the solution is pretty simple; all you need is chalk. Simply rub a piece of it – no matter the color – over the stain on your couch and wipe it up with a clean cloth afterward. The chalk soaks up the grease, which makes wiping it off easier.
20. WD-40
If you have leather sofas, chalk may not be as useful, as you can usually wipe up the mess immediately without having to deal with any stains. Nevertheless, leather sofas need frequent conditioning to maintain their appearance and avoid cracking.
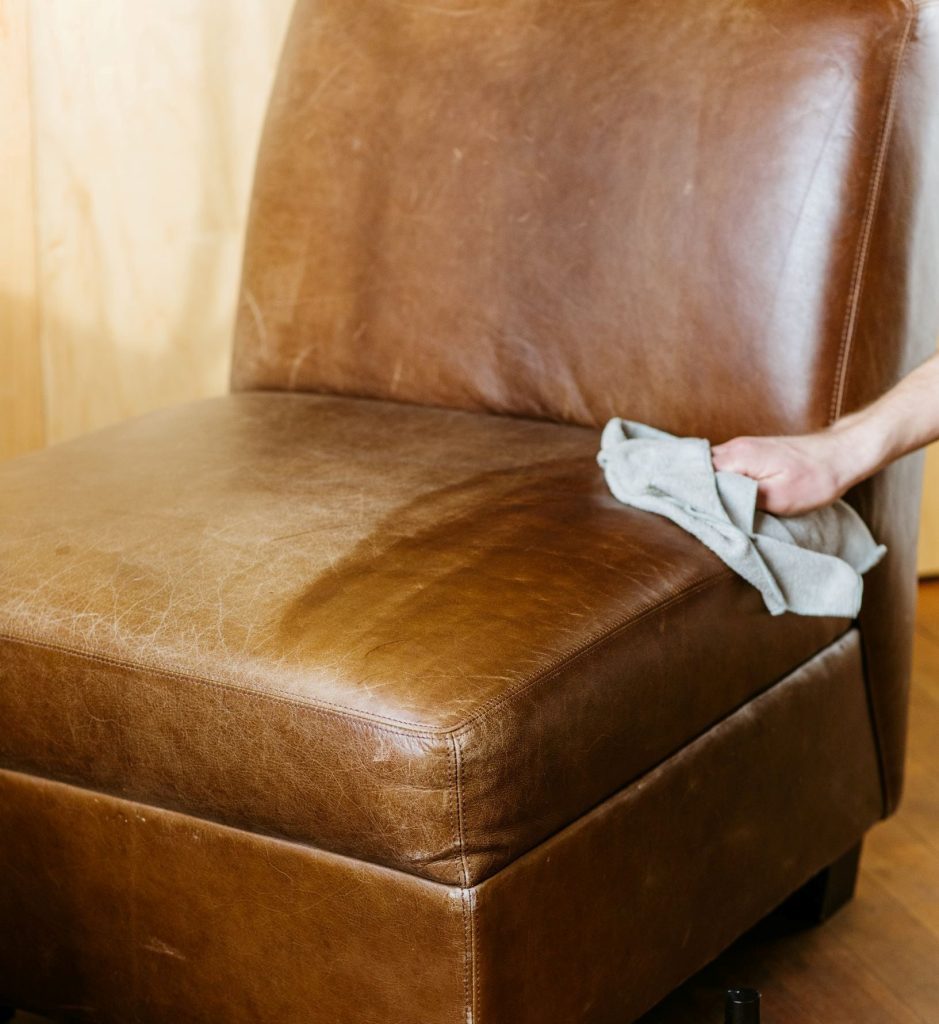
You’ll need some WD-40 spray, which is an amazing leather conditioner. It can soften the leather on your furniture while cleaning and protecting it. To condition your sofa, spray some WD-40 onto a soft, clean cloth and wipe down the entire surface.
21. Liquid Leather
Leather sofas that sit around in your home for too long might start to develop dreaded leather cracks. That goes for anything leather that has not been used in a while or is in your possession, from belts to shoes.
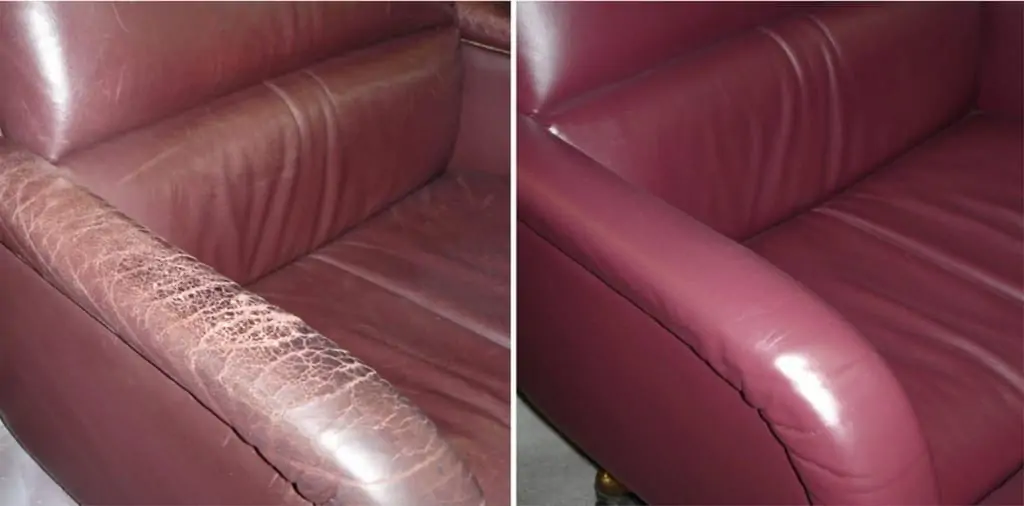
Luckily, we have liquid leather to our rescue. It is a miracle substance that can repair small to medium tears, splits, and cracks in your leather furniture. Be sure to read the instructions carefully before using it. Look at the difference!
22. Mayonnaise
Monica Geller of Friends was very particular about using drink coasters because condensation dripping from glasses can cause water ring stains on tables. Trying to get rid of water stains, especially on wooden tables, is a nightmare no one wants to experience.
Fortunately, there’s an easy way of getting rid of the water ring stains. We would never have imagined it! Mayonnaise can do wonders in ridding your wooden furniture of water ring stains. Simply dab some mayo on the ring, let it sit for a while, and wipe it off.
23. Lemon Oil
One common thing that most old furniture has is scratches; these are the furniture’s “battle scars” from all the years “in the field.” Although battle scars should be worn with pride, we as homeowners would very much like to get rid of them.
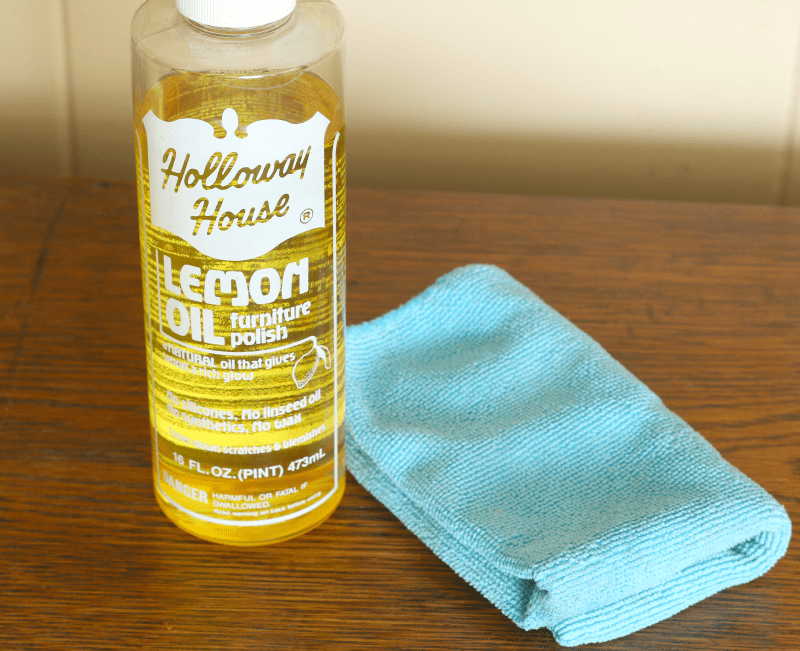
Lemon oil is a “scar” remover for furniture as aloe vera is to scratches we get; it can be made from a 1:1 ratio mixture of lemon juice and vegetable oil. This mixture would effectively get rid of furniture scratches. However, this is only limited to surface scratches.
24. Walnuts
Another thing that can help remove light and small scratches from wooden furniture is something you can find in your pantry: walnuts. Yes, you read right. Rubbing a pealed walnut on a scratched wooden surface can effectively remove any marks.
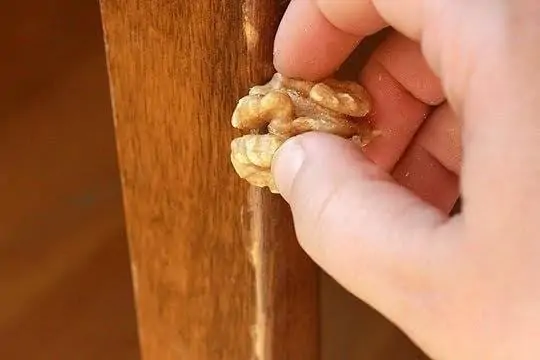
After rubbing it on the scratched area, let it sit a few times and follow up with a good polish using a soft, clean cloth to lock in the work you’ve done. Like the lemon oil, this works well for surface scratches.
25. Shoe Polish
On the other hand, deep scratches are tougher to tackle; they aren’t like surface scratches that you can get rid of with a simple lemon oil mixture. This is a much more complicated matter. But don’t worry because you can get rid of them with the help of shoe polish or wood paint.
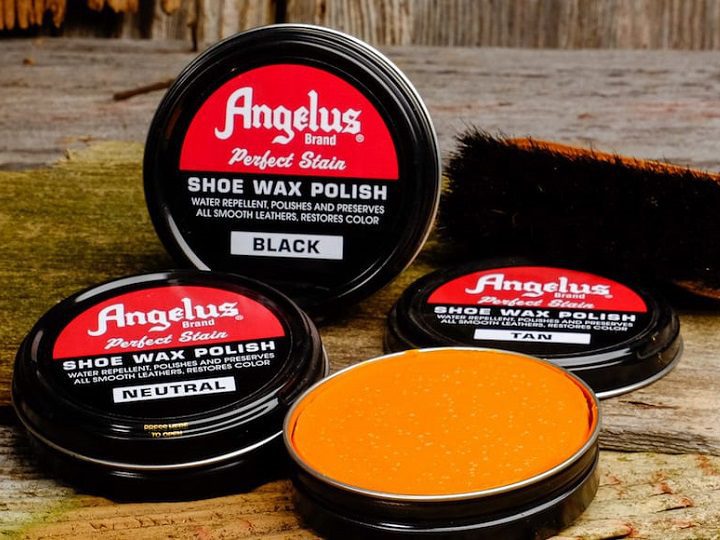
Who would have thought shoe polish would be a good option? But it makes sense. With a small paintbrush, apply shoe polish or wood paint to the affected area of your area. This should be able to cover up the scratches; apply wax or polish to restore the finish.
26. Add Decoupage
Decoupage is the art of decorating an object by gluing colorful paper cutouts on it to create a special effect. You can cover an entire piece or make a small design. In this case, decoupage can be used to cover up stains or scratches on old tables.
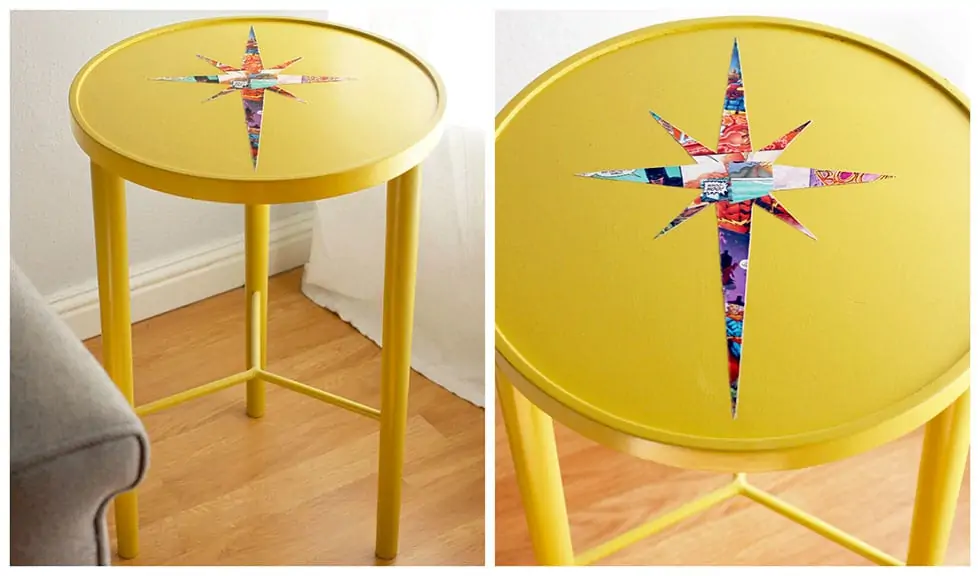
Adding decoupage is an extra environmentally friendly way to revive old furniture. Where better to get those colorful pieces of paper than old magazines you have lying around your home? While DIYing your restoration project, you also get to recycle those old magazines!
27. Coffee
Coffee and tea are common substitutes for one another, which means that homeowners can use coffee as an alternative for removing scratches on furniture; to achieve the best results, it is better to adapt this trick to wooden furniture with darker tones.

Firstly, moisten some coffee grounds. Next, dip a cotton swab into the moist coffee grounds and apply to the “wounded area” of your wooden furniture. After that, let it sit for about 10 minutes before wiping it away with a dry cloth.
28. Tiles
Maybe you don’t want to spend time collecting bottle caps. You could use tiles that were leftovers from the last home renovations you did. Alternatively, you could find odds and ends at different stores and piece together a unique mosaic.
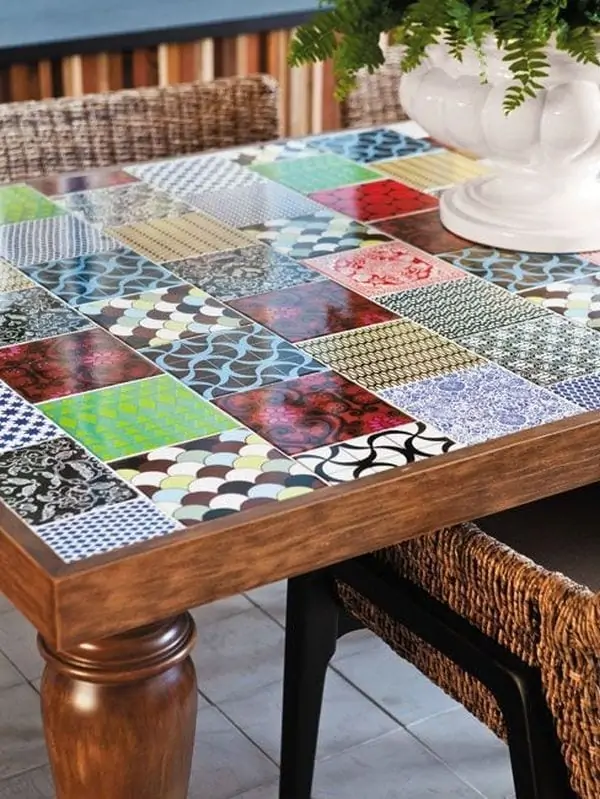
This is great for repairing damaged tabletops; simply attach the tiles to the surface of your table, taking care to ensure the surface is level once you are done. You could get a few designs or make it really special by making each tile different.
29. Furniture Repair Marker
If lemon oil, shoe polish, and tea bags didn’t do the trick in getting rid of deep scratches on wooden furniture, and you don’t want to repaint or replace it, then the only thing to do is fill the scratches with furniture repair markers. It can be easily found in hardware stores.
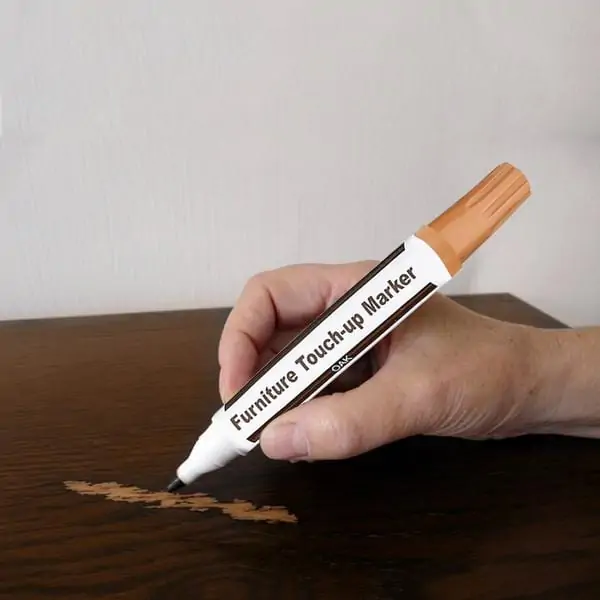
These markers work wonders for removing stubborn stains as they can easily color in the scratch marks and make the furniture seem as though it were brand-new. Of course, you would have to reapply over time as the ink would inevitably wear off.
30. Lemon
Lemon is a common ingredient in many cleaning “recipes.” We mentioned that lemon juice mixed with vegetable oil can remove surface scratches efficiently, but did you know lemon juice paired with some other ingredients will make a solid doorknob or door handle cleaner?
That’s right. The juice of half of a squeezed lemon mixed with two teaspoons of baking soda would get clean dirty copper doorknobs as well as door handles easily; simply rub the solution into the copper with a clean cloth and wipe it away later.
31. Removing Rust Spots
Furthermore, lemon juice is effective in cleaning rust spots which often appears on outdoor furniture after it has been used for some time. Once again, lemon juice has proven that it’s an essential ingredient in creating most useful and effective cleaning solutions.
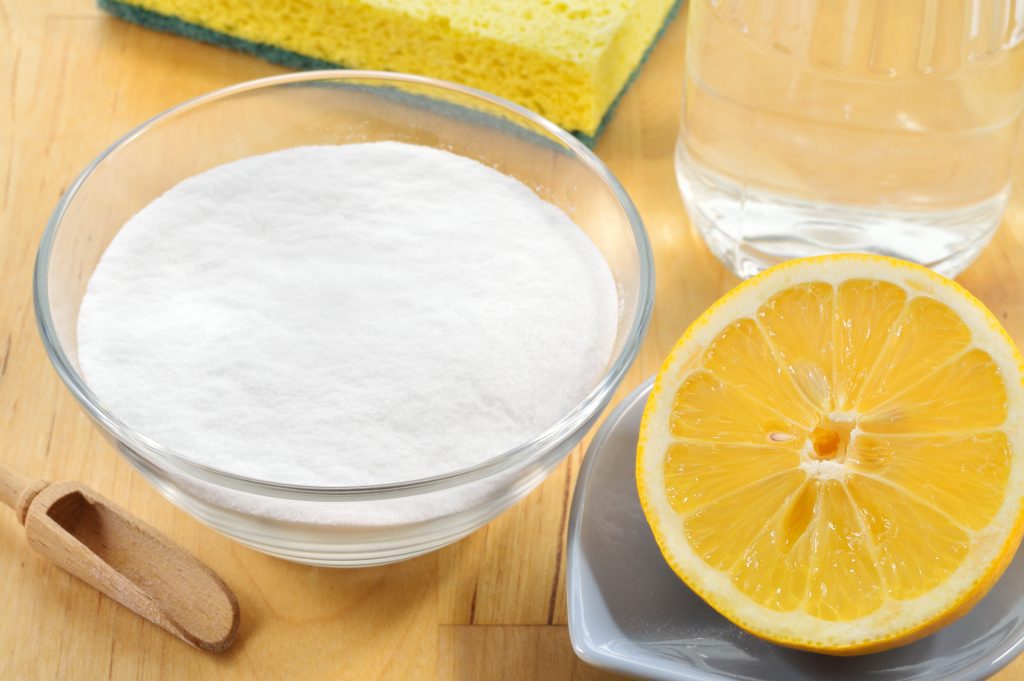
Unlike the previous two lemon cleaning solutions, this one only requires one lemon; squeeze one lemon over the rusted area of your outdoor furniture and let it sit for roughly 10 minutes. Next, use a scouring pad to remove the dust and finish off with a rust-resistant paint.
32. Embellishments
Embellishing your furniture gives it a brand-new look. For your guests who aren’t paying much attention, adding accessories to old furniture would fool them into thinking you got new furniture. But in reality, all you did was add embellishments to things you already have.
Adornments aren’t only for old furniture; they can be added to new but simple pieces. You’d be able to elevate the style. The furniture will look more expensive, and no one would know that you bought it at a low price.
33. Nail Polish Stains
No matter how hard you try to protect your furniture from it, sometimes nail polish stains and spills are unavoidable and inevitable, unless you cover them. It is not a good idea to use nail polish remover or rubbing alcohol on wooden furniture as they can strip the finish. So what can you do?
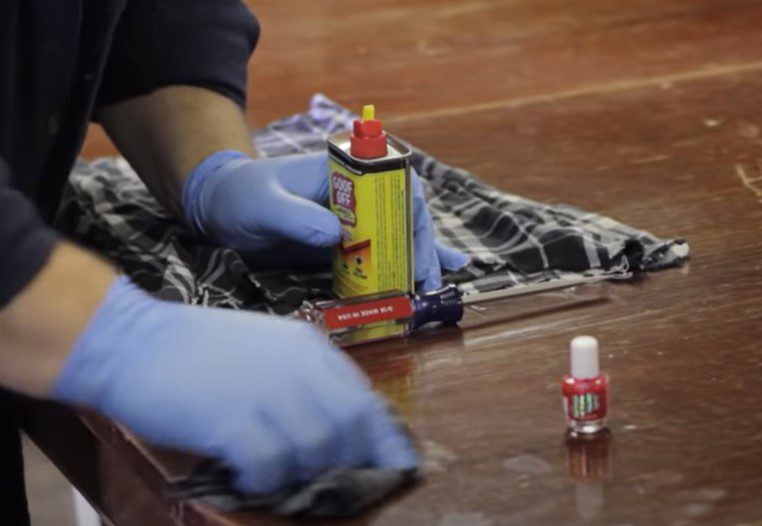
Mineral spirits to the rescue! Use a small brush or soft cloth to apply mineral spirits which softens the polish. Then take a soft, clean rag and wipe the stain off in a circular motion. Depending on how hard the polish is, it may take more elbow grease.
34. Hair Conditioner
Stainless steel furniture is a rather popular type of furniture because many homeowners think it will last a long time. Well, this is true to an extent; over time, stainless steel furniture would lose its shine, making it look old and used.
To fix this minor problem, all you need is your regular hair conditioner. Whenever you think that your stainless-steel furniture lost its shine, go ahead and rub some conditioner with a damp cloth, and its shine would be instantly be restored.
35. Iron and Water
Over time, wooden furniture is bound to develop dents here and there; this may be caused by a lack of protection (like if you have natural, unfinished wood in your home). Dents in wooden furniture are absolutely annoying, so here’s how you can get rid of it.
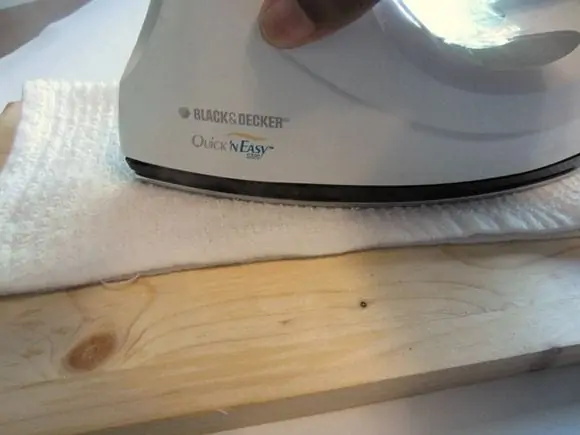
Start by pouring water over the dent and placing an old shirt or towel over it. After that, apply heat with an iron to the area; the heat should be able to expand the wood and pop the dent. Finally, sand the heated area down with sandpaper, if necessary.