
Crafting With Confidence: 30+ Tips And Techniques For Busy Knitters
Whether you took up knitting as a hobby or were convinced by a grandparent or a friend to try the craft, there’s no denying its magnetic hold. All knitting enthusiasts universally acknowledge the meditative power of knitting, which is why making it as enjoyable and easy as possible is crucial. We’ve curated a list of the best knitting hacks for beginners and even seasoned knitters.
We’ve got everything from the best ways to undo a mishap to DIY projects that’ll spruce up your knitting kit. For those who can’t find the inspiration to work on something new, we’ve also discovered ways of repurposing your household items for your kit. Let’s dive in and learn how we can make knitting more enjoyable.
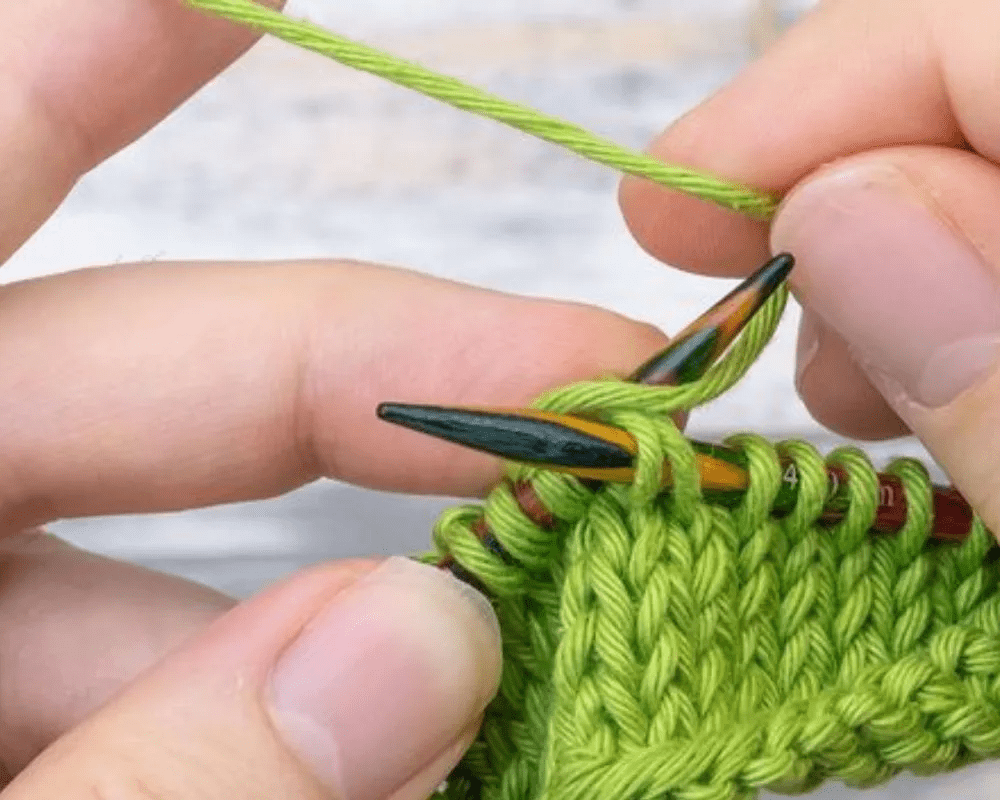
1. Neatness for the win!
Removing those pesky knitting ‘ears’ that sprout at the end of your bind-off has never been easier. Here’s the trick: slip your last stitch carefully onto the right needle. Then, tackle the back loop of the stitch adjacent to (below) this loop using the left needle.
Once you’ve done this, lift both the stitches and slip them onto the left needle. Knit them together and continue your work. You have your stitches sorted and with a neater edge. This can give a more refined and uniform finish to your pieces.
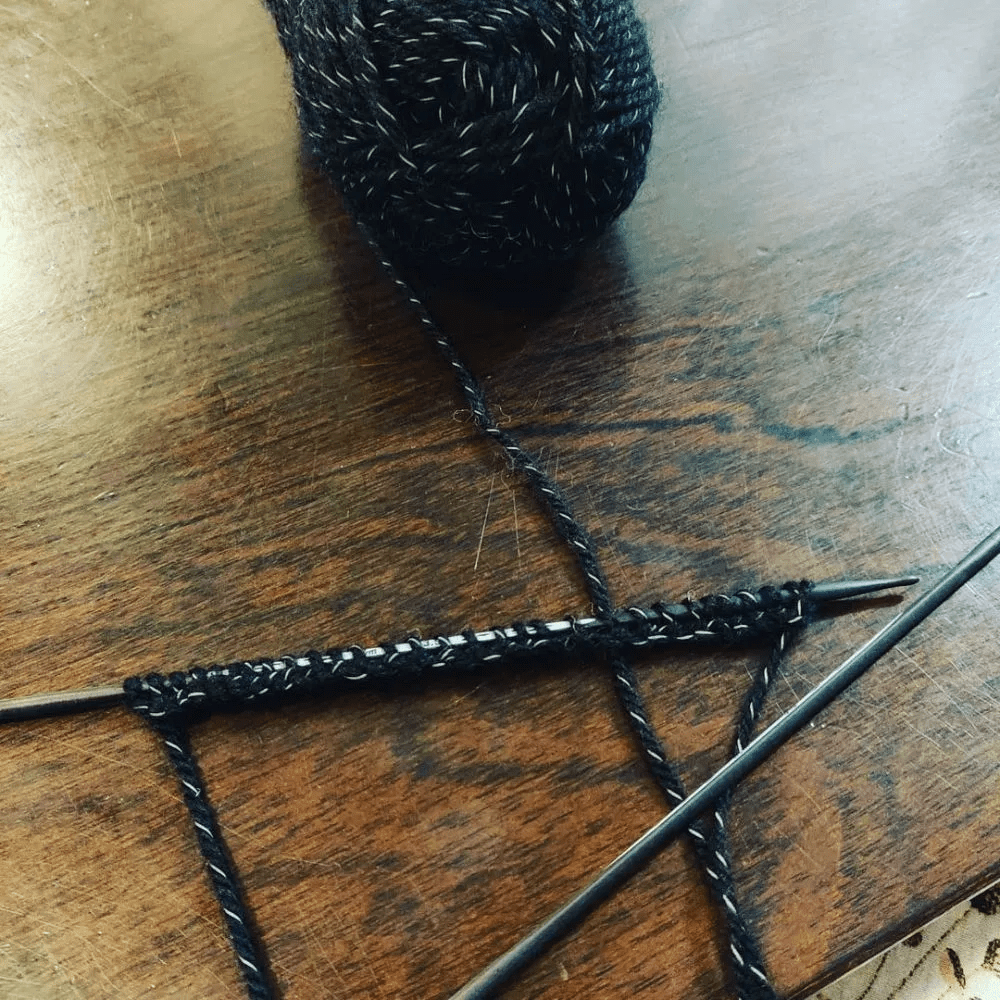
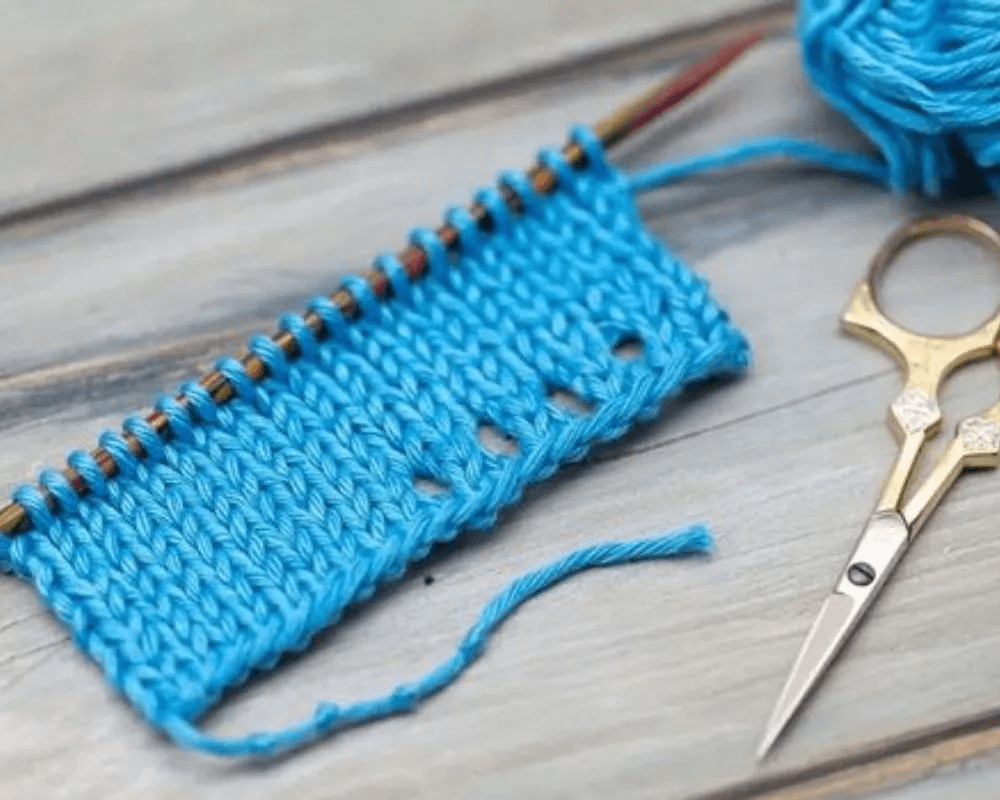
2. Using a lifeline
Having a safety net for your knitting projects can be a great way to ensure no half-knitted projects get spoiled, especially since completing all your knitting in one sitting is practically impossible. Here’s how you can use waste yarn as a lifeline.

All you have to do is thread some waste yarn through your stitches. Don’t miss the places where you’ve got a wonderful pattern going. If you accidentally mess up, because we all do sometimes and no one’s perfect, your lifeline can save the day.
3. A convenient yarn holder
Keep your yarn tangle-free with this simple yet ingenious hack. As for the supplies, you need a plastic bottle and a pair of scissors. Once you’ve arranged these, use the scissors to cut out a big hole in the central portion of the bottle.
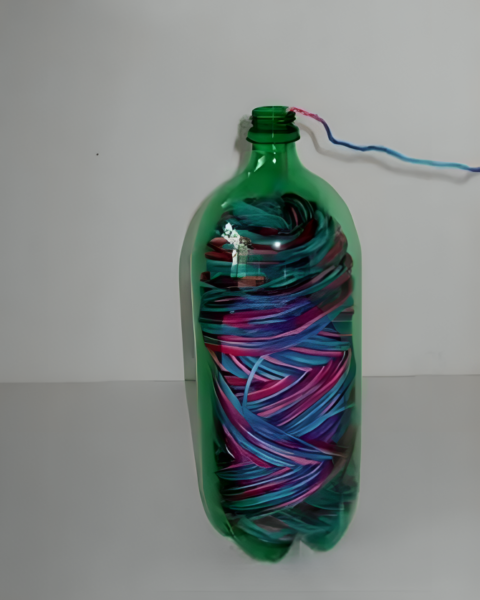
Make sure it’s close to the size of your yarn but not precisely the same, and that’s it, easy breezy! You can conveniently thread your spool through the neck of the bottle, and your yarn will never be out of place again. Plus, it’s super handy.
4. Your knitting station
Move around the house without the hassle of gathering all your knitting supplies when leaving a room. This portable knitting station will fix all problems related to knitting mobility around the house. The best part is that it’s easy to make- even if you aren’t particularly good with craft.
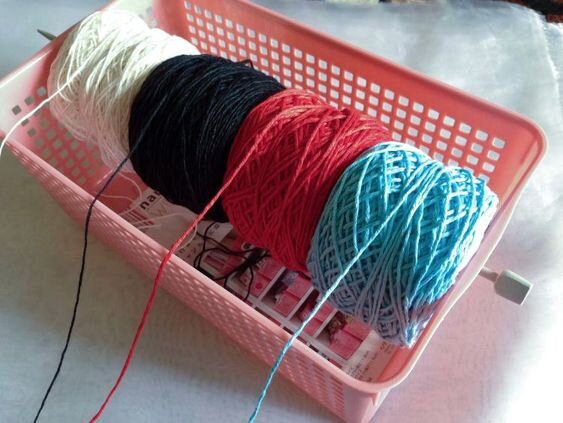
All you need are dowels or chopsticks and any old basket with holes. Stick the dowels at opposite ends of the basket with your yarn in the middle. Plenty of space at the bottom of the basket for all your other knitting supplies, like scissors, threads, buttons, etc.!
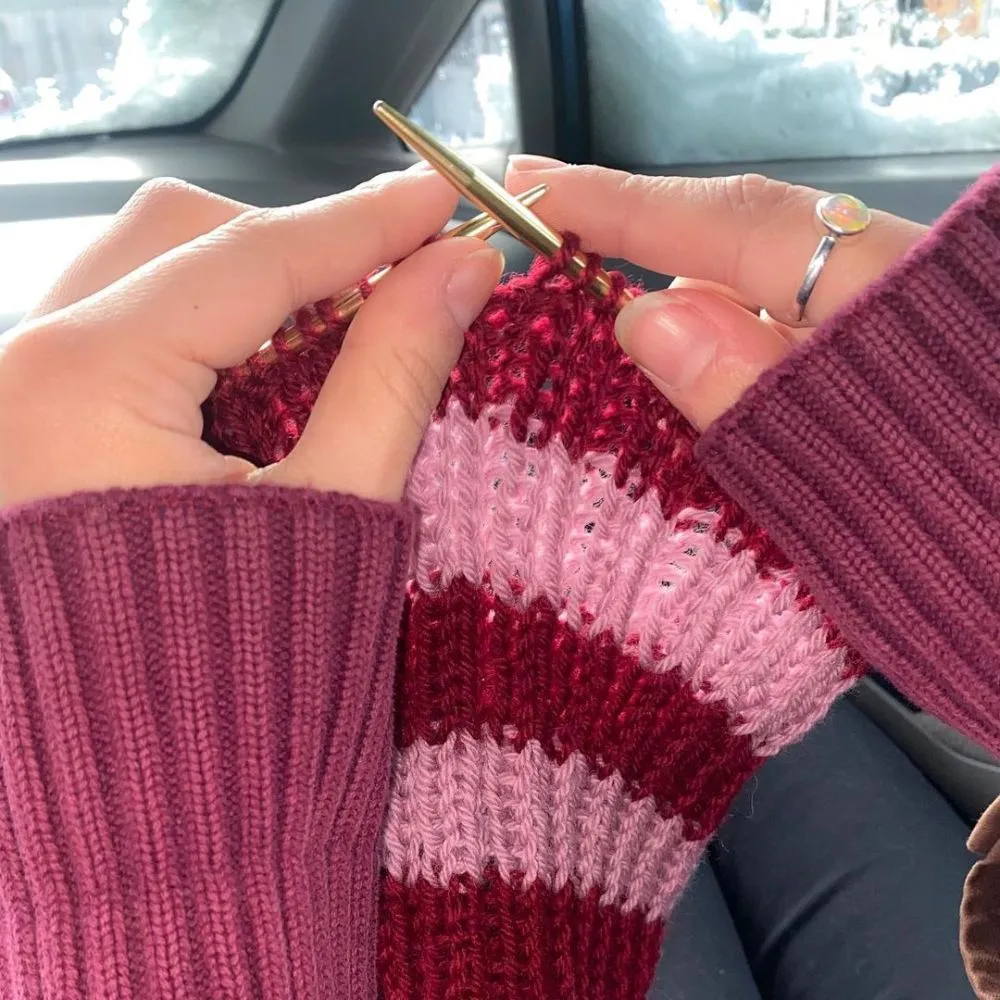
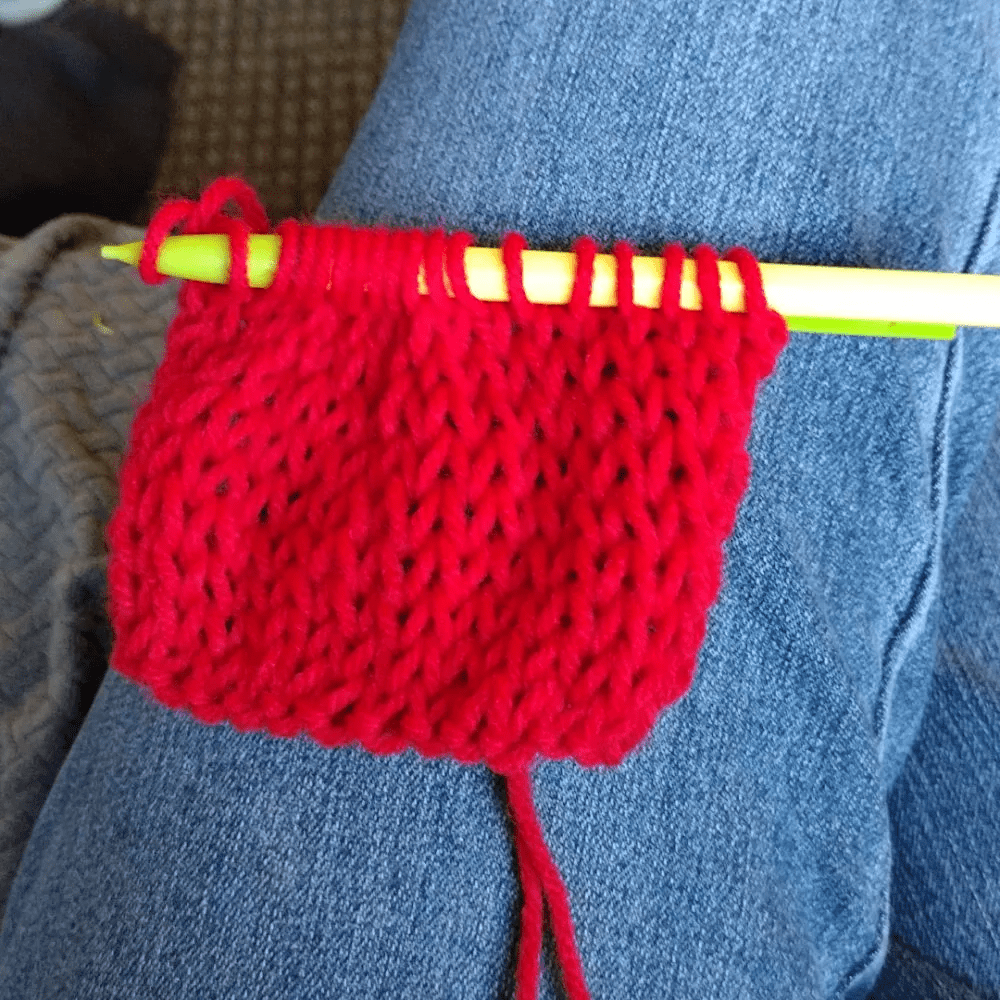
5. All kinds of sizes
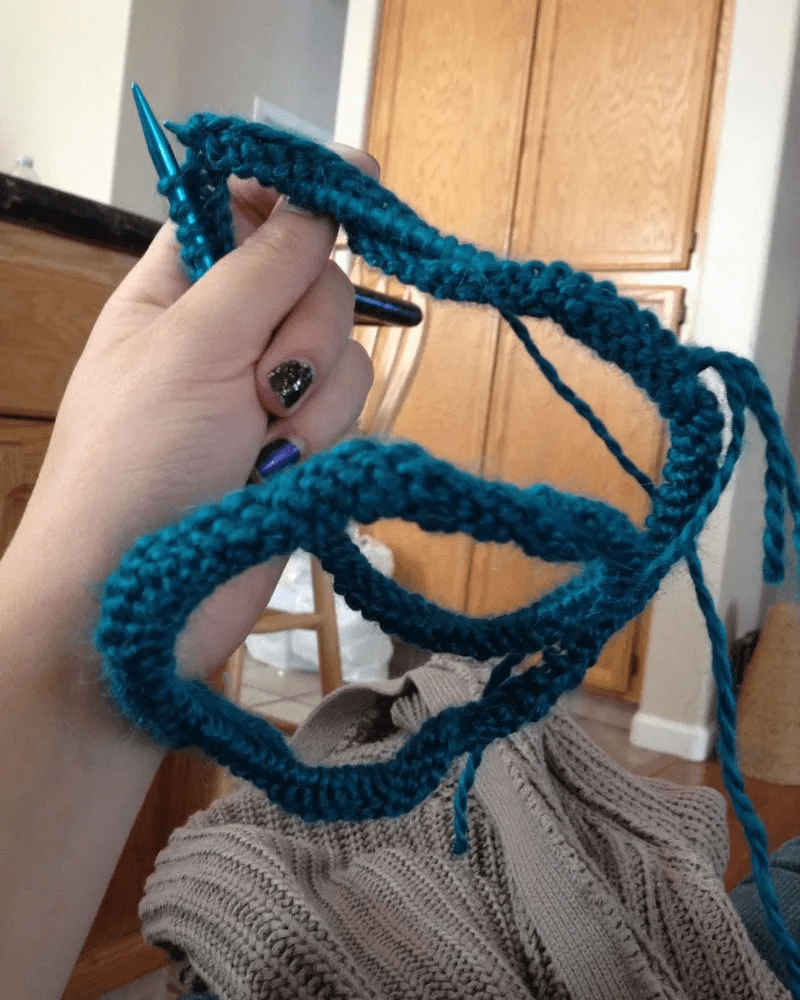
Say goodbye to gauge dramas with this knitting hack. Now, it’s no secret that the right-side needles are the real boss when it comes to knitting. The trick is to use a smaller needle for the left side of your circular needles.

Here’s how it changes things: your left needle becomes the perfect stitch holder while you use the right needle to loop through. This needle can quickly become a slip & slide entrance for your stitches. This trick is going to be perfect for a variety of looping maneuvers.
6. Reversing the snag
As much as we want it to be, knitting is not meant to be a process without inevitable hiccups. Snags are one of the most annoying of these. Here’s what you can do when this happens. Get a double-edged needle- the closer it is in size to the knitting needle, the better.
Next, put the needle through the snagged loop from the wrong side. One gentle tug, and you’ll have the snag reversed! Now, you only need to use the needle to return it to its original size. This will also realign the yarn so you can continue working smoothly.
7. The power of a ruler
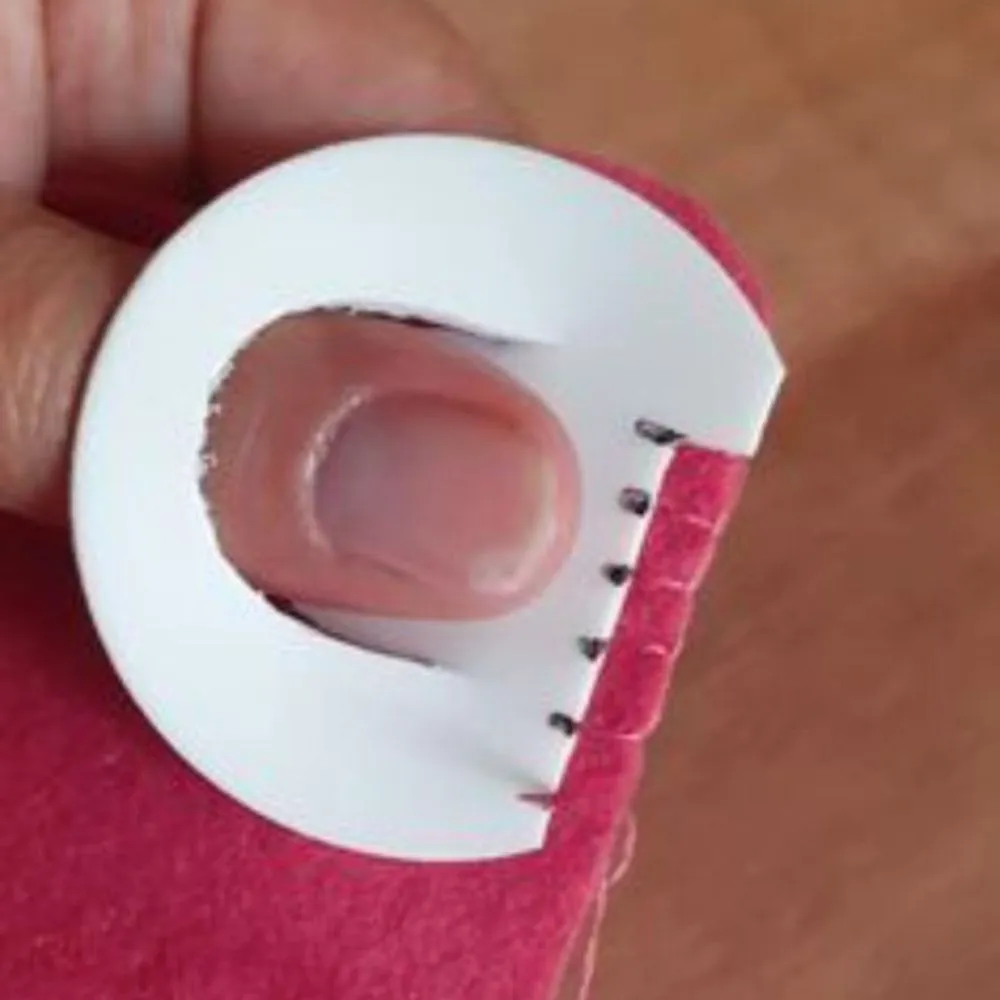
Sorting needle sizes is not always easy, so it’s good to have a backup. Choose a gauge ruler for matchmaking. We have a super simple solution if you don’t have a needle measure. Grab your pens, papers, and, most importantly, your needles.
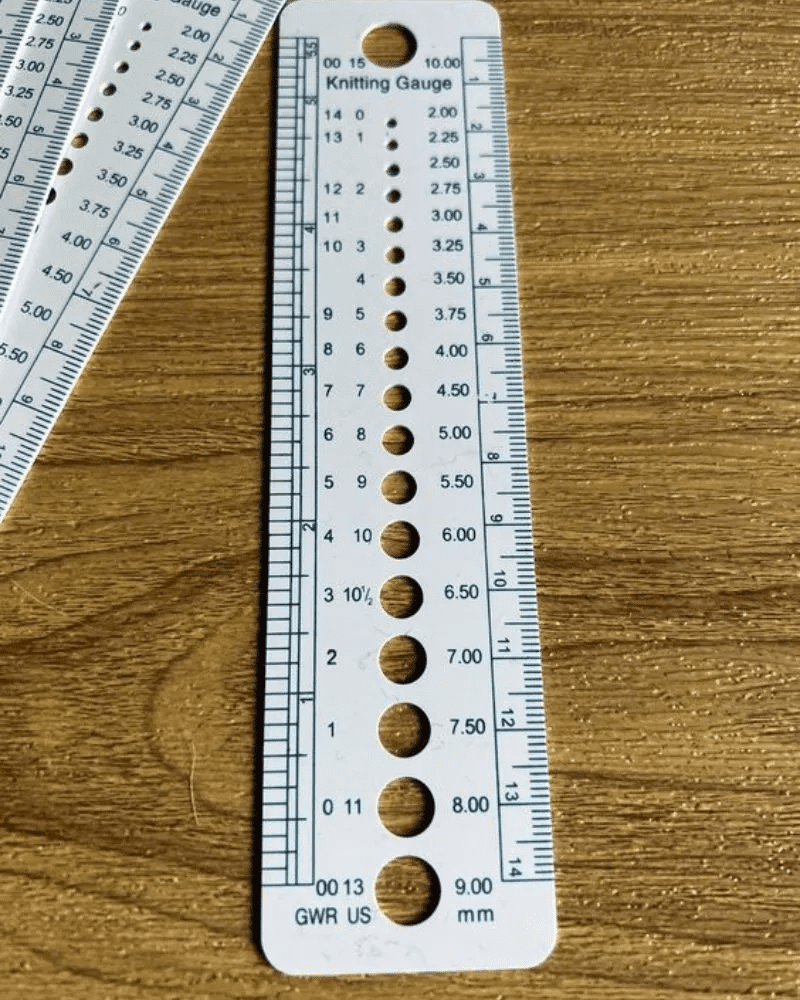
Now, carefully poke a hole into the paper. Be cautious not to injure your finger. Once you’re through with this step, measure the width of the hole. The number you get is the size of your needle in millimeters. Simple and quick.
8. Fixing the loose stitches
Whether you’re looking for easy ladder fixes or a way to tighten the loose stitches without ruining the entire piece, this hack will save the day. Get your needles- both wool and knitting needles will work if they’re not too sharp.

Tackle the loose stitches by using the needles to tug at the leg of the stitch. Once it is in place, redistribute the space among the stitches to ensure consistency. Knit away without having to worry about these tiny knitting hiccups.
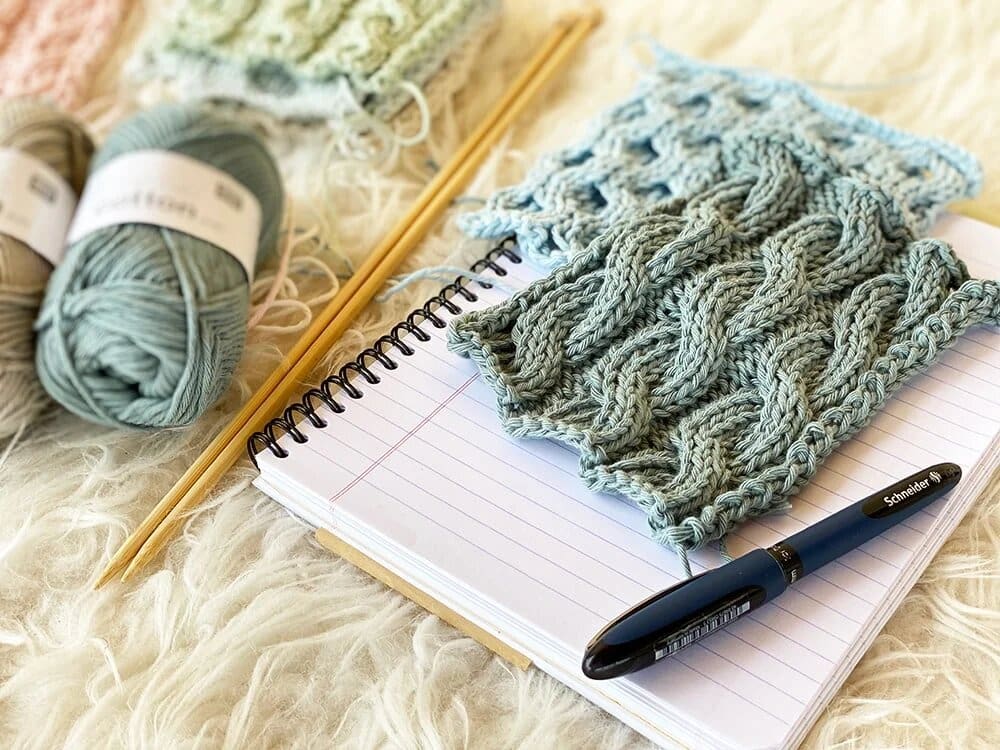
9. Grandma’s secret
Whether you’ve learned the art of knitting from a master artisan or your grandma- we bet you probably missed this super-important knit lesson. The importance of tool organization is well-known to all in this craft. While it may sound too simple, it can profoundly affect how you work.

Organize your needles and threads into neat compartments. You can even coordinate the colors for a more pleasing visual composition. Also, don’t forget to use the scraps for a colorful masterpiece- it might turn out to be better than expected.
10. Knitting on the move
Can’t keep your hands off the knitting needle while traveling? No worries; we’ve got a couple of tricks to make it easier for you. First off, if you haven’t already, try working on mittens or beanies. These projects are relatively more manageable, especially if you’re knitting on the go.
Next, do yourself a favor and assemble a knitting kit for all the portable projects you will take on. Don’t forget to add a pack of lightweight needles to the bag. Choosing one that’s tangle-resistant for the yarn will save you a lot of time.
11. Saving the yarns
Neglecting a push here or a tug there can cause a yarn disaster. And we know what follows- a desperate attempt to spool the yarn back together, which is not always successful. However, this common problem has an incredibly simple solution.
All you have to do is wrap the yarn tail around the knitting needle—10 wraps for 10 stitches, and so on. Don’t forget to maintain a safety net- leave at least 10 cm of the yarn if you need more.
12. An awesome DIY-knitter upgrade
What if we told you it’s time to replace traditional knitting methods with something more extraordinary? This fantastic knitter requires a little effort, but the result will be worth it. All you need is some popsicle sticks and a small water bottle- a vitamin water bottle might work.

Once you’ve assembled your supplies, cut out the bottle to remove the neck and the base. Arrange the popsicle sticks around the remaining part of the bottle and glue them. You have a knitting base much stronger than cardboard tubes or embroidery hoops.
13. Ditch the fancy blocking boards
The fold lines that spoil the final look are one constant worry with undertaking a tubular knitting project. What if we told you that one of your home improvement supplies is the key to avoiding the disaster of such creases?
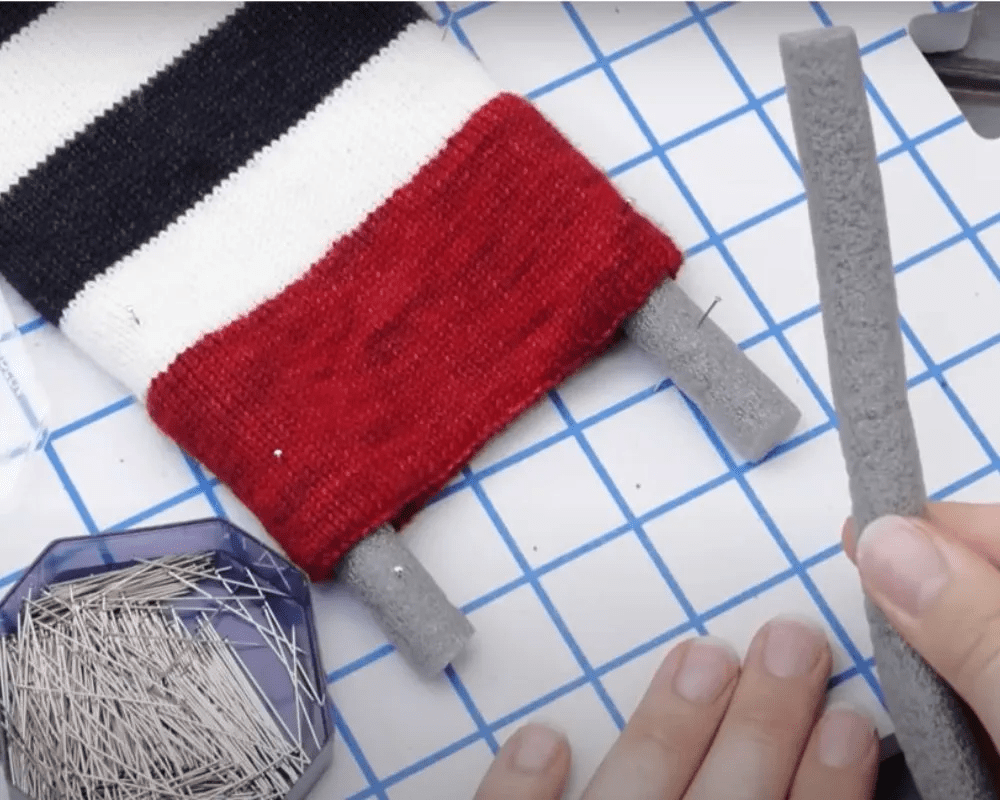
Look around in your home for filler ropes. This home caulking tool can easily ensure no unwanted creases in your knitted pieces. You only need to wrap the knitting edge around the filler tube and knit away for a professional finish.
14. Just a little straightening
The problem with using circular needles is that they can cramp up the style of your knitted pieces. Here’s a super simple way to fix this. Get some hot water and put the twisted cord in the water. A few gentle tugs will straighten it out once it’s taken out of the water.
Once you do this, your needles will be reshaped and ready for another fantastic knitting project. You can do this every once in a while to ensure your needles are in the best shape. Seems like a spa day might be enough to make all kinds of problems disappear!
15. DIY stitch gauge
We’ve all been there- the problem of our stitches being entirely out of alignment despite our best efforts. It can be pretty frustrating, so we’ve got a solution for you. The ingenious’ stitch gauge’ can ensure your stitches are in the perfect alignment.
Plus, it doesn’t require too much effort to make. All you have to do is cut and notch the edges of a thick paper (so it lasts longer. You can even use cardboard if possible). Make sure your stitches are perfectly aligned with this amazing hack.
16. Cool yarn pets
If you’re in the mood to upgrade your knitting essentials, we’ve got a DIY project that’s hard to resist! The dual yarn pet can help you switch easily when working with two balls of yarn. To begin, get a 7″ x 7″ wooden base.
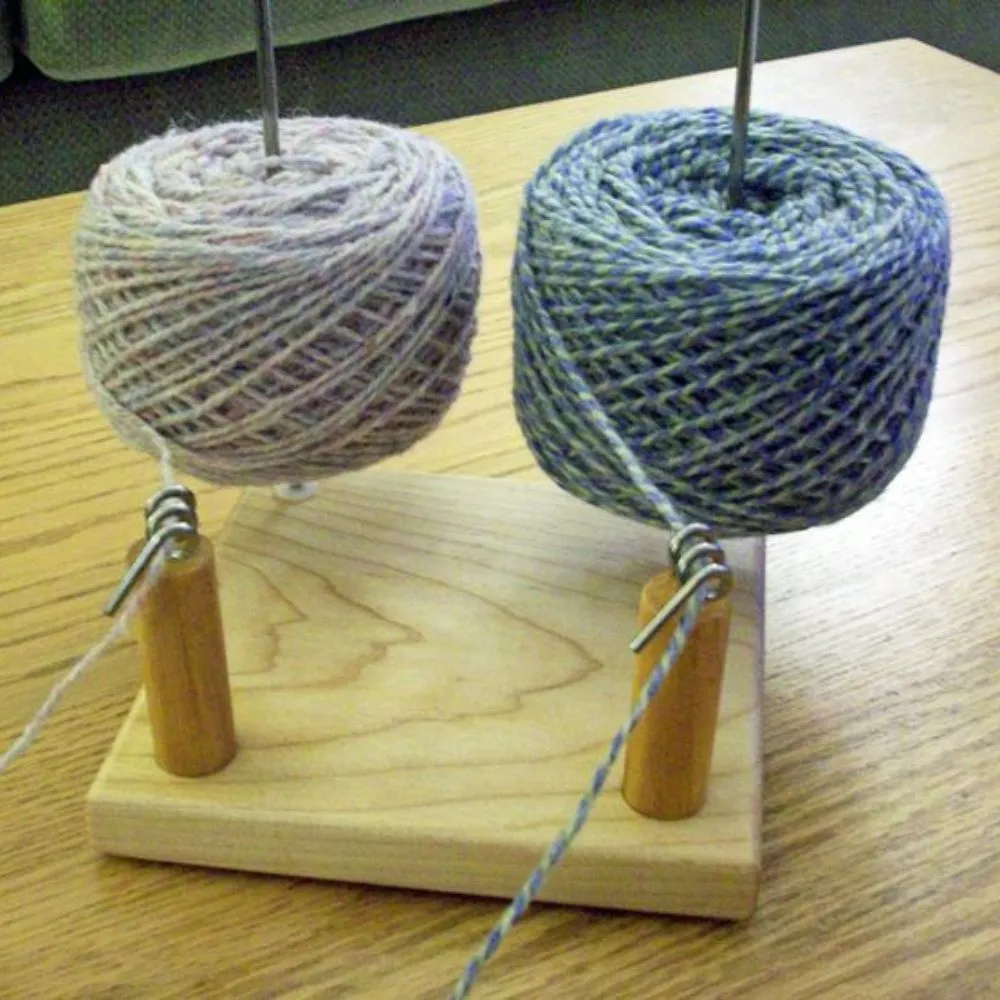
Maple hardwood remains a popular choice for this part, although other materials work just fine. Drill three holes here- two in the corners and one in the middle. Now, insert 12-inch rods inside for your yarns. As shown above, you can add extra wooden discs and clamps for stability.
17. Learning the right way
Hunting the rows to continue your pattern where you left off can be highly frustrating. The good news here is that this issue can be conveniently fixed. For this simple DIY project, you only need a piece of cardboard or a spare piece of paper and scissors.
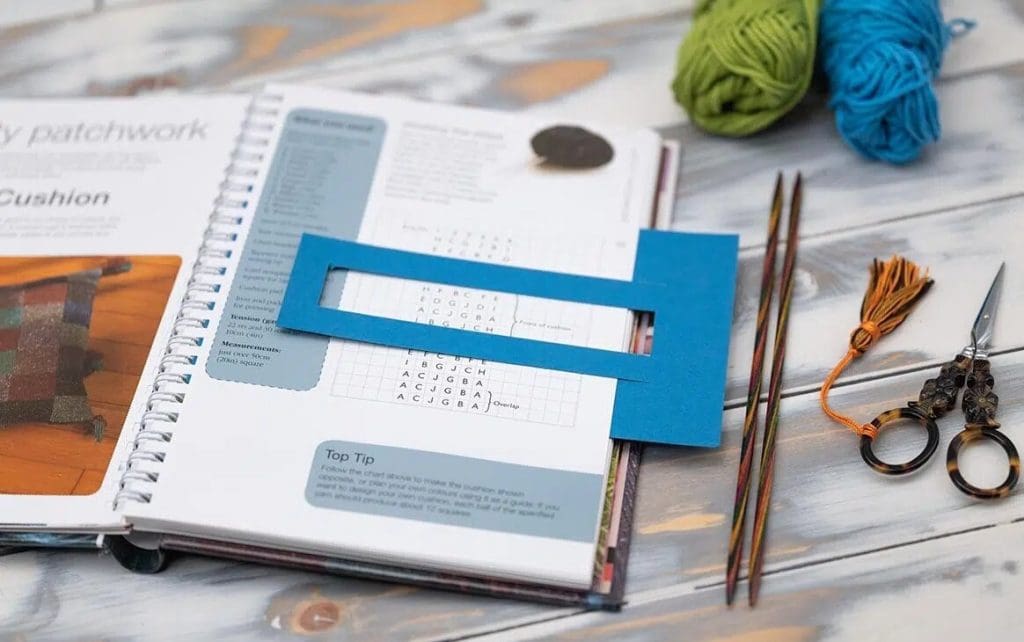
Make two cuts, and there you have it. This clever knitting tool will make knitting super easy for you. You can conveniently slip your pattern through the gaps and even use this as a bookmark for your knitting book. Make sure you’re using a thin piece of cardboard.
18. A compact solution
Whether it is stitch markers or tapestry needles, you can never be too careful with these knitting essentials, especially since they’re so small and difficult to handle. Using large organizers is nearly as hopeless; you’re left fumbling through the compartments for your supplies.
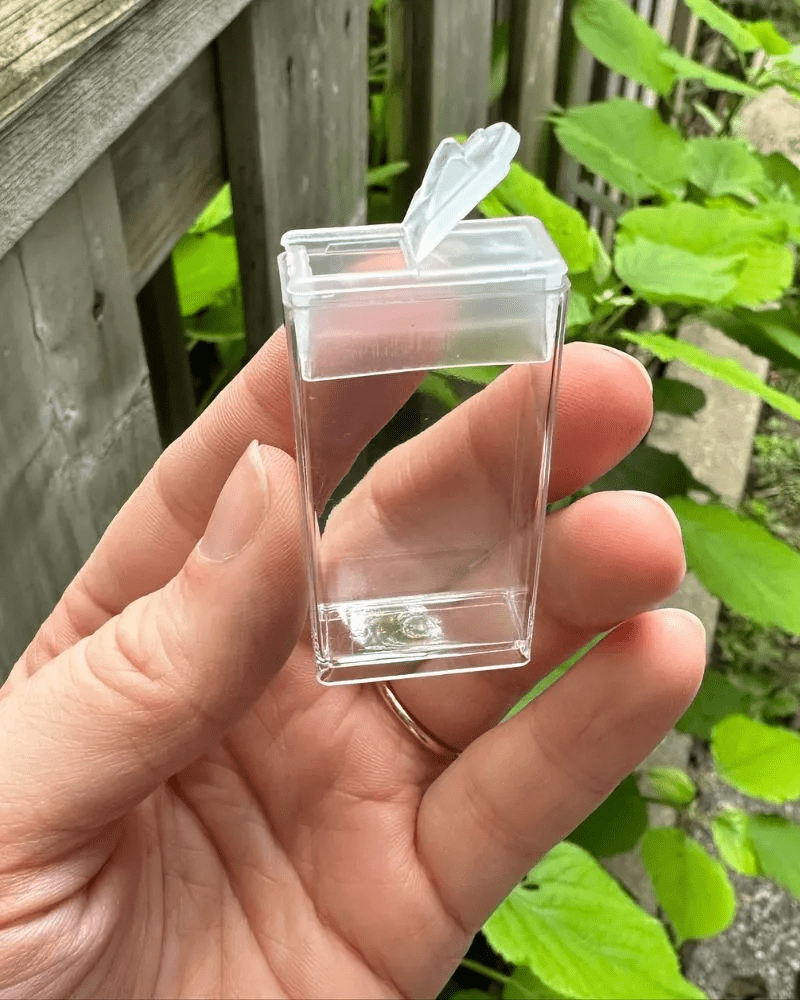
Stuff all your knitting essentials in a tic tac box to avoid this. This compact little organizer ensures you don’t lose any knitting gear, especially if you enjoy knitting everywhere you go. This little case can be tucked away in your purse easily.
19. Yarn winder
Having a yarn ball winder is a must, no doubt. But who said it had to be one of those fancy ball winders that require you to break the bank, especially when you have a cheaper and perfectly workable solution? We love it when we don’t have to spend extra money, don’t you?
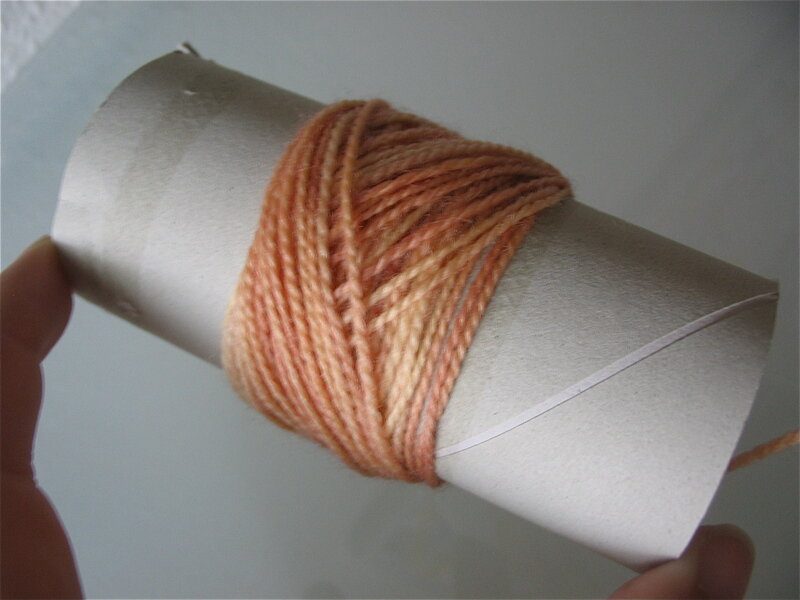
A used-up toilet paper roll makes for a great ball winder. This super affordable solution is going to be indispensable for your knitting supplies. Just anchor the end of the yarn ball, wind it up, and you have a center-pull yarn ball ready for your projects.
20. Ringing it up
Granny squares have to be one of the most popular pieces in the world of knitting. Whether it’s about making the best of the waste scraps or taking up a crochet project, you can finish in a breeze; these squares are perfect.
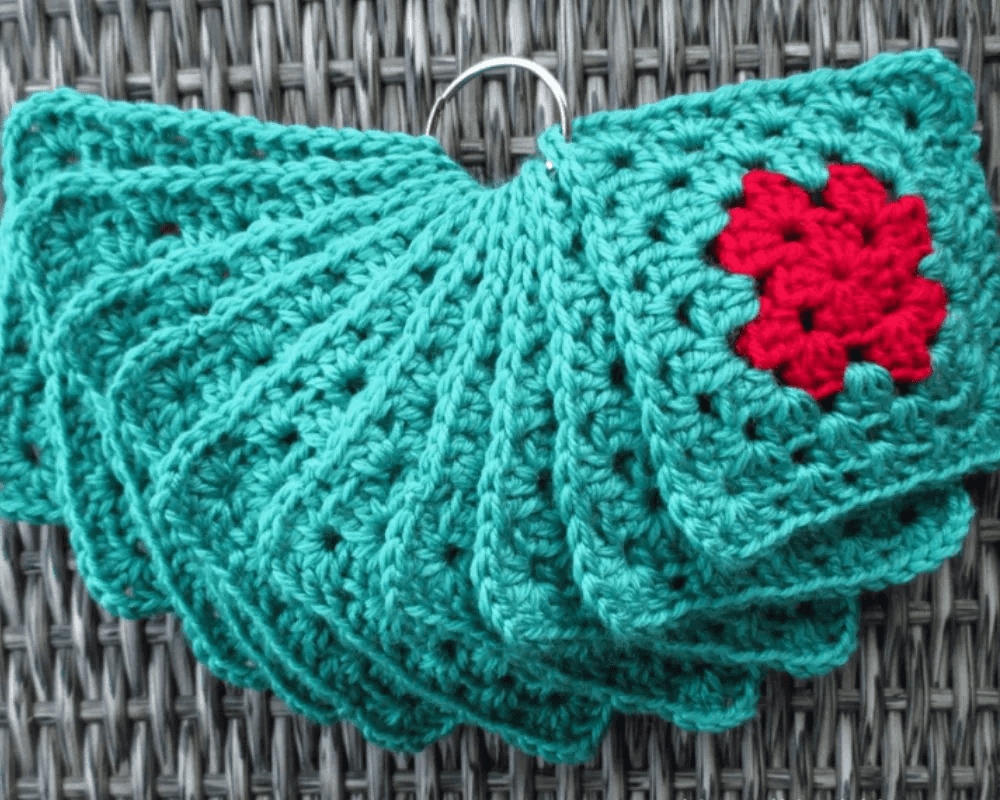
As unique as they are, working with too many squares can quickly become a mess. To avoid this, use a ring to organize your granny squares. This way, you wouldn’t have to spend hours counting and arranging the number of squares you have.
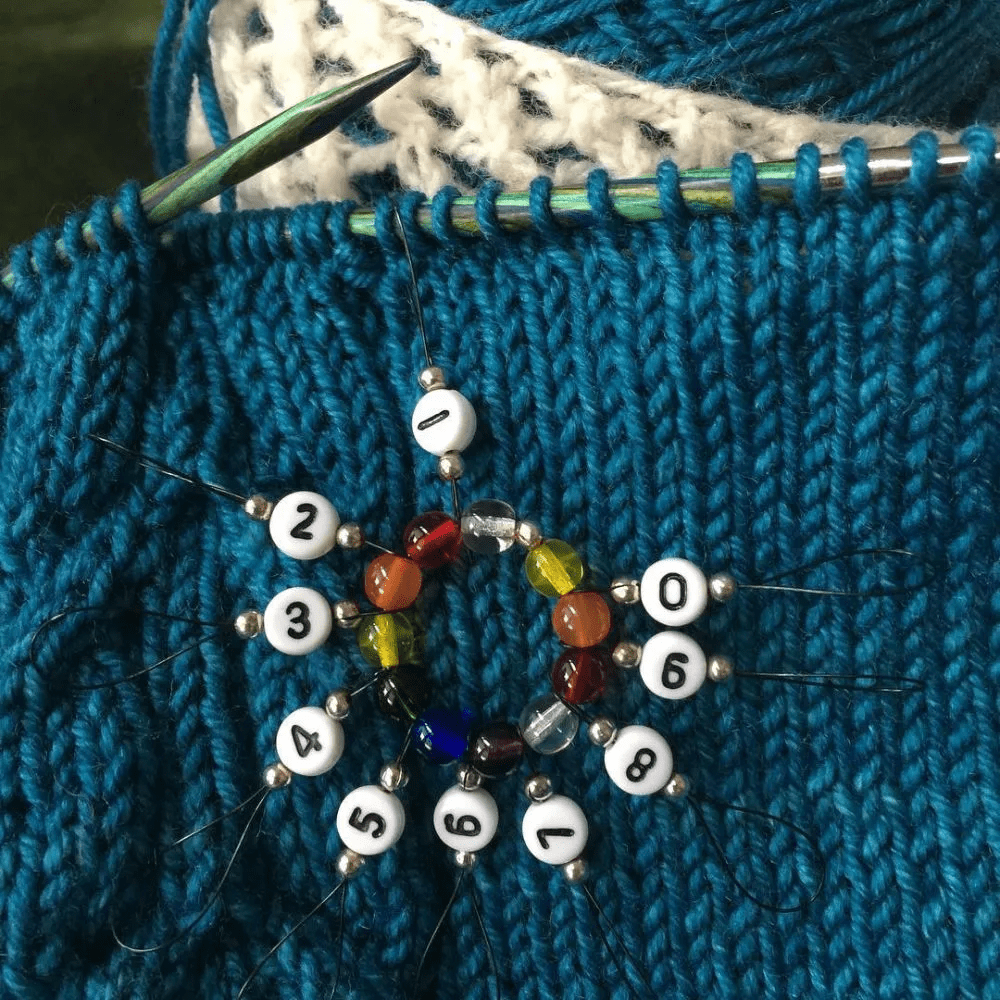
21. A memory map for needle sizes
Losing track of your needle sizes while working on a project can be frustrating. Here’s a hack to avoid this- a memory map for your needle sizes. The best part is that it can easily incorporate into your knitting piece without a hitch.
Knit eyelets of different sizes corresponding to your needle sizes into the first row of your piece. If you’re dealing with the tricky half-sizes, try tackling them with purl stitches. This trick is especially helpful when you’re juggling between gauge stitches. Plus, your memory map is quite pleasant to look at.
22. The tumbler solution
You’re going to love tumblers after you try this hack. A 24-ounce tumbler can be the perfect place to keep your yarn. You might just be tempted to repurpose all the tumblers in your house as knitting essentials, but we urge you not to; you still need some for your beverages.

The best part is that you can use the tumbler’s mouth as a yarn whisperer. This budget-friendly hack is what every knitting maestro has been waiting for. This ingenious DIY yarn ball holder keeps your yarn balls dust-free and organized.
23. Makeshift cable needles on the go!
If you’re one to take your knitting supplies wherever you go, you’ll probably have to deal with the problem of losing your cable needles, which can be avoided with this simple replacement. First, prepare a kit for mobile knitting projects.
Replace your precious cable needles with cotton buds, bent paper clips, pencils, toothpicks, and bobby pins. Especially for the complex cable knit patterns, which require you to be careful! These are more functional and convenient to carry and arrange than the clunky knitting needles.
24. DIY yarn spool
Sometimes, no matter how hard you try to keep your yarns in place, they’re constantly rolling around or getting tangled. Luckily, we’ve got a solution that is affordable and easy to arrange. Here are the supplies you need: a cardboard box and a chunky knitting needle.
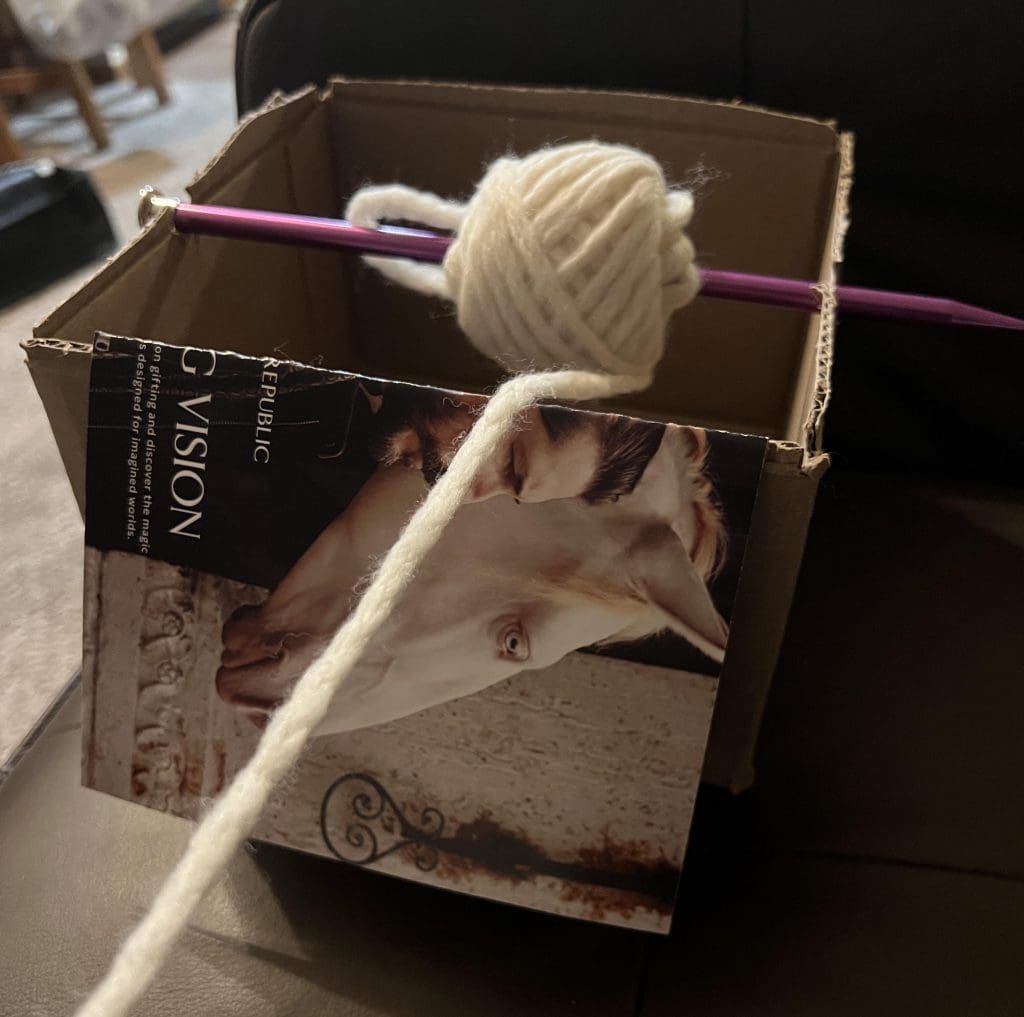
Now, make a hole on opposite sides of the box (or jab the needle through the box lid) and insert the knitting needle. You can use it as a yarn spool. Say goodbye to the messy tangles and knots and hello to a pleasurable knitting experience.
25. Colanders for the win!
We have a new hack for you to try for all those knitting enthusiasts who can turn even the most mundane supplies into knitting tools. Turn an ordinary colander into an ingenious knitting essential. This trick is especially useful if you’re working on a project requiring you to tackle several yarns.
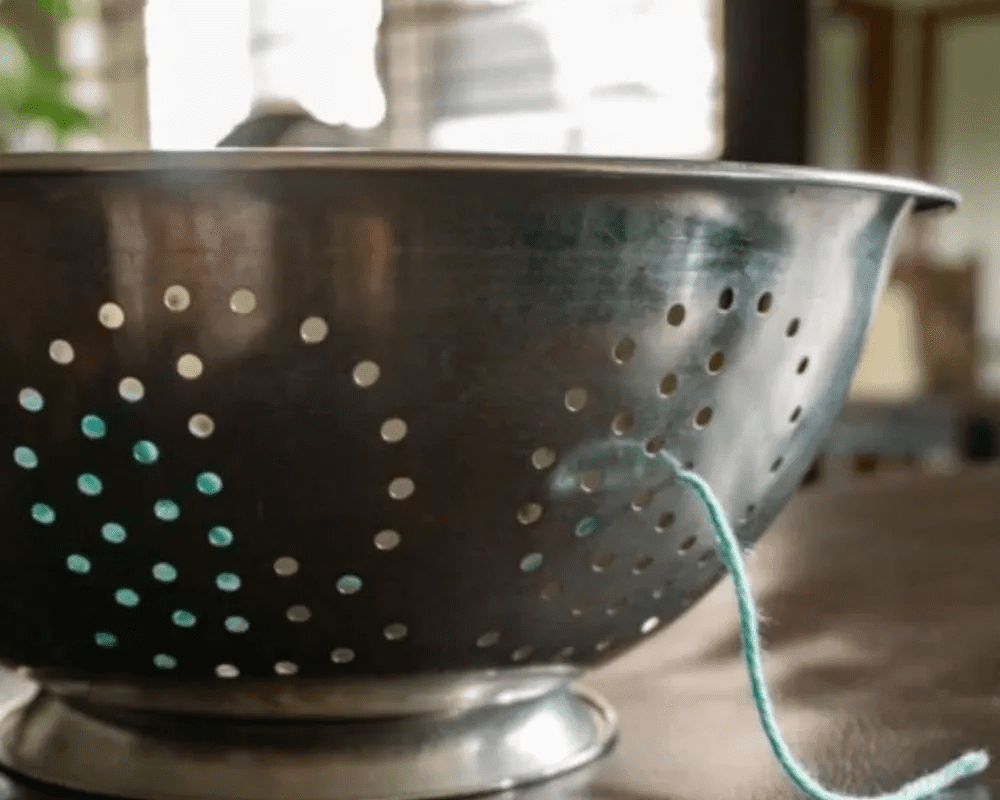
Keep all the yarns you need in a bowl, and be prepared to enjoy a grand knitting session without any tangling hassles. The holes in the colander can be excellent tools for untangling any leftover pieces of yarn. This is going to save you from a lot of frustration. Why didn’t we think of this sooner?
26. Labels but make it creative
We’ve all made the mistake of taking our yarn labels for granted, followed by having to hunt the stores for the perfect shade or material to finish our masterpiece. Here are a few ways to ensure the label stays in place, so you can easily buy more of the same yarn if you need to.
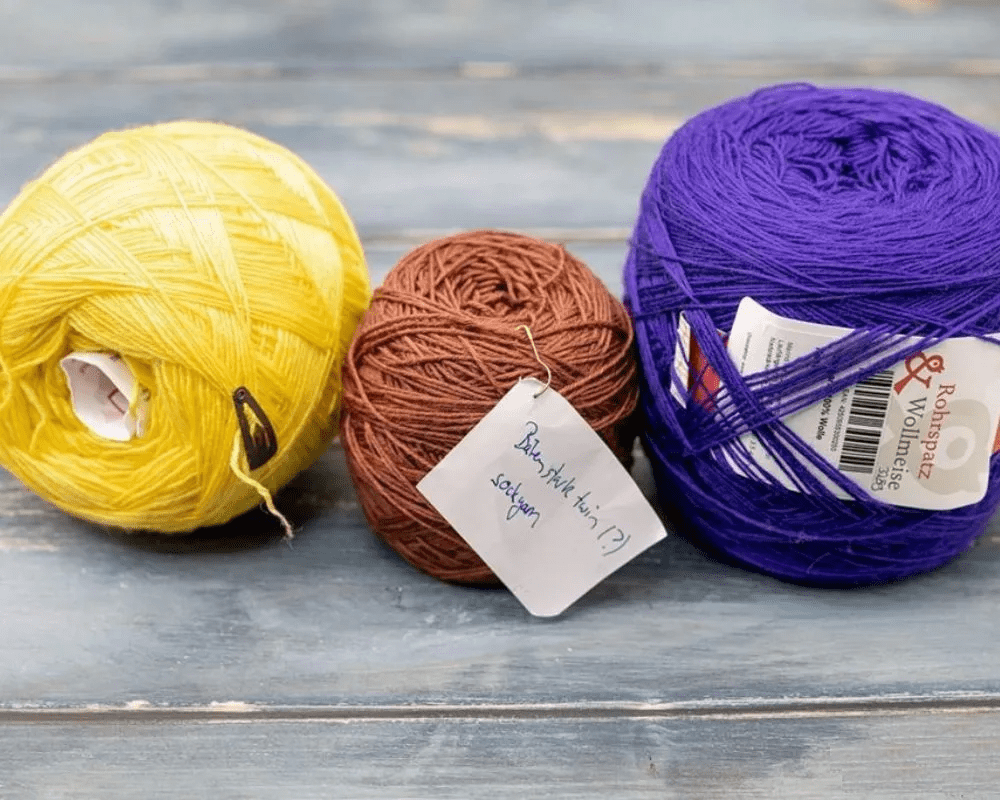
Use stitch markers to fasten the labels to the respective yarns. Or, if it’s a center-pull yarn ball, you can try to insert the label near the end so it doesn’t get lost until you’re done. You can also tape a piece of the yarn to the labels and stow them away safely.
27. Don’t get it twisted
We’ve got you covered if you’re looking for a way to fix those twisted stitches that well up now and then to disrupt your knitting process. This simple hack ensures no unraveled or pesky dropped stitches ruin your work of art.
The trick is simple- knit through the back loop to maintain consistency. That’s it! Whether you’re just starting out knitting or have been a pro for some time, this knitting secret is sure to go a long way for all your pieces to come.
28. Mini needles
Handling the different stitches while working on a big project is challenging. Even the slightest neglect can undo the tedious effort you’ve put in. Slip the stitches effortlessly onto a short cable with the help of cable stoppers to ensure nothing stops you from multitasking.

These cable stoppers can protect your stitches and ensure you can pick up right where you left off. Plus, it can help you save all the time spent on finding the right stitch to start over and avoiding any redos.
29. Pretty pincushions
Maintaining a needle case is no easy task. Fumbling with those tiny needles can be pretty frustrating at times. To fix this problem, add a pincushion to your kit. This addition will help you keep your needles in place and add a dash of quirkiness to your knitting kit.
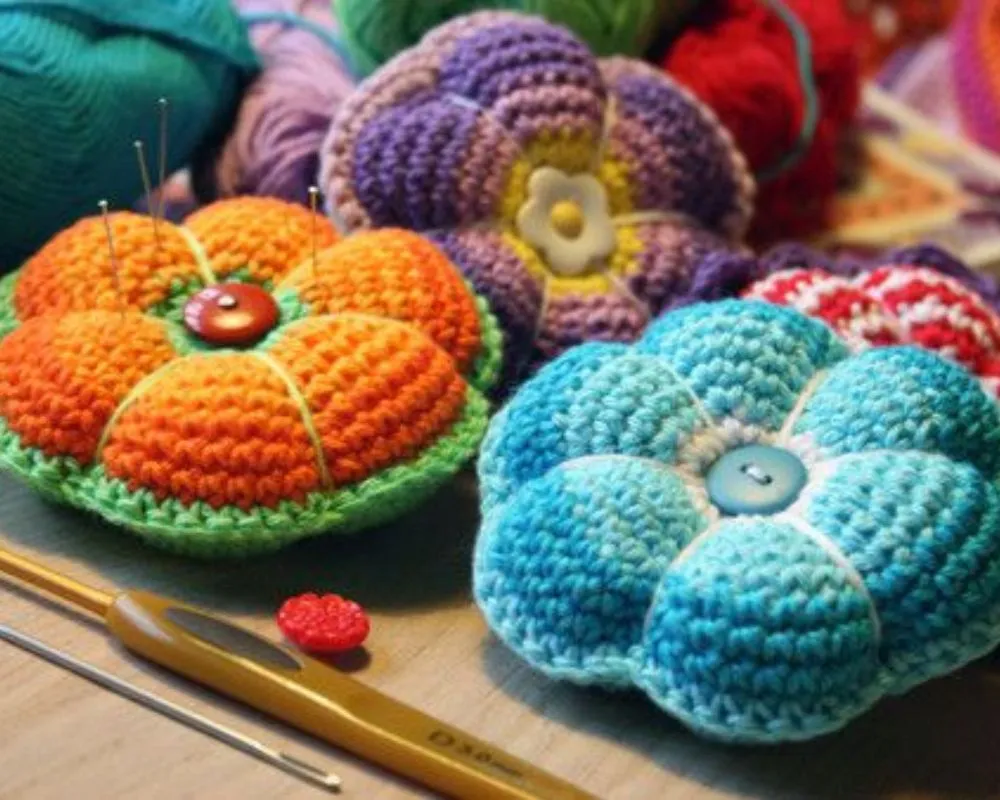
Plus, let’s admit it: it’s fun to have a bit of color in everything! Don’t let your needles get too cozy, though- any of us would feel tempted to leave the supplies untouched, especially if the arrangement is so organized and beautiful.
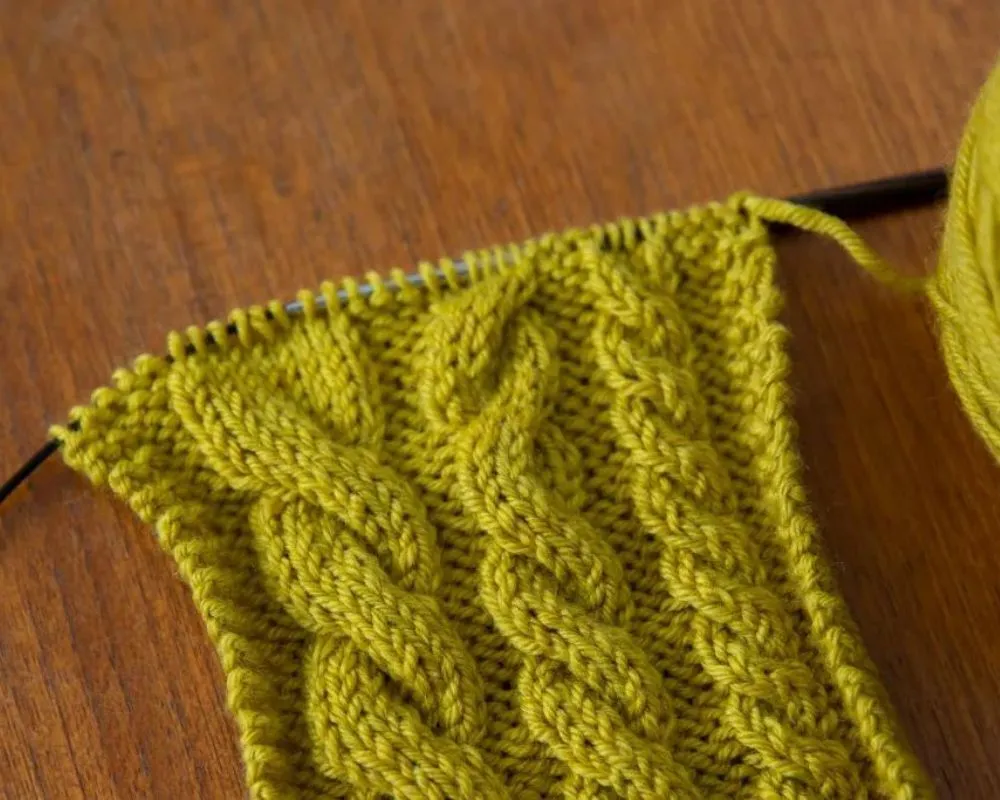
30. Ensuring tight edges
If you’re struggling with tight cast-on edges, we have a great trick that can help. All you need are two needles or one large needle. Once you have these, use the long-tail cast-on method to make stretchy patterns like the 2×2 rib, but if you’re using two needles, cast on both.

The first row may not be perfect, but you’ll get the hang of it in no time. Don’t opt for the slip knot if you’re going with the circular knit method. A discreet, twisted loop might be a better way to begin.
31. No loose ends
Don’t throw away your old hair clips just yet. We’ve got a brilliant use for them. These pins can be a great way to keep your wool yarns organized and tidy. Here’s how it works: all you need to do is clip them at the end of the yarn, and that will do.
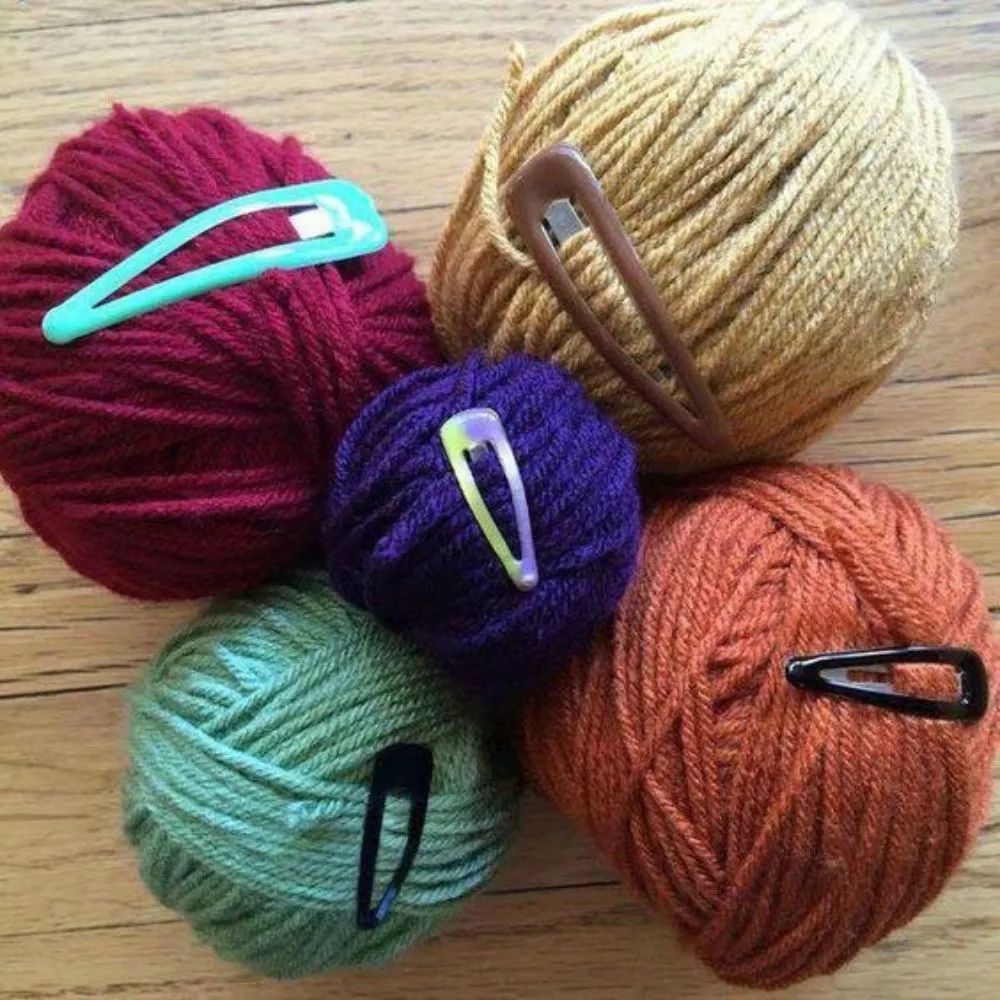
If you’re feeling extra inspired, you can use these clips as tail tamers. No matter how long the cast-on tails are, these clips are a reliable solution. You can continue knitting without worrying about the entanglements getting in the way of your relaxing endeavor.
32. Taming the threads
Using kitchen supplies for your knitting needs is one of the most satisfying things. Today’s special is using an egg beater. It’s time to reuse your empty thread spools. Attach a part of the serger thread to the spool. You can use tape or even tuck it securely.
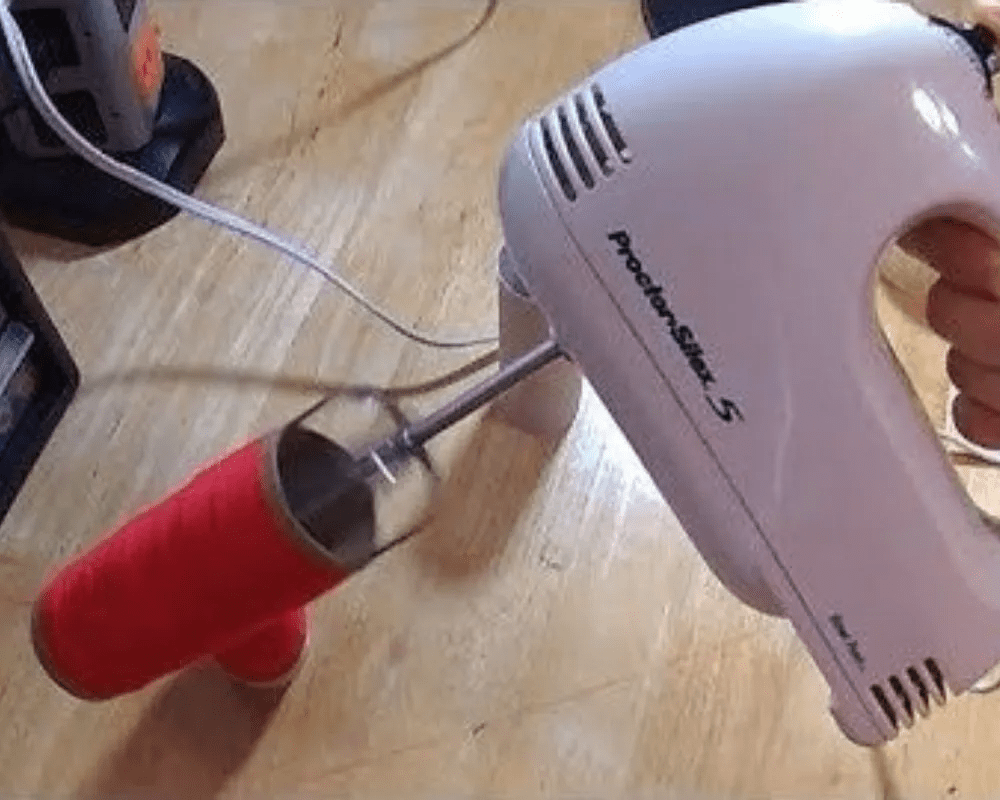
Now comes the tricky part- using the beater to guide the thread onto the spool. Crank the beater up slowly to ensure the thread is spooled properly. No more throwing away the empty spools, and make the best of all your knitting supplies.
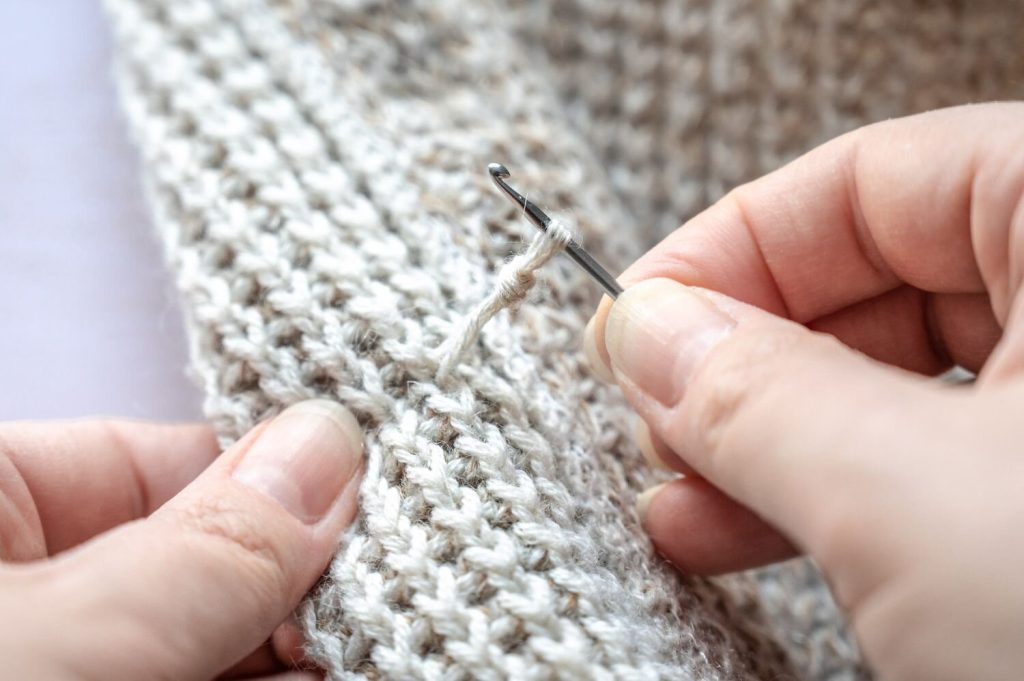
33. A makeshift crochet hook
Whether you’ve lost your crochet hook or have been avoiding getting one because they’re ridiculously expensive, we’ve got the right hack for you. All you need to do is get your hands on a pencil grip. That’s it; you have a cheap crochet hook!
Not only will this hack save you money, but it will also make for an excellent and speedy substitute. Plus, these pencil grips can give your knitting material a nice, colorful touch. Try it out! Just stick a pencil grip on your favorite stick and knit away.
34. Repurposing a binder
Everything can be repurposed as a knitting essential if you’re dedicated enough. While you’re at it, a standard binder or a photo album is a great way to organize your needles. Don’t forget your Sharpie to make sure all your needles are marked the correct size.
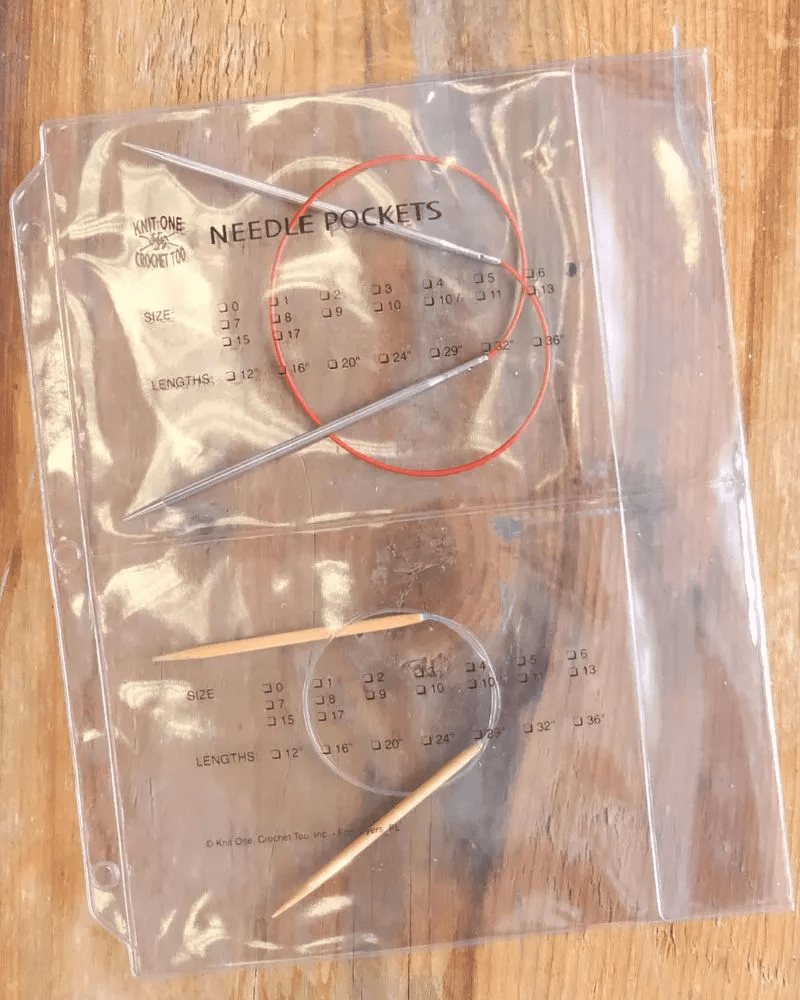
If you prefer a DIY project that requires less effort, you can get needle sleeves and organize them. Remember, the neater your supplies are, the smoother your process, and consequently, the better the finished product will be! Don’t let a needle hunt make your knitting process any less meditative than it is.
35. A circle of creativity
Use a loom with pegs to elevate your knitting game- this hack will change how you knit for good. Get your favorite yarn and the aforementioned loom. Once you’ve secured the yarn, wrap it clockwise around each peg. This is your foundation row.
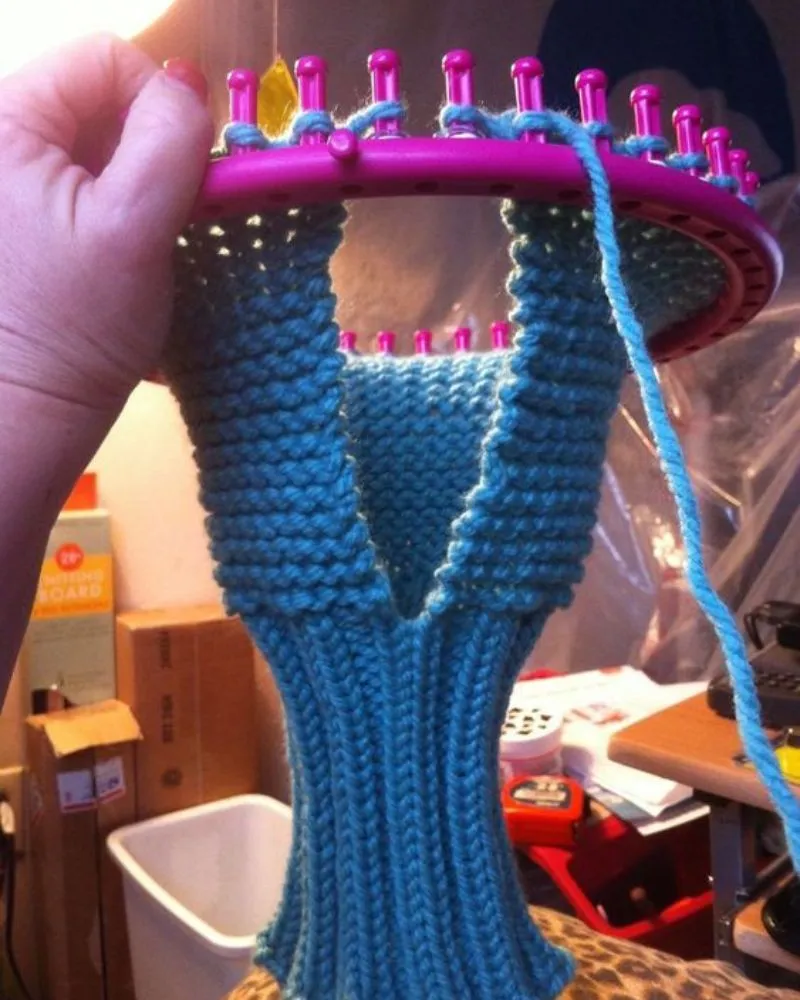
Top it off once more with a second loop. That’s it! Now, you can knit quickly while maintaining the tension you need for your masterpiece. Enjoy the process until you’re done. Don’t worry; you can easily untangle it after. Thank us later.
36. Cork it up
After popping your bottles, save up all the corks. Don’t throw them away because you’ll need them for this creative knitting hack. Slide the cork over the needles to make sure there are no runaway stitches. It is especially helpful if you prefer using double-edged needles.
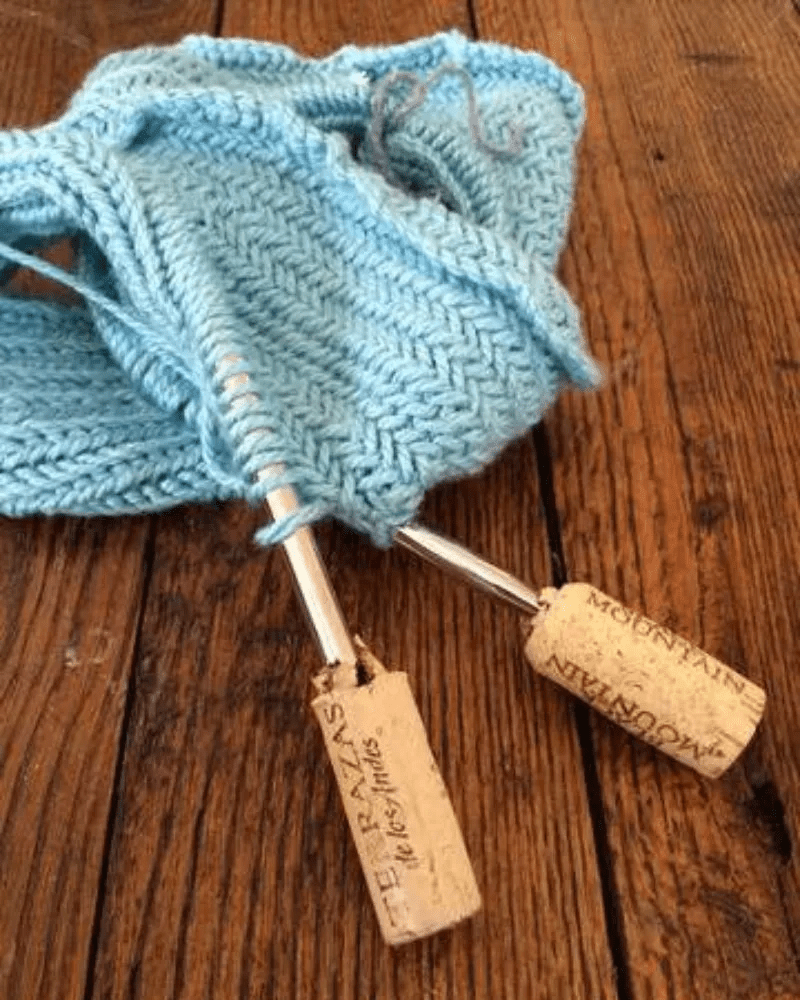
It might be equally great for circular needle enthusiasts. Prop up your needles with corks to give your knitting kit a quirky personal touch while protecting them. If you have trouble organizing your needles, this hack can be super handy.
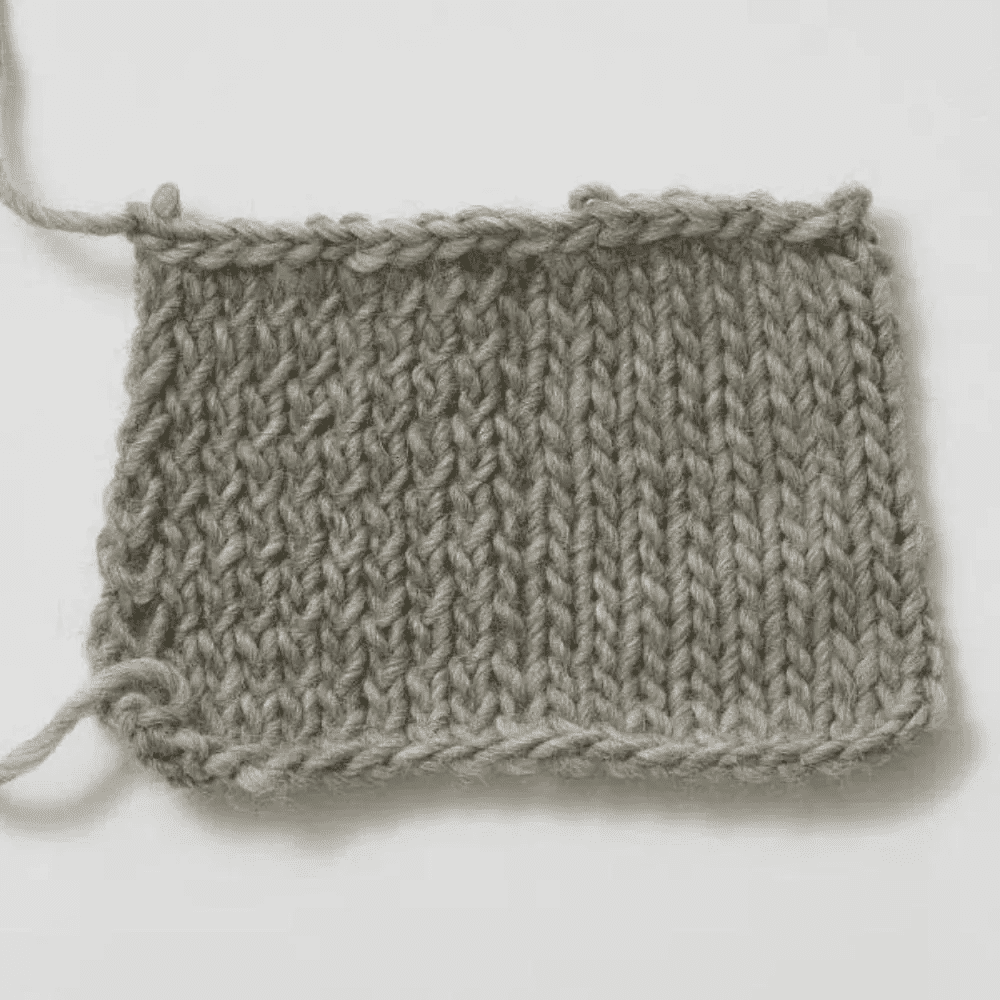
37. Purl-fect!
Mastering the famous stockinette stitch is easy if you know how to work with purl stitches. If you’re ever stuck in a purl problem, we have the right solution. This will revolutionize the way you knit. It’s all about the asymmetrical needlework.

Put a smaller needle through the flat stockinette ring, and you’re all set. This ensures all your stitches are in place and have a smoother and more consistent texture. This process is a must to try, especially if you’re working on a unique piece which requires everything to be perfect.
38. Hitting the ‘undo’ button!
Knitting backward can be demanding, but there’s no going back once you learn how to do this. You’ll be fixing all your knitting mistakes in a wink. It can be easily undone, whether it’s dropped stitches or any similar mistake.
If you’re only starting with knitting or are less experienced with this technique, try using a lifeline if you make a mistake. Try knitting a bit of yarn through the row you’re working on. If there’s a knitting hiccup, it can be fixed without unraveling the entire thing.
39. A clever crochet hook
When you’re stuck in a situation where you can’t find your crochet hook and need a quick alternative, your knitting needles can rescue you. These make a reliable alternative, especially when it comes to fallen stitches. The first step is to use the left needle to tackle the stitch.

Then, use the needle to adjust the strand and pull it through with the correct needle. Once again, use the needle to pop the stitch right over the left needle. That’s it. There’s no trace of your little stitching mishap anymore.
40. The ultimate granny square
It’s no secret that granny squares inspire our creativity in ways nothing else does. How the colors grow outward is beautiful and doesn’t require too much commitment. If you’re one to leave your hefty knitting projects halfway, this granny square hack will solve it.

Don’t worry; you only need to knit as many granny squares as you can. When you feel you’ve done enough, knit them together with a single stitch or crochet. You can even use this piece to make a pouch- add a zipper and a single piece of fabric for lining.
41. Organization is the key!
Having a needle case is not enough to manage the chaos of switching between different kinds of needles while knitting. It can get pretty tiresome pretty fast. This is where you can use bulb-shaped stitch markers to make your knitting process a lot smoother.
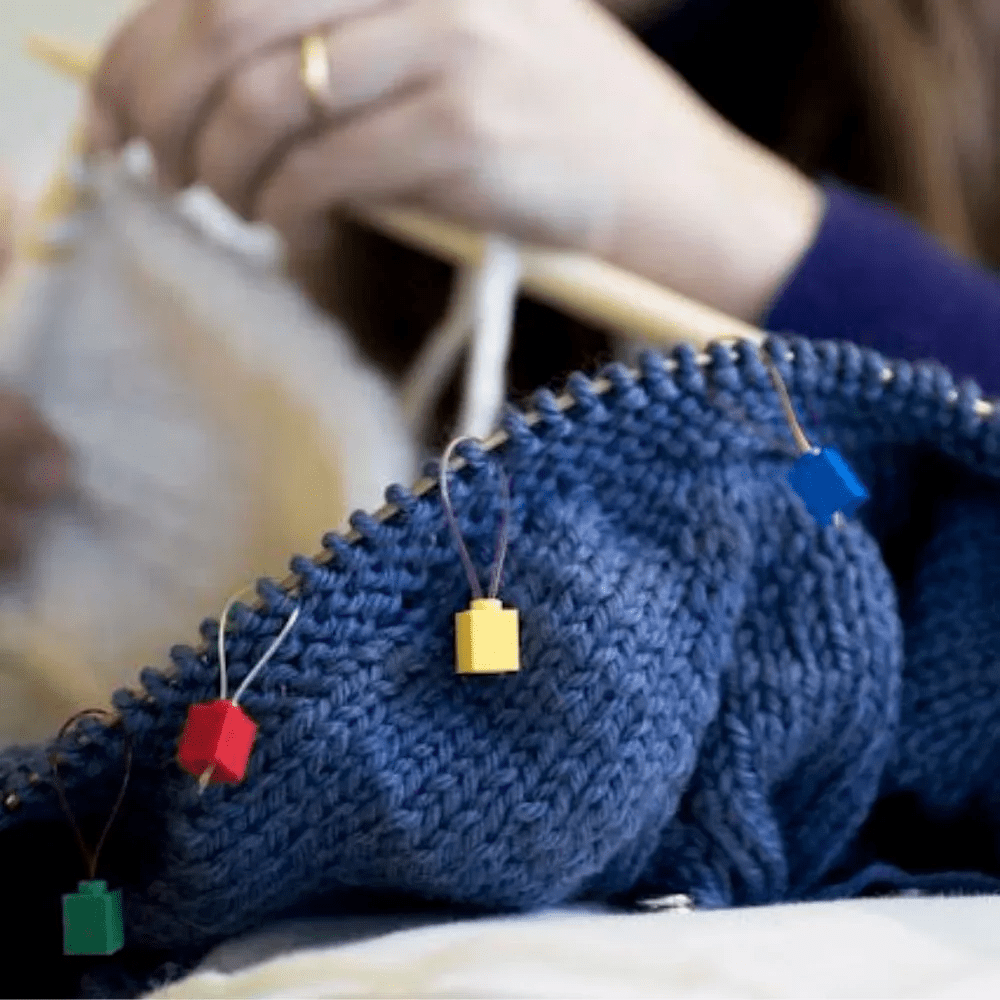
This is an excellent alternative to needle cases. For even better organization, try sewing a pincushion in your organizer. You’ll have all your needles in one place and pluck them instead of fumbling when your needles are spilled on a flat surface.
42. A trick for counting rows
Upgrade your knitting equipment with this must-have row counter. You can easily keep track of the number of rows you’ve knitted your way through without having to rack your brains too much. This can make knitting much easier, especially for those who zone out every once in a while.
You can knit patterns on repeat without worrying if they will be perfect- because they are. Looks like this is a great time to try that complex pattern you’ve been meaning to work on for a while now, and see how easy it comes.
43. Armed with the best
Here’s a solution for all the knitters who love knitting on the go but hate maintaining a kit. This DIY wristlet is a favorite with knitting enthusiasts. Size 6 needles, cable needles, and a yarn needle are must-haves for this project; you can even accommodate them in your wristlet once it’s done.

There are two ways to go about this. First, you can work with a 16-step process that uses knit, purl, and cable stitches. The second is a provisional cast followed by a main pattern groove with a three-needle bind-off finish.
44. Mastering left-handed cables
All knitwear looks better with this upgrade- yes, we’re talking about the left-handed cables. Although they might look complex, these knits are pretty simple. Depending on how you use the cable needle, they can be left-leaning or right-leaning. A cable needle in the front will produce right-leaning stitches and vice versa.

First, place two stitches on the cable needles. For a right-leaning cable, hold the cable needle to the front. Knit the next two stitches and put them back on the right needle. Two more stitches on the front, and you’ve got the perfect cable knit.
45. A great rack
This wooden rack for yarns is sure to be a big hit with all knitters, regardless of whether or not they’re neat freaks. After all, what’s better than having all your yarns organized by colors and in the same place?

It can make those knitting sessions so much easier and fun. Moreover, it can also help you manage the arduous task of keeping the yarns free of tangles and knots. You can quickly get it online or even make it a DIY project.