
45 Creative Ways To Use Mod Podge In Crafting
If you are a crafter, you certainly know what Mod Podge is. Crafters can use this product for decoupage, sealing, and finishing. There are multiple fabulous Mod Podge uses in crafting. This versatile glue, sealant, and finish can be applied on most things, from wood to cloth. You may use this magic potion for making coasters out of old postcards or bottle caps! Just remember to put felt pads on the bottom so it doesn’t scratch up your tables.
Some other uses include making frames, Glitter upgraded stationary, decorating pots, or DIYing t-shirts. The benefits of crafting are endless. We’ll show you some amazing Mod Podge crafts that’ll certainly get your inventive juices pouring. So get ready to be inspired!
1. Glittery Stapler
Who wouldn’t love a glittery stapler? And making one is pretty easy. All you need is some glitter and Mod Podge. First, gather your supplies. Of course, you’ll need a stapler, along with Glitter and Mod Podge. The latter can be found at most craft stores.
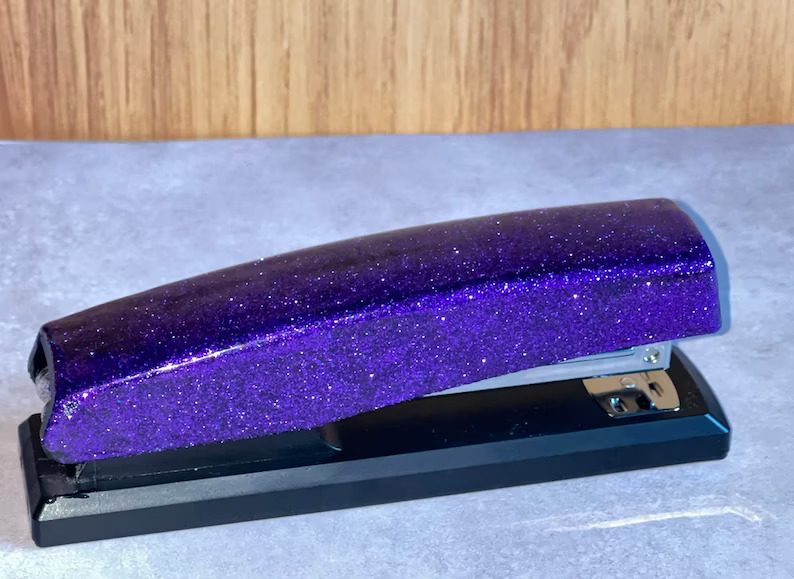
You don’t have to fret over being excessively precise when measuring – some trial and error is all part of the fun! Now it’s time to get this party going. You can start by covering the stapler in a layer of Glitter. Once that’s done, apply a layer of Mod Podge over the top. Allow everything to dry thoroughly.
2. Notebook Cover
Have you ever seen those beautiful, intricate fabric-covered journals and wondered how they were made? Well, wonder no longer! With a little bit of Mod Podge and some pretty fabric, you can quickly transform any boring notebook into a chic and unique accessory.
Cut a piece of fabric that’s slightly larger than your notebook. Coat an adequate layer of Mod Podge to the front cover of your notebook or book. Set the cloth on the Mod Podge and smooth it out. You may need to use your fingers to eliminate any air bubbles.
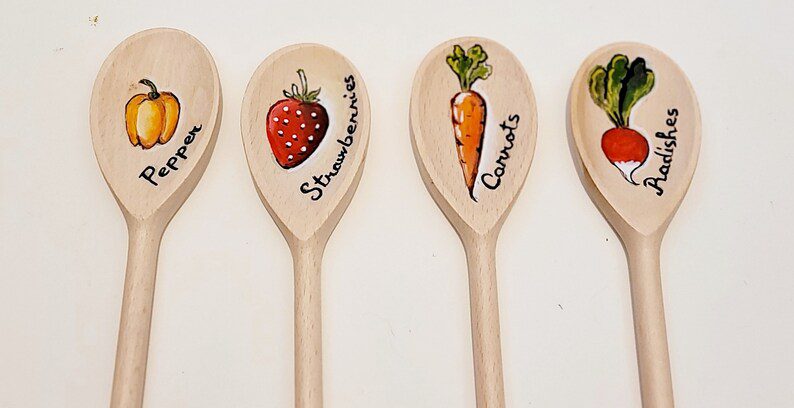
3. Cute Mod Podge Spoons
What a fun and creative idea! We love the idea of using Mod Podge to decoupage vintage prints onto spoons – a great way to add a personal touch to your table setting or home decor. Find some pretty vintage prints – you can use photocopies or scanned images if you can’t find originals.
Cut them out into shapes that will fit onto your spoons, then apply a layer of Mod Podge to the back of each piece. Next, adhere the pieces to your spoons, pressing down well, so they’re securely attached. Once your pieces are in place, brush on another layer of Mod Podge.
4. Decoupaged Book Pencils
If you’re looking into upcycling old books and giving pencils a new life, you’ll love this idea. You’ll need an old book, a Mod Podge bottle, a brush, and pencils. Cut out pages from the book you want to use for your pencils. Try to choose pages with exciting designs or text.
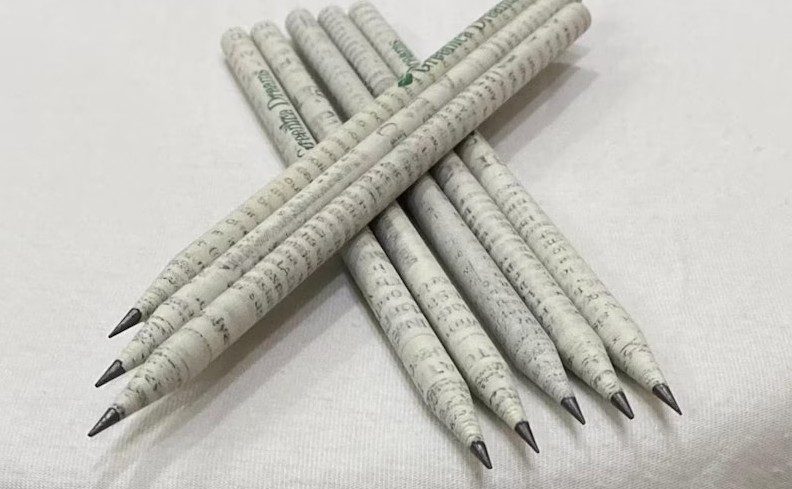
Apply a coat of the sealer to the back of the pages and attach it to a pencil. Don’t forget to smooth out the bubbles and wrinkles that stay behind. Let the Mod Podge dry completely before using your new pencils! You’ll be thrilled by the end product if you love books and crafty DIY projects.
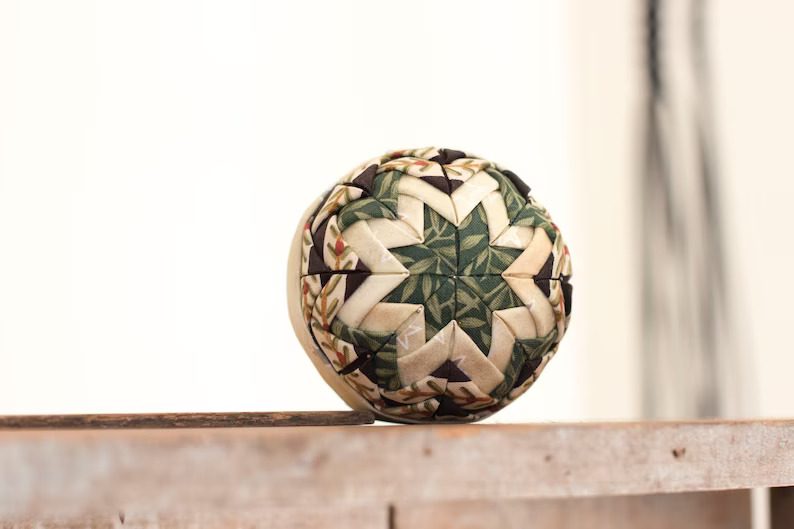
5. Creative Decoupage Letters
This project will need maps, book pages, Mod Podge, a paintbrush, and wooden letters. Cut out your map and book page pieces. You will want to ensure that the pieces are sufficiently large to fit both the posterior and anterior sides of your wooden letters. Apply Mod Podge to the letter.
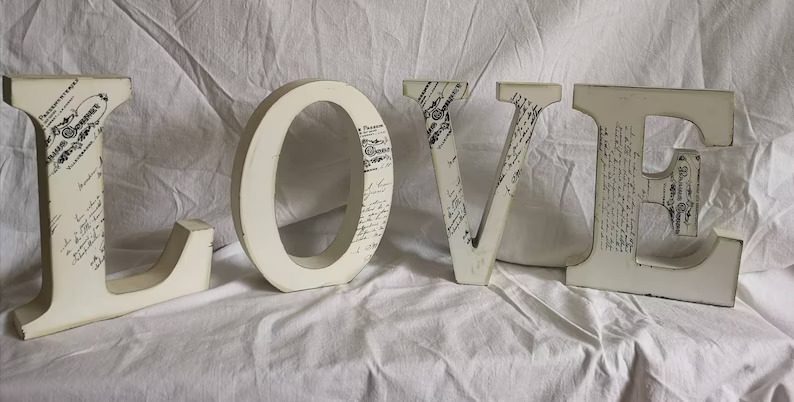
Be sure to cover the entire surface. Place the map or book page piece upon the item covered in Mod Podge. Make sure you transfer them in reverse (mirror image). Using your hand or a brush, rub the page until all the air bubbles are gone. Repeat steps 3-5 for each letter. Let it dry.
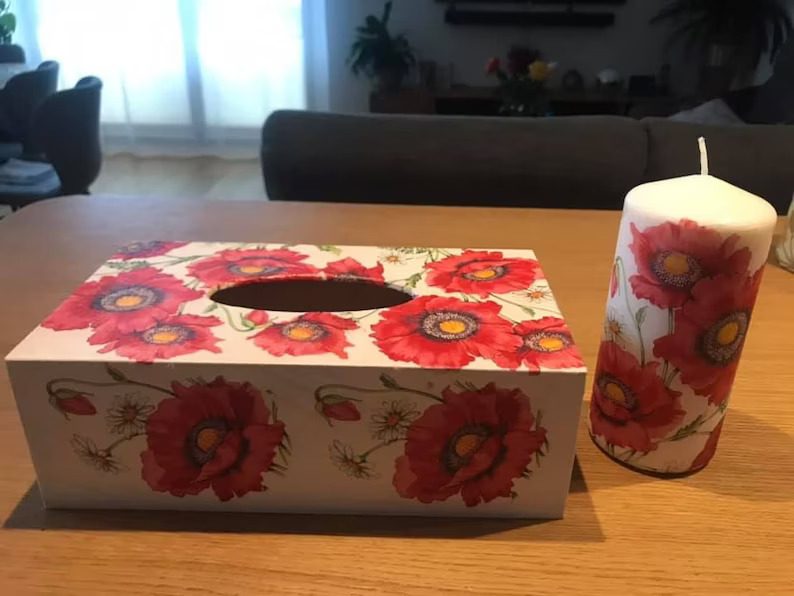
6. Salt Candle Holders
Why not add a little sparkle to your candle holder by upgrading it with some Epsom salt? It’s easy to do and adds extra flair to your home décor. Start off by painting the jar with a coating of Mod Podge. Cover the entire surface so the Epsom salt will adhere properly.
Next, sprinkle Epsom salt over the wet Mod Podge. You can be as liberal or conservative with the amount you like. Allow the jar to dry before adding a candle. That’s it! Now you have a beautiful, sparkling candle holder that’s sure to catch anyone’s eye.
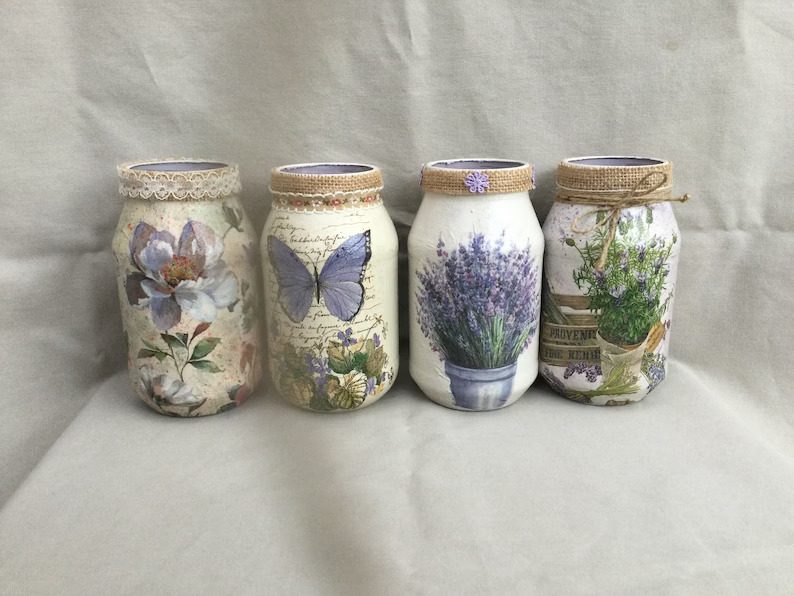
7. Color Old Mason Jars
This is an enjoyable and easy craft project that anyone can do! All it takes is a bit of food coloring, Mod Podge, and mason jars. Simply mix the food coloring and Mod Podge to create your desired color, then brush it onto the outside of the jar.
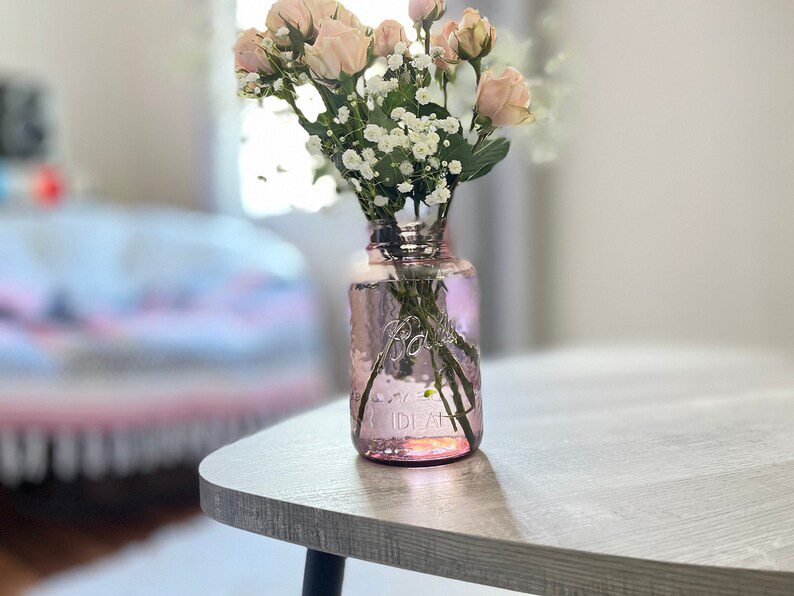
You may either paint it in one solid color or get creative and make a design! Don’t forget to evenly cover the exterior of the jar. Once the outside of the jar is covered, allow it to dry completely. Depending on the climate and humidity levels, this may take a few hours or overnight.
8. DIY Fabric Chair
If you’re looking for an easy way to give an old chair a new look, Mod Podge is the perfect solution. Begin by cleaning the chair with soapy water to ensure the surfaces are clean and free of dirt and oil. Spread a layer of Mod Podge solution on the chair’s surface with a brush.
Make sure to smooth out any bubbles or clumps. Place your fabric on top of the Mod Podge, press it into place, and smooth it out as you go. Apply one more layer of Mod Podge over the top of the fabric, being careful not to create any new bubbles or wrinkles.
9. Craft Some Paperweights
Who doesn’t love a good paperweight? Not only are they enjoyable to make, but they can also be used to add a splash of color to any room. And with Mod Podge, there are lots of options. To get started, gather some paints, brushes, and stones to use as paperweights.
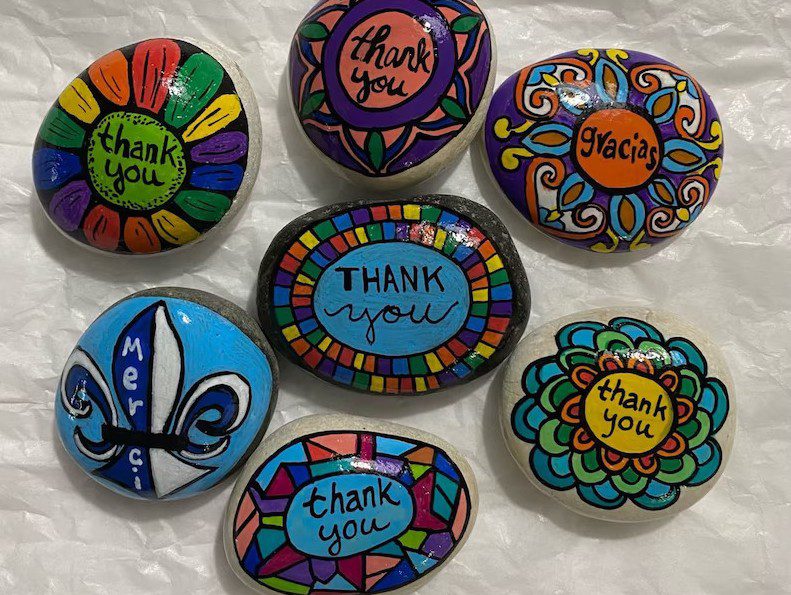
Then simply start painting away! Once you’re satisfied with your designs, allow the paint to fully dry before you add a coating of Mod Podge. This will seal your design and allow you to use your paperweights for years. So go ahead and get creative – your design options are limitless.
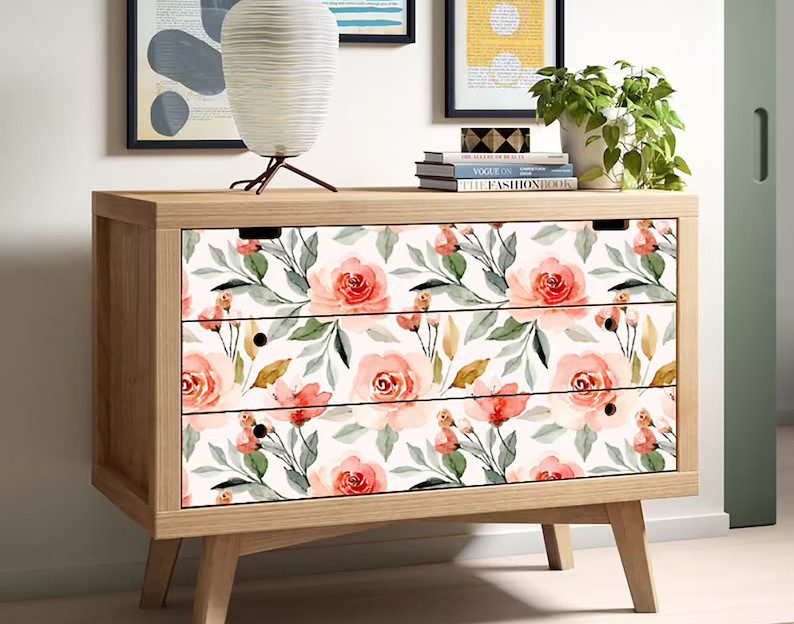
10. Artsy Recipe Box
To get this idea to come true, there are some things that are required. An old wood recipe box, scissors, a sponge brush, Mod Podge, and some floral contact paper or wallpaper. The first step is to cut the contact paper or wallpaper to size to cover the entire surface of the recipe box.
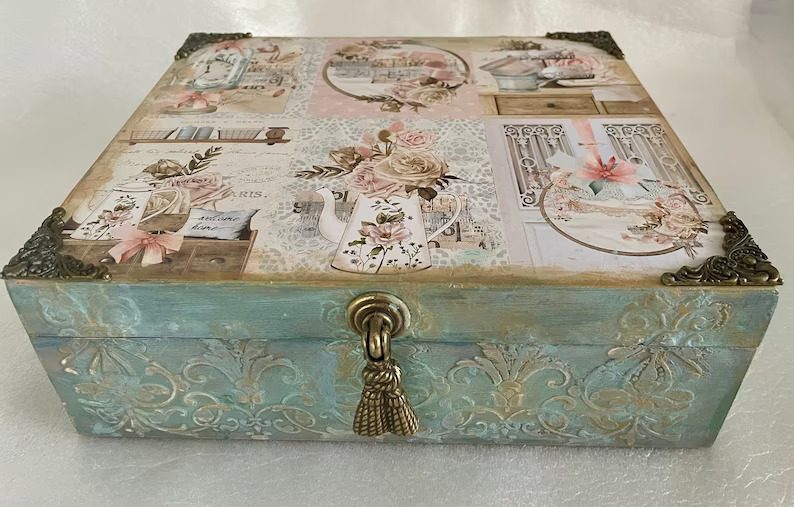
Next, use your sponge brush to apply some Mod Podge over the box’s surface. Place the contact paper or wallpaper in position on top of the Mod Podged surface and smooth out any bubbles with your fingers. Let the Mod Podge solution dry before you apply a new coating of Mod Podge.
11. Decorate A Glass Vase
This simple yet fun project will add some personality to your home decor. For this project, grab an old glass vase, scrapbook paper in various colors and patterns, Mod Podge glue, and a paintbrush. Cut out a piece of scrapbook page to fit the size of your vase.
If the paper is too big, fold it in half or smaller pieces to make sure it fits. Apply a coating of the sealer to the exterior of the glass vase using the paintbrush. Place the scrapbook paper on top of the glue and let it dry before adding the last layer of the Mod Podge.
12. Image Transfer
Do you love the look of image transfer projects but hate the hassle of messing with printers and photocopiers? Well, then, DIY Mod Podge Image Transfer is the perfect solution for you! This technique is easy, mess-free, and produces impressive results. Start by trimming your image to the size to fit the wood surface.
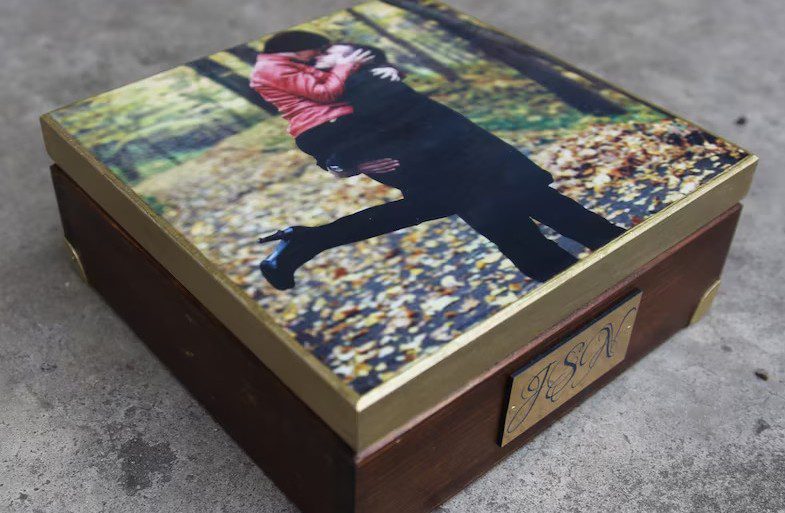
Then, brush a layer of Mod Podge onto the back of the image. Next, place the image onto your wood surface and press down gently to make sure it’s sealed in place. Then, brush a new layer of sealer over. Wait for a day until the box is dry, then go about removing the paper.
13. Fabric Christmas Ornaments
Why not make your own fabric Christmas ornaments this year? It’s a simple project you can do with your kids and doesn’t require special skills. Plus, you can use all of those old fabric scraps you’ve been collecting for years! To get started, cut out circles from your fabric scraps.
Be sure to vary the sizes and colors for a nice variety. You’ll also need a Mod Podge, which you may find at most craft stores. Once you have everything assembled, simply brush a thin layer of Mod Podge onto the back of each fabric circle. Then press them onto the surface of your ornament.
14. Decoupage Lace Coasters
You can make decoupage lace coasters using Mod Podge in just a few easy steps. Get some lace doilies, a Mod Podge, and a sealing spray (optional). Next, cut the doilies to fit your coaster bases. Apply a Mod Podge layer to the coaster base’s top, then smooth on a doily.
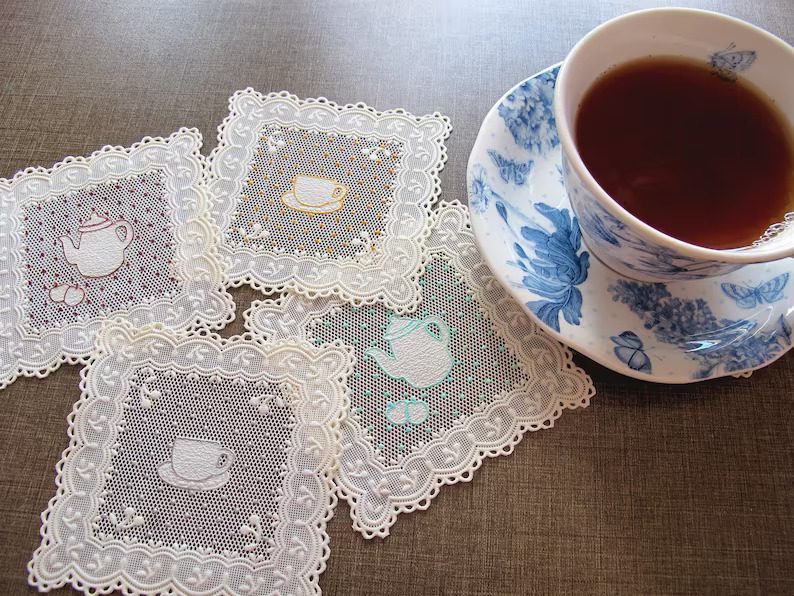
Repeat this step until all of your coasters are covered. Allow the coasters to dry completely, then seal with a clear sealing spray if desired. That’s it – now you have beautiful new lace decoupage coasters! Another simple way is to cover old coasters with lace and seal that with Mod Podge for a new look.
15. Matte Shadow Box
Making a memory shadow box is entertaining to display your favorite memories from the past year or two. Moreover, you may make a travel or birthday shadowbox. Use a shadow box or any other type of frame, photos, or other memorabilia from your favorite memories and matte Mod Podge.
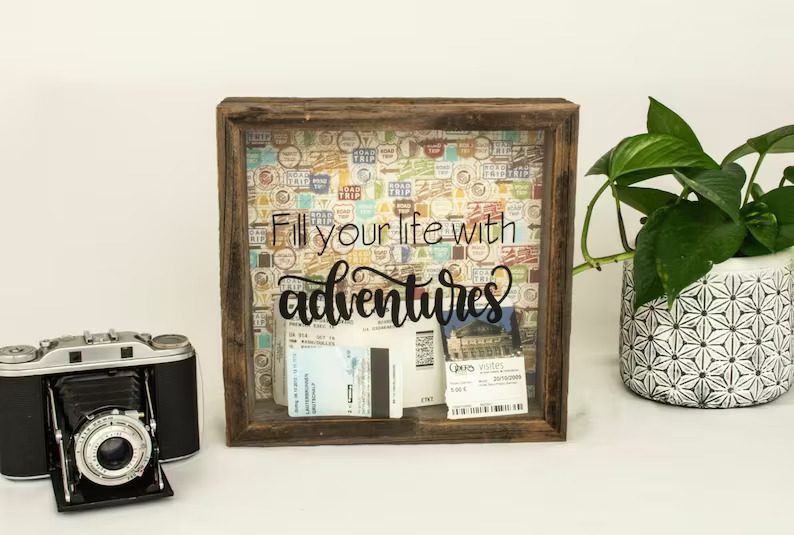
Cut out your photos and other memorabilia to fit inside the shadow box. If you’re using pictures, it’s best to trim them down to square or rectangular shapes so they fit evenly in the frame. Leave some room across the edges so you can attach them securely with Mod Podge.
16. Feathered Glass Vase
This is an elegant DIY that will transform any old glass jar. Use an old glass jar, peacock feathers, Mod Podge gloss, and a paintbrush. Begin by thoroughly cleaning the glass vase with soap and water. Dry it off completely before applying the feathers.
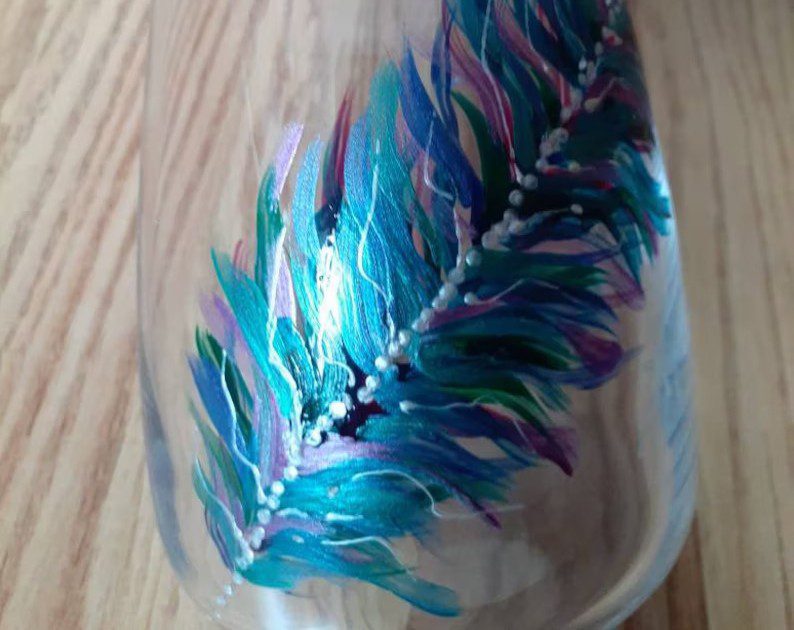
Trim the peacock feathers to fit comfortably inside the vase, making sure to leave a little bit of stem on each one. Starting at the bottom of the vase, add a layer of the sealer to the glass using a paintbrush. Stick the feathers into the Mod Podge, arranging them in any pattern you like.
17. Glittery Purse Upgrade
You may have old purses in your closet that require an upgrade. This is a superb method to give an old purse a refreshed look! Simply mix Mod Podge with paint in the desired color, then apply it to the leather purse.
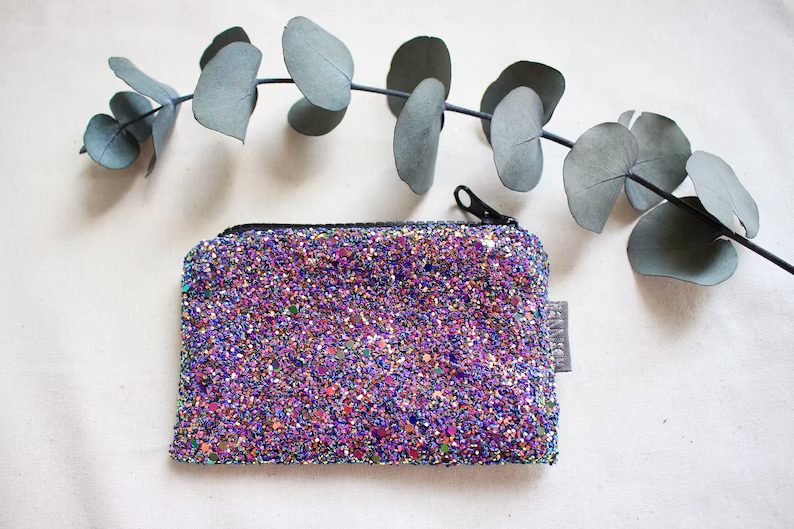
Ensure that the purse’s material is non-porous, or the paint will absorb the inner fabric. When the paint is still wet, add some glitter for extra flair. Coat this with another layer of Mod Podge when dry to seal all the Glitter. Enjoy giving old things new upgrades.
18. Emoji Easter Eggs
Making emoji Easter eggs is a lot of fun. You may need plastic eggs, smiley face stickers or paper cut-outs, a Mod Podge, and a paintbrush. Apply a decent amount of Mod Podge to the anterior side of every sticker or paper cut-out. Cut a smiley face out of a piece of paper.
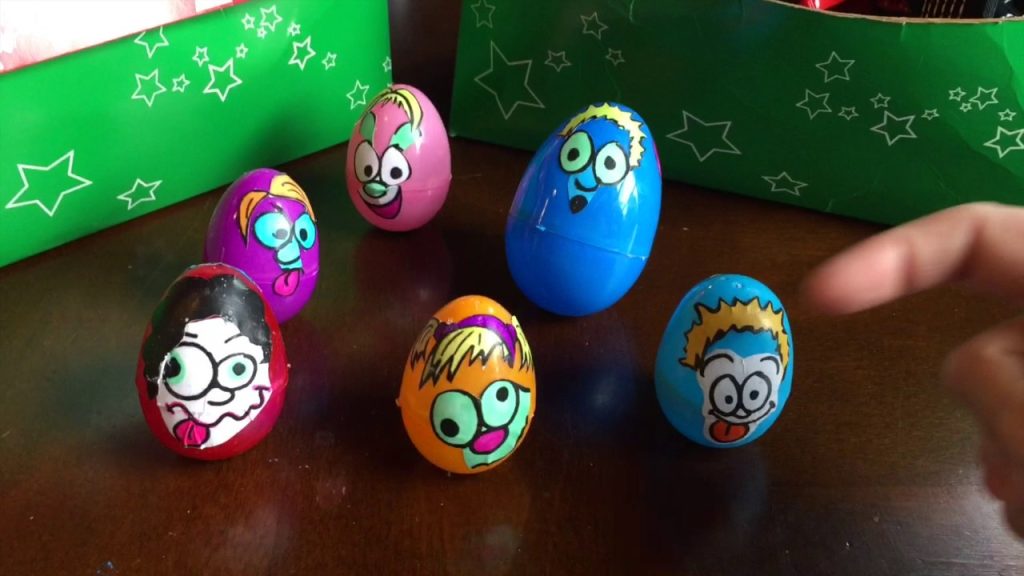
Stick the stickers or cut-outs to the eggs and remove the bubbles. Paint a Mod Podge coat over each sticker/cut-out to seal them in place. Let it dry. Repeat with additional coats if needed. You may make these in different shades and dimensions.
19. Playful Slime
DIY slime using Mod Podge and food coloring. This slimy concoction is hours of playful fun and is so simple to make. Here’s what you have to collect: Mod Podge, food coloring, and you’ll need quite a bit of tolerance because it will get messy. Once you’ve got your ingredients ready, just follow these easy steps.
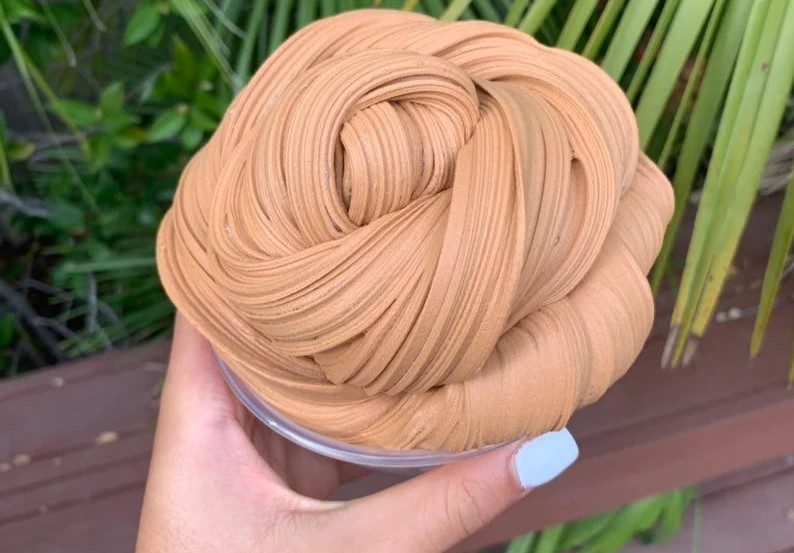
Mix 1/2 cup of Mod Podge and 1/4 cup of water in a bowl. Add food coloring to the mixture until you achieve your desired color. Pour the mixture into a zip-lock bag. Add 4 teaspoons of Borax powder and mix until it has a slimy consistency.
20. Designer Shoes On A Budget
Want designer shoes? Here’s how you can do it yourself using faux leather shoes and some fabric. First, cut the fabric into shapes or designs you may want to use on your shoes. Then, apply a thin coating of the sealer onto the shoe’s surface, directly on the spot you want the fabric to go.
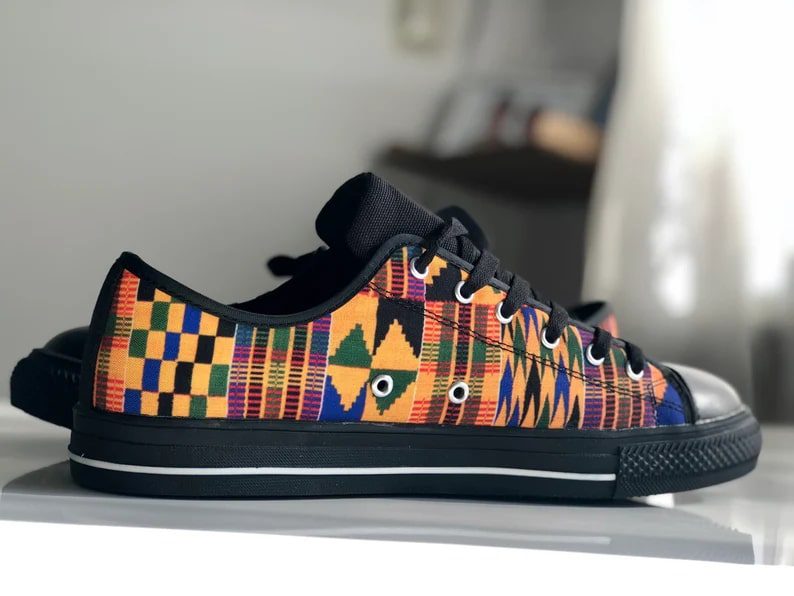
Gently press the fabric onto the glue and let it dry. Once it’s dry, brush another Mod Podge layer over the material to seal it in place. That’s it! Now you have one-of-a-kind shoes that are designer. You may do this DIY with pumps and sneakers as well.
21. Printed Designer Knobs
Upgrading old knobs will revive your furniture with a new look. You’ll need tissue paper in the pattern or colors of your choice, Mod Podge, and knobs. Use different tissue patterns or stick to just one for a cohesive look. You may also want a paintbrush to help with applying the Mod Podge.
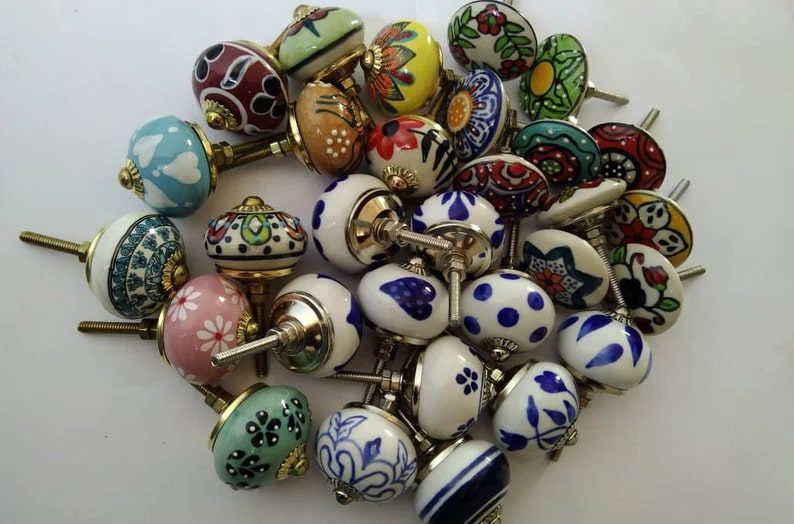
Next, cut your tissue paper into big squares to wrap around your knob. Add the powerful sealer to the posterior side of the knob before adding a tissue paper square on the top. Get rid of the air bubbles using your hands or maybe even a brush.
22. Quirky Window Clings
You can use paint, Glitter, and Mod Podge to create cute and quirky designs. Get started by planning your design. Then, trace it onto contact paper or sticker vinyl. Paint your design onto contact paper or vinyl. Be as innovative as you want to – use various colors, and add some glitter.
Just let the paint thoroughly dry before you proceed to the following step. Once the paint is dry, carefully cut out your design from the contact paper or vinyl using a sharp knife. Use Mod Podge solution to stick them to the windows.
23. Vintage Decoupage Furniture
You may create vintage farmhouse furniture with just a few supplies! You’ll require some paper napkins, Mod Podge, and a few other items you certainly have at home. With a bit of creativity, you may transform any piece of furniture into a rustic masterpiece. One remarkable project to try is decoupaging paper napkins onto a table.
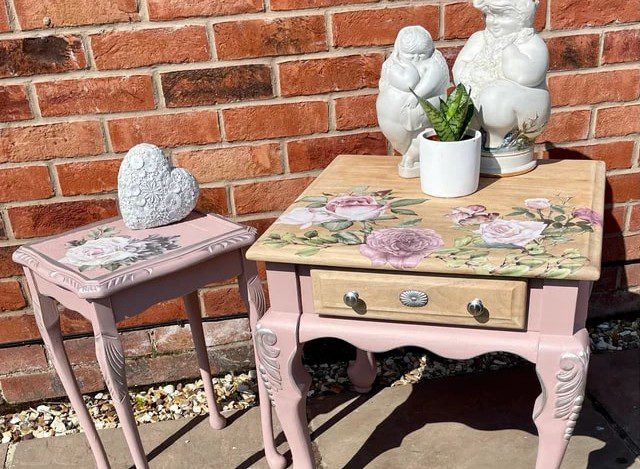
Sand down the table to create a smooth surface. Add a layer of the sealer to the table and place the paper napkins onto it. Once all of the napkins are in place, add another coating of Mod Podge across the surface. Allow drying overnight before adding any final touches.
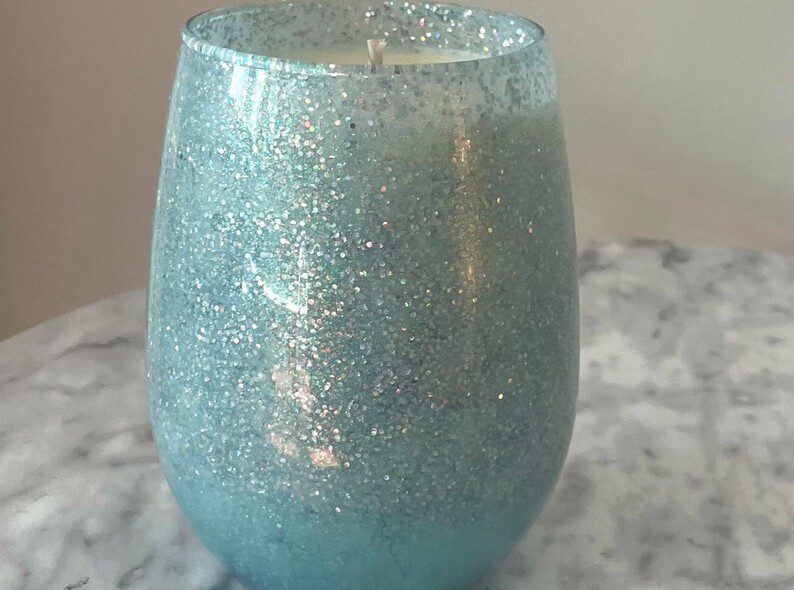
24. Sparkling Wine Glasses
You can make your sparkling wine glasses using Glitter and Mod Podge! Clean the glasses you’ll be using. You want to ensure they’re free of any dirt or oils that could adequately interfere with the glue adhering. Use a layer of Mod Podge on the outside of the glass.
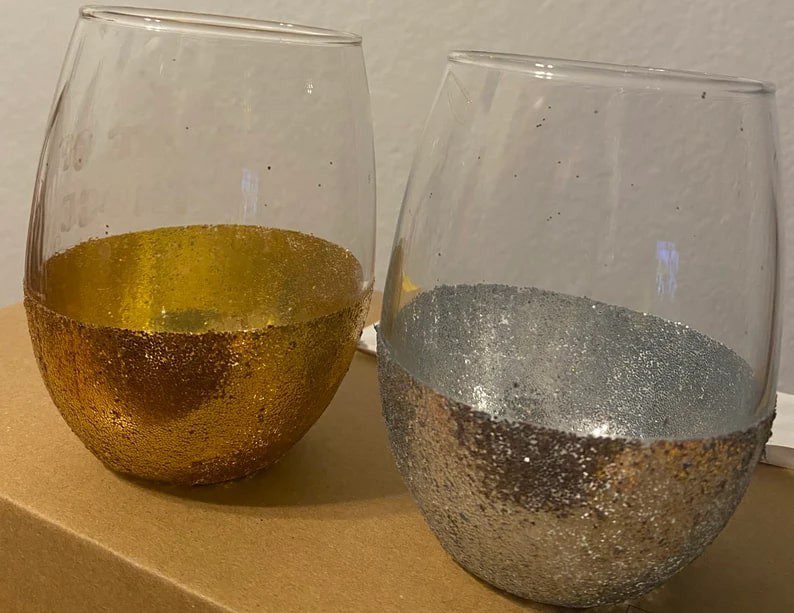
Then, sprinkle on some glitter. Ensure that you cover the whole surface evenly. Allow the Mod Podge and Glitter to thoroughly dry (this will usually take a few hours). Then, add an additional coating of Mod Podge on top of the glitter. This may help seal the Glitter and prevent it from flaking in the future
25. Napkin Art Pots
This is an effortless and enjoyable way to dress up plain plant pots! All you need are some printed napkins. You may find some great ones at the dollar store, a bottle of Mod Podge, and a paintbrush. Cut your napkins into small squares. Apply a layer of the sealer to the vase.
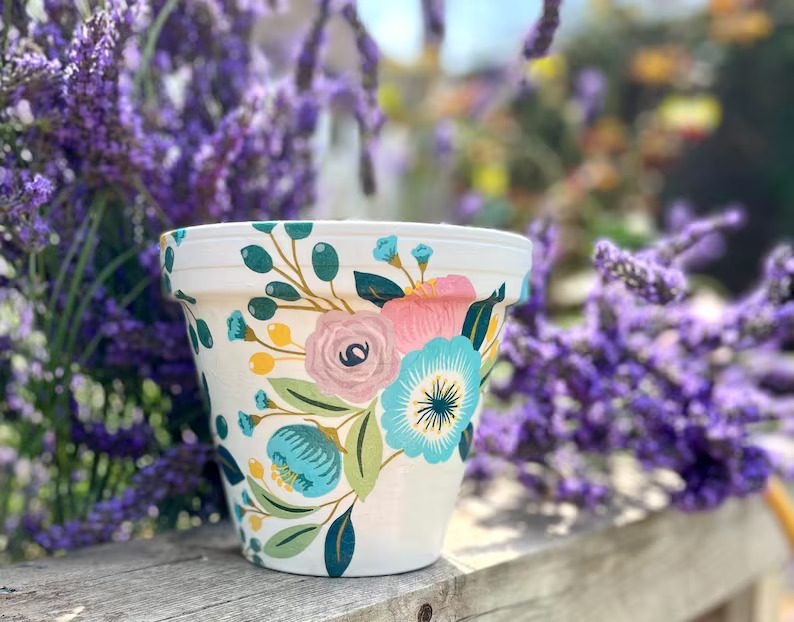
Place one of the napkin squares in the center. Brush one more coat of Mod Podge solution over the top of the napkin square, making sure to smooth it out, so there are no wrinkles. Repeat with other squares until you have covered the entire pot. Give it a night before it’s fully dry.
26. Affordable Malachite Table
Although malachite is a beautiful mineral with a unique green color, it’s expensive to purchase. So, you may attempt to DIY a faux malachite table. Paint the entire surface of your table black. This will be the background for your malachite pattern.
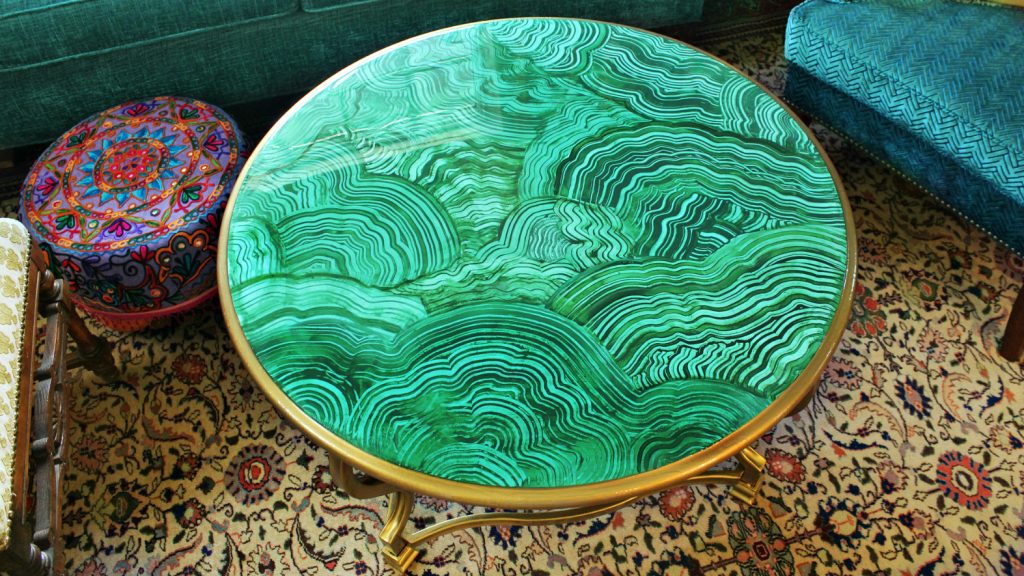
Once the paint is dry, mix green and blue paints to create a light green color. Apply this in stripes over the black paint. When the paint is dry, add more sealer to the entire surface of the table. Be sure to smooth it out well to avoid bumps or streaks.
27. Make Emoji Fridge Magnets
Making your emoji fridge magnets is pretty easy – and a lot of fun! All you need are some clear glass marbles, Mod Podge, and printed emojis. Start by printing out your favorite emoji images. Make sure they are sufficiently tiny to fit in the glass marbles.

Cut out each emoji carefully with a sharp knife or scissors. Now for the fun part – Mod Podge! Apply a decent layer of Mod Podge to the back of each cut-out emoji, and then stick it onto the glass marble. Let it dry for 1-2 hours. Lastly, use small stick-on magnets on the back.
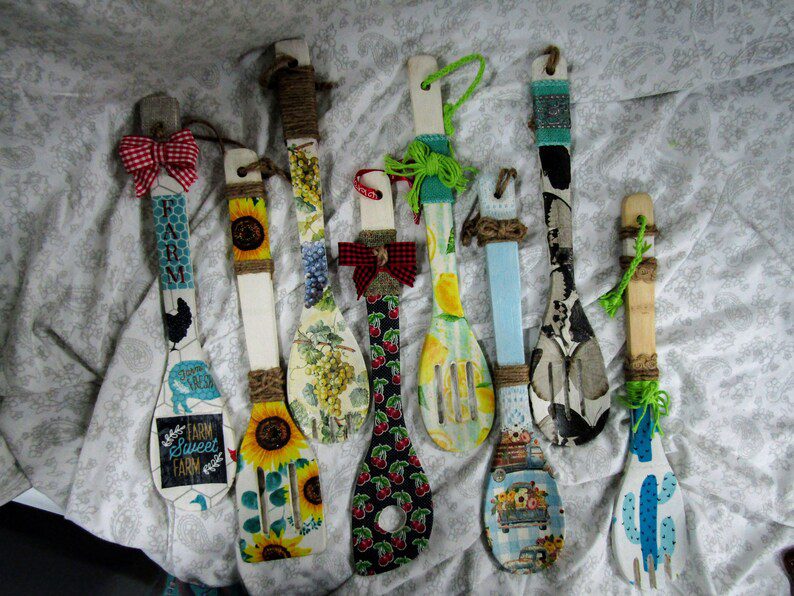
28. Spoon Garden Signs
This is a great way to upcycle old napkins and spoons, and it’s a fun project to do with kids. Choose some old printed napkins that you don’t mind getting messy. Cut out the designs of your choice using sharp scissors. Using a brush, apply a thin layer of Mod Podge to each napkin design.
Carefully place the napkin design on the handle of a spoon, making sure to smooth it out, so there are no wrinkles or tears. Give it about 15 minutes to dry. Add an extra layer of sealer across the napkin.
29. Easy Tray Decoration
This is an entertaining and easy way to dress up your serving trays for the holidays! For this project, cloth or paper, a Mod Podge solution, and a paintbrush are required. Simply cut a piece of cloth or paper to fit the size of your tray, then brush on a layer of Mod Podge.
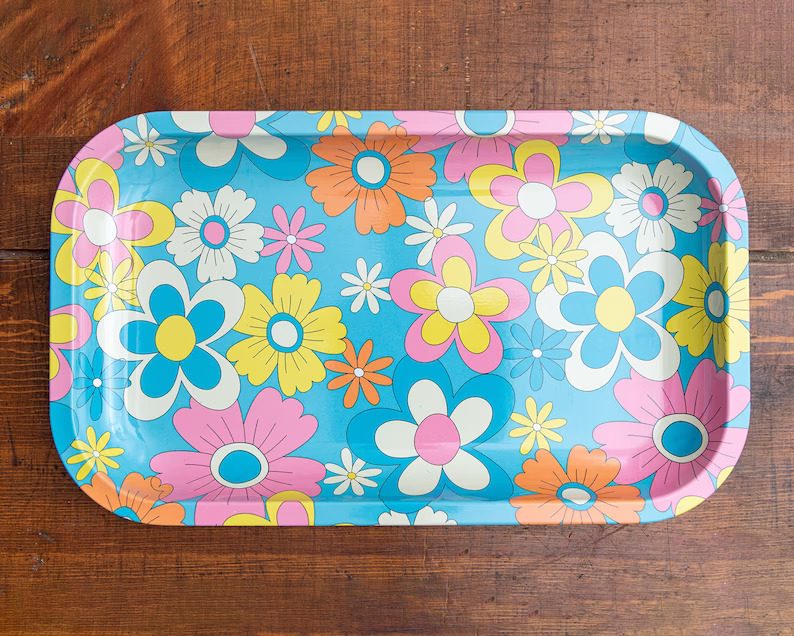
Stick the fabric or paper to the tray, then brush on another layer of Mod Podge to seal it in place. Let it dry completely, then enjoy your beautiful new tray! You may try this DIY for different-size trays to make a set. Use it for display or serving.
30. Drawer Liners
There are many ways to upgrade an old dresser’s look, but using Mod Podge and fabric is a simple, affordable, and stylish option. Remove all the contents of the drawer, clean the exterior with a moist rag, and give it time to fully dry. Cut your fabric to fit the dresser surface.
Ensure there’s enough extra fabric to wrap around the edges. Apply a Mod Podge to the dresser’s surface and place the cloth on top. Smooth it out evenly to prevent bubbles. Dry the drawer before layering the Mod Podge solution.
31. Printed Heels Bottoms
Looking to add a bit of personal style to your wardrobe? Try DIYing your printed heels using image transfer with Mod Podge. Though it may sound complicated, it’s pretty simple—the results can be striking. Grab a pair of heels with a smooth sole, an image of your choice, and a Mod Podge.

Print out the image in your desired size. Cut it out and round the edges if desired. Add a thin coat of the sealer to the bottom of your heel. Stick your image onto the heel and press down firmly and wait for it to dry completely before wearing them!
32. Decorate Your Ceiling Fans
Before starting, ensure the fan is turned off. Place a drop cloth or some newspapers underneath the fan to protect your flooring or furniture. Try to use a light fabric or paper, as something heavyweight could end up being too heavy for the blades and cause them to spin slower.
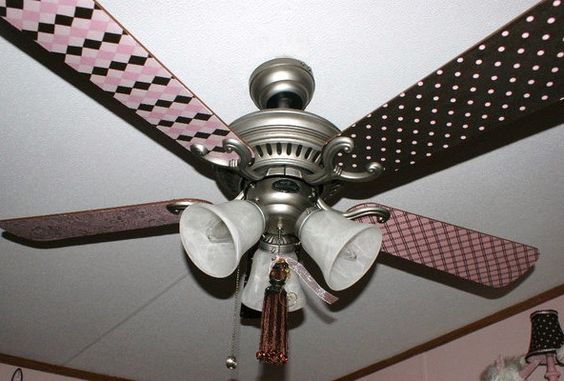
Measure your fan blades and cut out your chosen design to fit. Then smear a layer of the finish across the edge and place your design on top. Smooth it down, then brush an extra coat of Mod Podge. Let it dry for 24 hours before repeating with a third layer.
33. Letter Wall Sign
It’s a creative way to decorate a kids’ room! Adding a personal touch to your child’s room with a DIY letter wall is a fun and easy project that can be completed in just a few hours. Plus, it’s a pocket-friendly way to add some personality to the space.
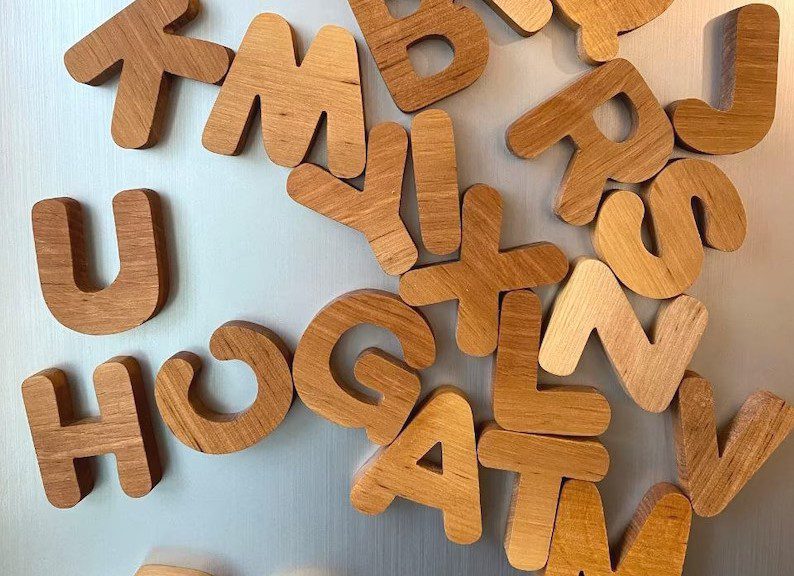
You’ll need Mod Podge, foam brushes, craft paint, and stencils to create your letter wall. Also, grab any other decorative materials you’d like to use (ribbons, sequins). First, cut the letters out of cardboard or foam board using stencils and then paint them with craft paint. Once the letters are dry, coat them with Mod Podge.
34. Sea Shell Art
Doodling on seashells is a fun way to personalize them and give them your own touch. You can use any paint or marker, but we recommend using a marker that won’t fade or smudge and protect the shell. Mod Podge is a great option to add when you’re done doodling.
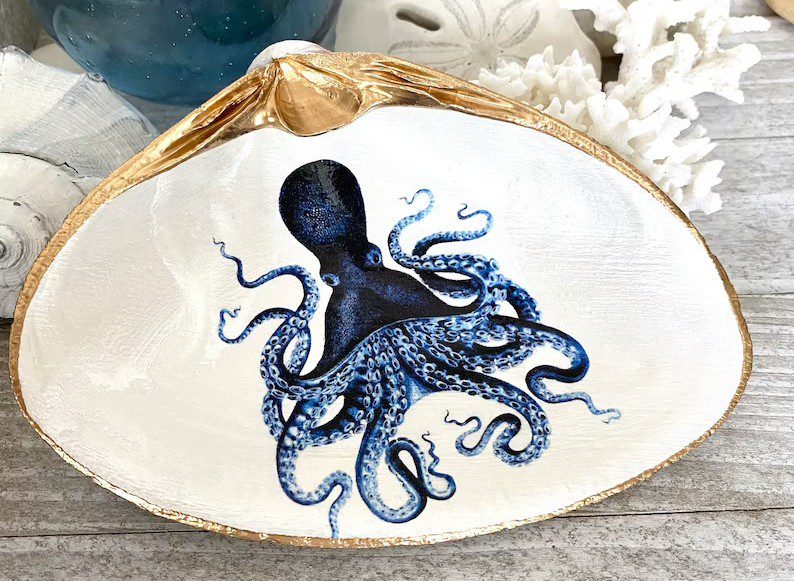
It dries clear and will keep your doodles looking good for years to come! You may create artsy decor pieces by doodling and sealing with Mod Podge. Moreover, you may use different color markers and patterns to create custom art that goes with your decor.
35. Desk Organizer
This is a clever way to make a desk organizer using fabric, cardboard, and Mod Podge. If your desk is not organized, this DIY may help you a bit. Cut the fabric and cardboard to size. Use the Mod Podge to adhere the material to the cardboard, smoothing it out well.
Let the Mod Podge dry completely. You may then use a coat of sealer on top if you want. A large cardboard box will be ideal for storing more items. You may use more than one cardboard box and stick them together to form different compartments.
36. Fancy Suitcase
Transform an old suitcase from a thrift shop by giving it new life with some fabric and Mod Podge! This is a straightforward project that anyone can do, and it’s a great way to add some personality to your luggage. First, choose your fabric. You’ll need some fabric to cover the entire suitcase.
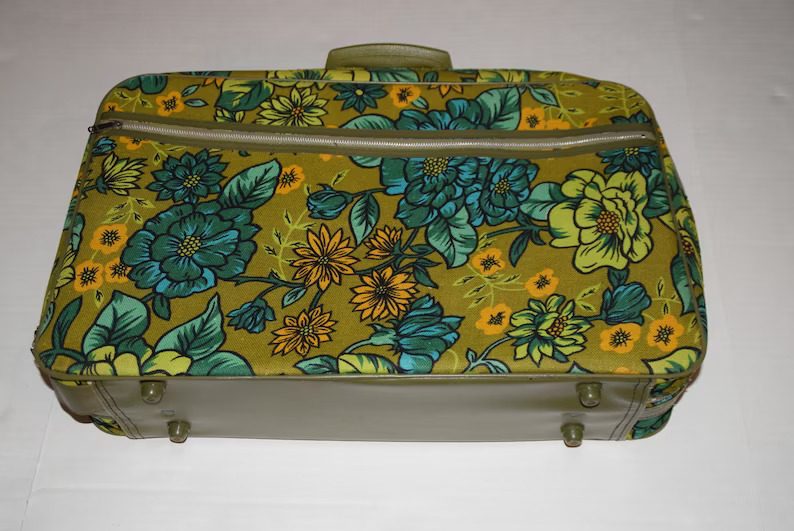
Keep an extra few inches for overlap. Cut the fabric to size, then brush a thin layer of Mod Podge onto the suitcase surface. Adhere the material to the Mod Podged surface, then press down firmly. Brush another Mod Podge layer over the fabric’s top to seal it in place.
37. Wine Bottle Decor
Decorating empty wine bottles with napkins and Mod Podge decoupage is perfect for wine lovers out there. This is an effortless and budget-friendly way to add more of your personality to your home. It’s also a terrific way to give a new purpose to those glass bottles that you might have around the house.
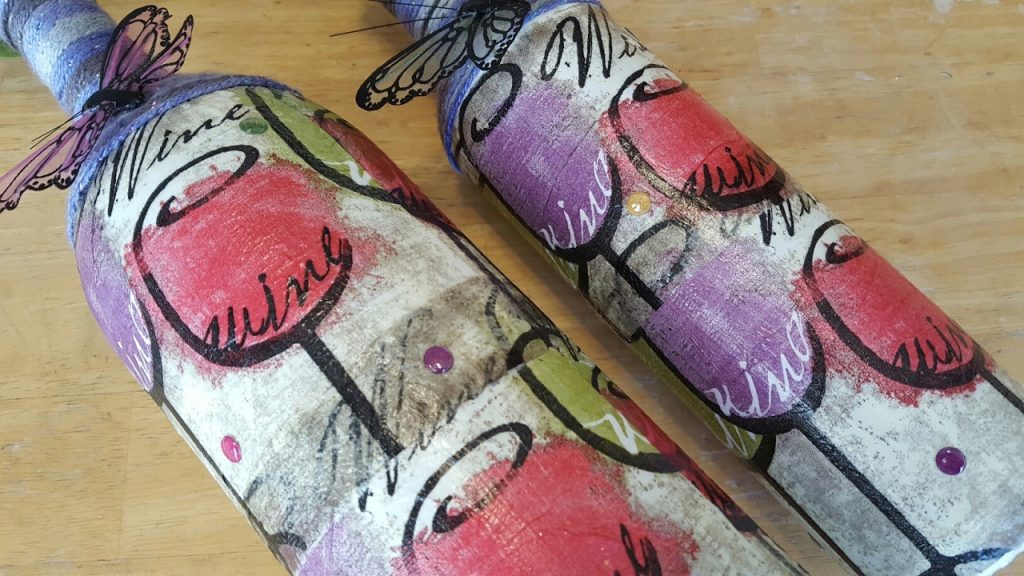
To get started, get some empty wine bottles, napkins, or tissue paper in the design of your choice, Mod Podge, brushes, and scissors. Begin by cutting your napkins or tissue paper into small pieces that will fit around the curve of the bottle. Start applying them to the bottle with Mod Podge.
38. Make A Printed T-Shirt
To get started, you’ll need a design screen, Mod Podge, squeegee, fabric paint, and an old shirt or two that you don’t mind ruining. Mix a small quantity of Mod Podge and fabric paint in a bowl. You don’t need to make too much of this mixture.
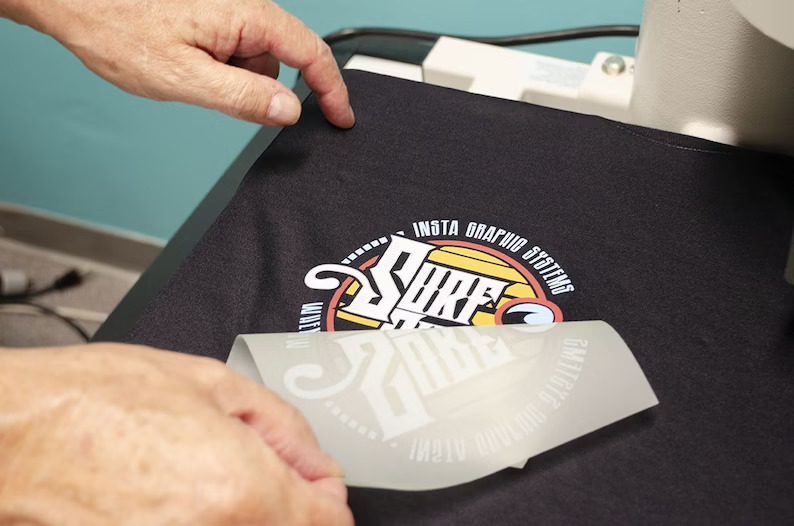
Next, place the screen over the shirt and use the squeegee to spread the Mod Podge/paint mixture evenly across the top of the screen. Don’t skip all the small corners. Next, lift the screen and let any excess liquid drop into the container
39. Vibrant Bracelets
First, you’ll need to gather your supplies. For this project, you’ll need fabric, scissors, bangles, and Mod Podge. You may find all of these items at a craft store or online. Next, cut the fabric into long enough strips to wrap around the bangles. Leave enough material to overlap the ends.
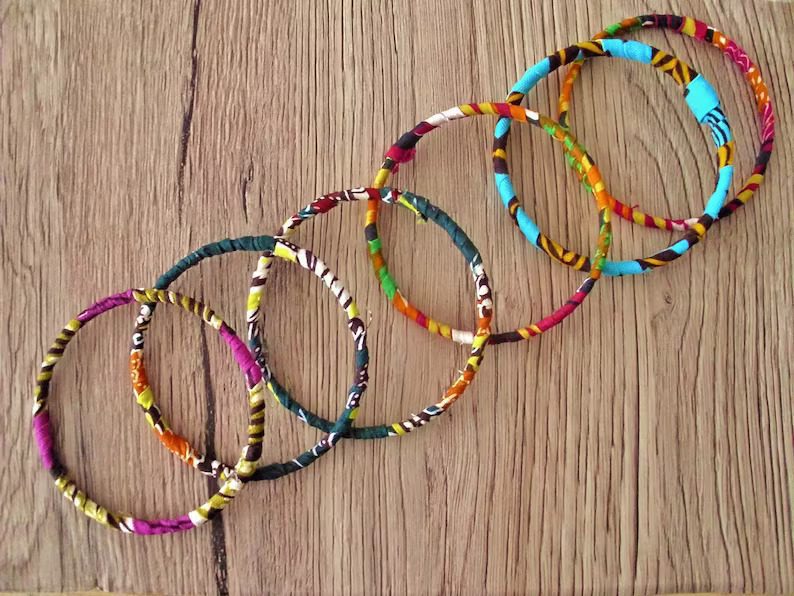
This way, you can glue them down with Mod Podge. Now it’s time to start covering the bangles with fabric! Wrap the fabric around each bangle and smooth it down. Once all of the bangles are covered, brush on a layer of Mod Podge over top of the material. This will seal everything in place.
40. Glitter Vanity Bowl
It’s time to move over boring acrylic bowls. You may switch it with a glittering bowl made from Mod Podge. You’ll also need a balloon to shape the bowl. The bottom half of the balloon will work as a mold for the bowl. Choose the right size of the balloon to make a large bowl.
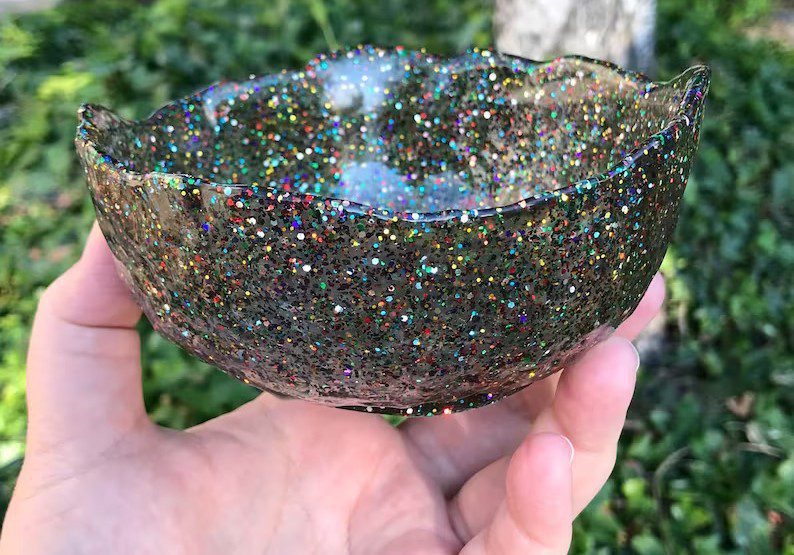
First, blow up a balloon and cover it with Mod Podge. Then, generously scatter Glitter over the wet Mod Podge. Let the bowl dry completely before popping the balloon. Cut any rough edges from the top to shape your bowl. Et voila! You’ve got yourself a pretty little glitter vanity bowl.
41. Poured Acrylic Painting
You can use Mod Podge to make poured acrylic painting art! You’ll need a container of Mod Podge, an acrylic paint color of your choice, and a piece of canvas or another flat surface to pour your painting onto. Pour a small amount of Mod Podge into your container.
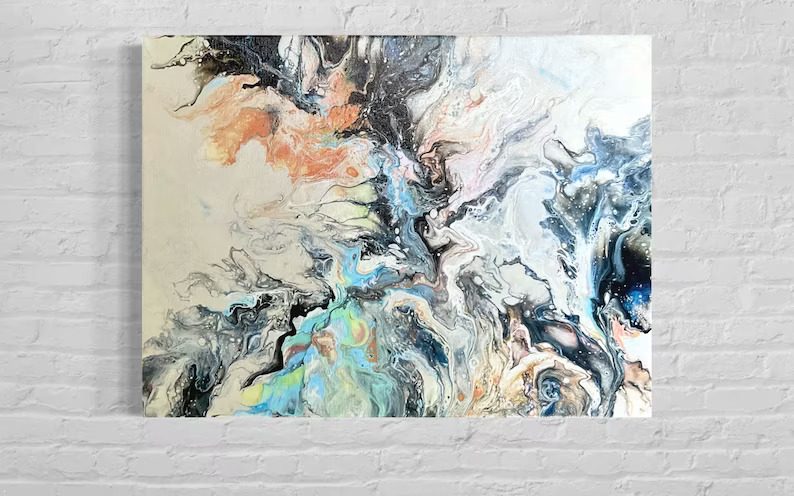
Add a few drops of the chosen paint color and mix well. Pour the mixture onto your prepared surface and allow it to dry completely. Once dry, your poured acrylic painting is complete! Enjoy your one-of-a-kind work of art! You may experiment more and see what kinds of results you can achieve!
42. DIY Treasure Box
One easy way to decorate an old box is by using tissue paper and Mod Podge. You can paint the box white first or leave it its natural color. Cut the tissue paper into small pieces and apply a Mod Podge layer over the box’s surface.

Then, gently press down the tissue paper on top of the Mod Podge. Apply another layer of Mod Podge on top to seal it in. Let it dry completely before adding any treasures inside! You may also add embellishments over the box to give it more personality.
43. Polaroid Coasters
You may use Mod Podge to make polaroid coasters! All you may need is a few inexpensive supplies and some elbow grease. Get a bottle of Mod Podge, a foam brush, a sharp knife or scissors, four 4×4 inch tiles or coasters, and four polaroid photos.
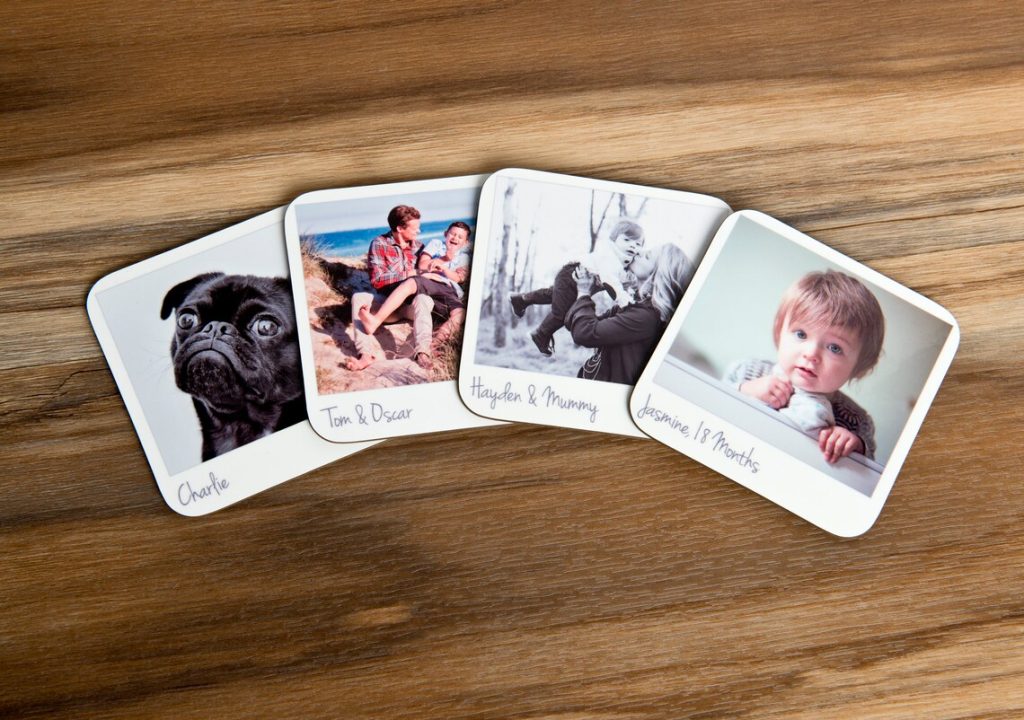
Polaroid photos are best for this project because they’re already the perfect size for coasters. But if you don’t have any on hand, you can easily crop regular photos to fit the tiles. Adhere the images to the tiles using Mod Podge. Be sure to smooth out any air bubbles as you go.
44. Cute Cuff Bracelet
Make a chunky DIY cuff bracelet using gemstones and Mod Podge. All you may need is a few supplies from your local craft store and some patience while the Mod Podge dries. The result is a beautiful, one-of-a-kind bracelet perfect for summertime. It may be customized in different designs.
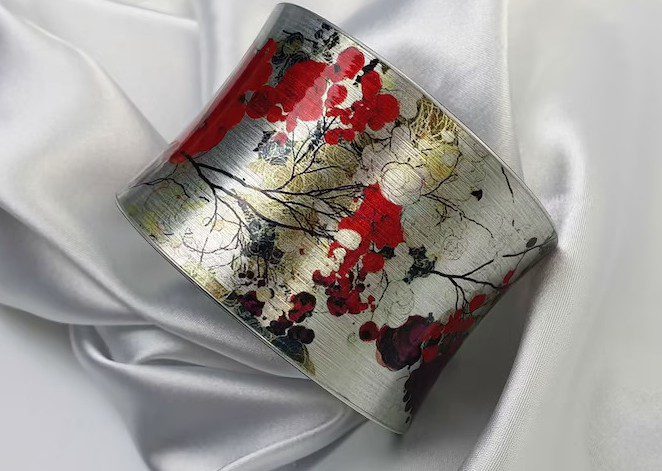
You’ll need some flat-backed gemstones, Mod Podge, a paintbrush, and something to use as a base for your bracelet. Next, start arranging your gemstones on the cuff bracelet until you have a design you like. Once you’re happy with the arrangement, glue them down with the Mod Podge.
45. Soup Can Planters
Add some warm color and life to your home. Consider making a planter out of soup cans! It’s a simple DIY project that anyone can do, and you can get as creative as you want with the decoration. You’ll need a few empty soup cans, some tissue paper, and Mod Podge to start.
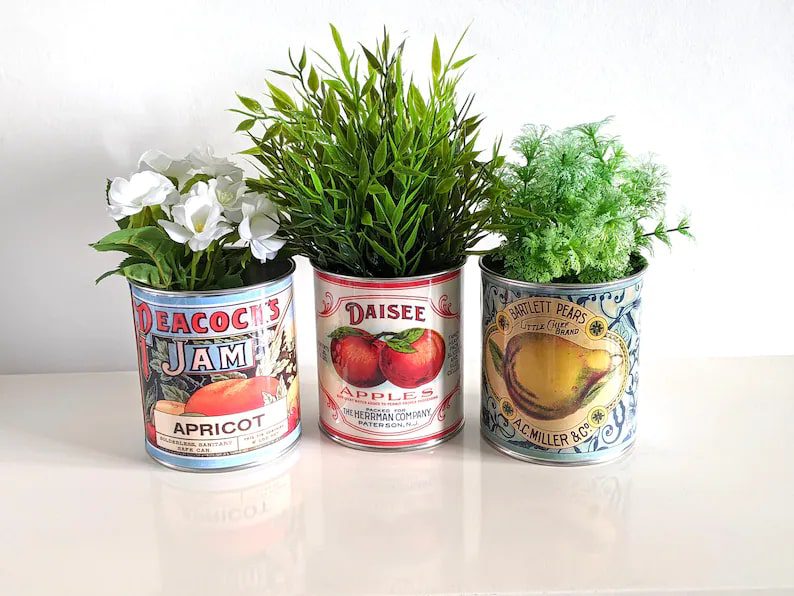
Begin by cleaning the soup cans and removing any labels. Then cut your tissue paper into small pieces or strips. Begin applying the Mod Podge to the outside of the can, then start attaching the tissue paper pieces. You may overlap them or create patterns—it’s up to you! Apply one additional layer of Mod Podge.