
Anyone Can Paint Like A Professional If They Know The Right Hacks
Many overly ambitious and sometimes inadvisable home projects can arise from bouts of boredom. Some of these DIYs include hanging new cabinets without any experience using only a YouTube tutorial, building a treehouse that you could never convince anyone is safe to use, or the easiest: painting your home yourself. Changing the color of a wall sounds simple, but it can change the entire vibe of a room. Maybe you want to add a tranquil cerulean accent wall or bring some atmosphere to your outdoor hangout space. You might have some old chairs that could use freshening up with a new coat of paint or varnish. Whatever your project may be, here are a few tips you should know before you pick up a brush.
Squeaky clean walls
And just like your new rolling brush, the walls you’re going to need a bit of prep work, in a word, as well. No matter how much you clean your house, you’d never exactly think of giving your walls a good scrubbing, would you?
But that’s precisely what you need to do. A small wipe down of the wall you are going to wage paint war on is a lot easier to tackle than the grimy, dusty mess you’d have otherwise. A Swiffer stick with a towel attached will do the job.
Reusable paint trays
One of the worst things about painting your home yourself is that you’re not paying someone to do your work for you, and two, you will have to deal with the cleanup. We know the essential supplies for a paint job: tray, brush and paint.
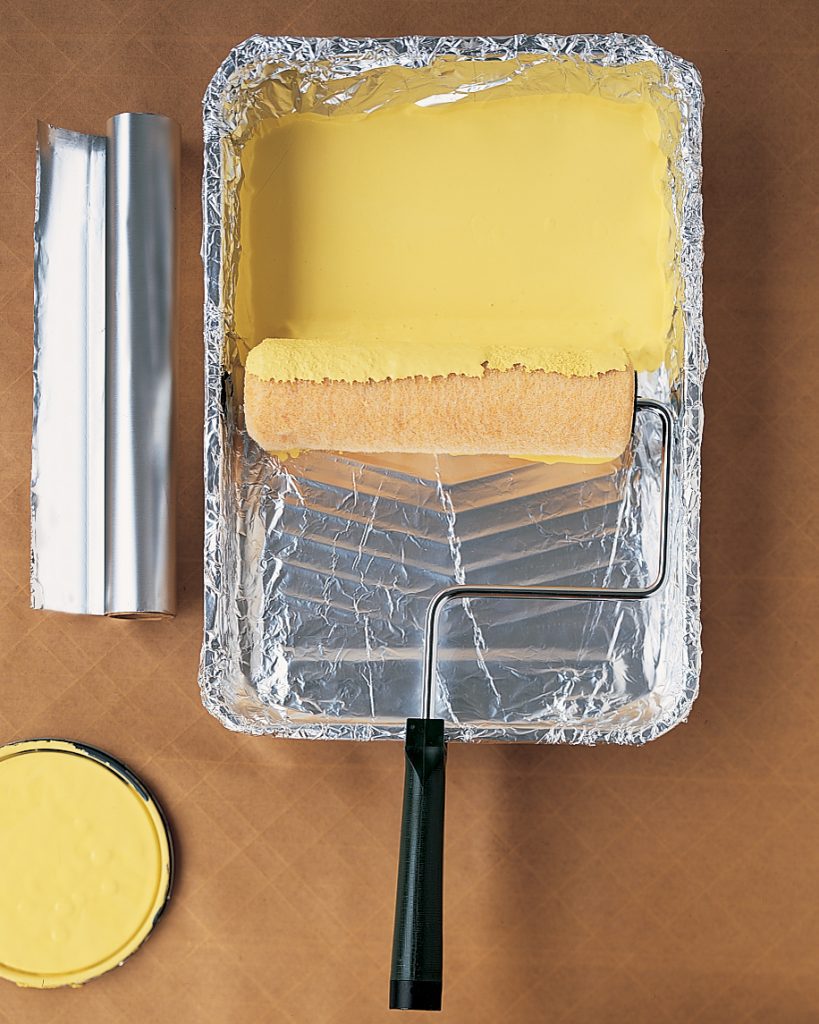
The tray can be a hassle to wash, especially if you take long breaks and the paint dries. Fortunately, by lining the tray with a plastic bag or foil, you can at least kick “clean paint trays” off a future to-do list.
DIY brush holder
It is indescribably annoying when after a hard day of slapping paint on walls, you put down your brush and realize a few moments later that you’d unknowingly set the dirty, paint-filled brush down on something you weren’t supposed to.
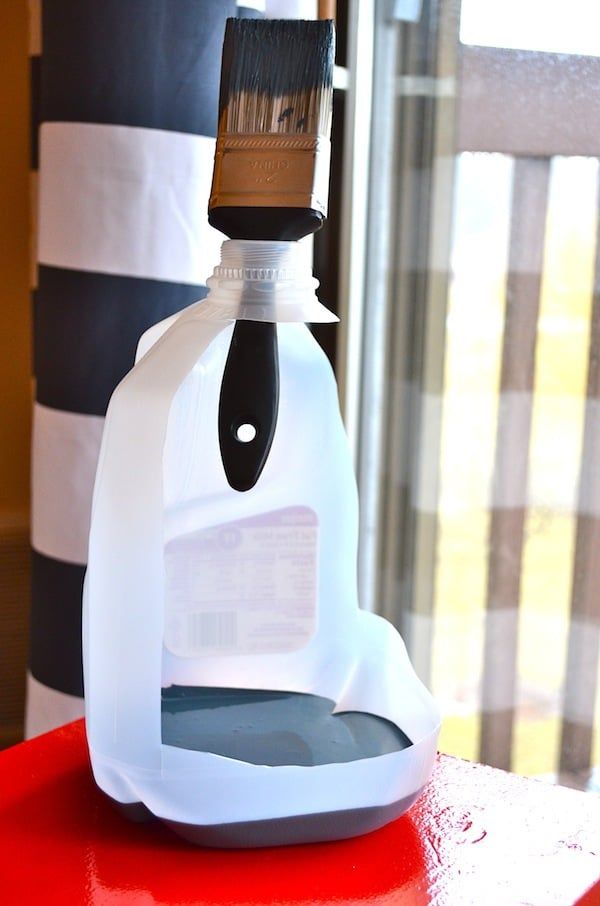
The solution to this particular problem is sitting somewhere inside your refrigerator. So, finish off that milk jug and cut out a side of it so that you can rest the brush in the spout and fill the bottom section with paint.
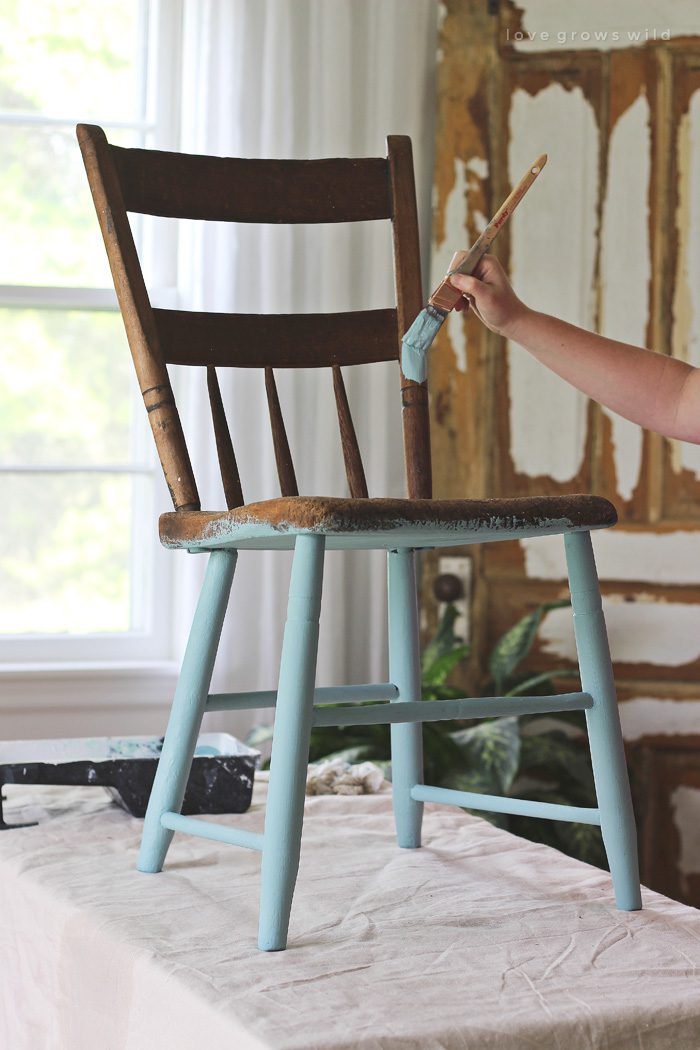
Give it a leg up
On one of those days when you have to repaint an old but treasured family dining table or Grandma’s prized reading chair, you would inevitably come across an issue if you start painting from the top and then flipping it over.
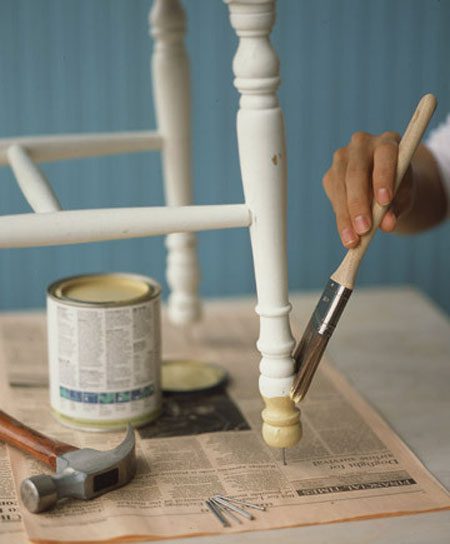
The laws of gravity are not kind to a piece of furniture that’s upside down. Turns out, if you tap a nail onto the bottom of the legs of the chair or table, you can paint them without flipping. It’s genius.
Or a boost up
The great thing about furniture is that no one checks the nooks and crannies of all your furniture to check if it is all dust-free and varnished to perfection every six months. But once the paint or varnish needs a touch-up, it’s time to roll up your sleeves.
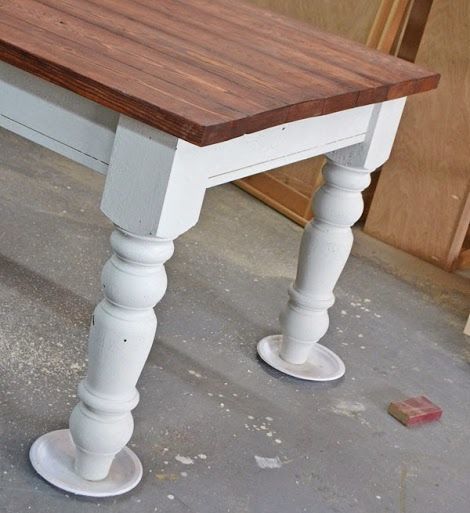
Rest assured that there’s a very simple way to touch up your bed frame or table, much like you’d paint a chair; just swap the nails on the bottom for bed raisers or even paper plates. This will ensure you have an even coat, down to the legs!
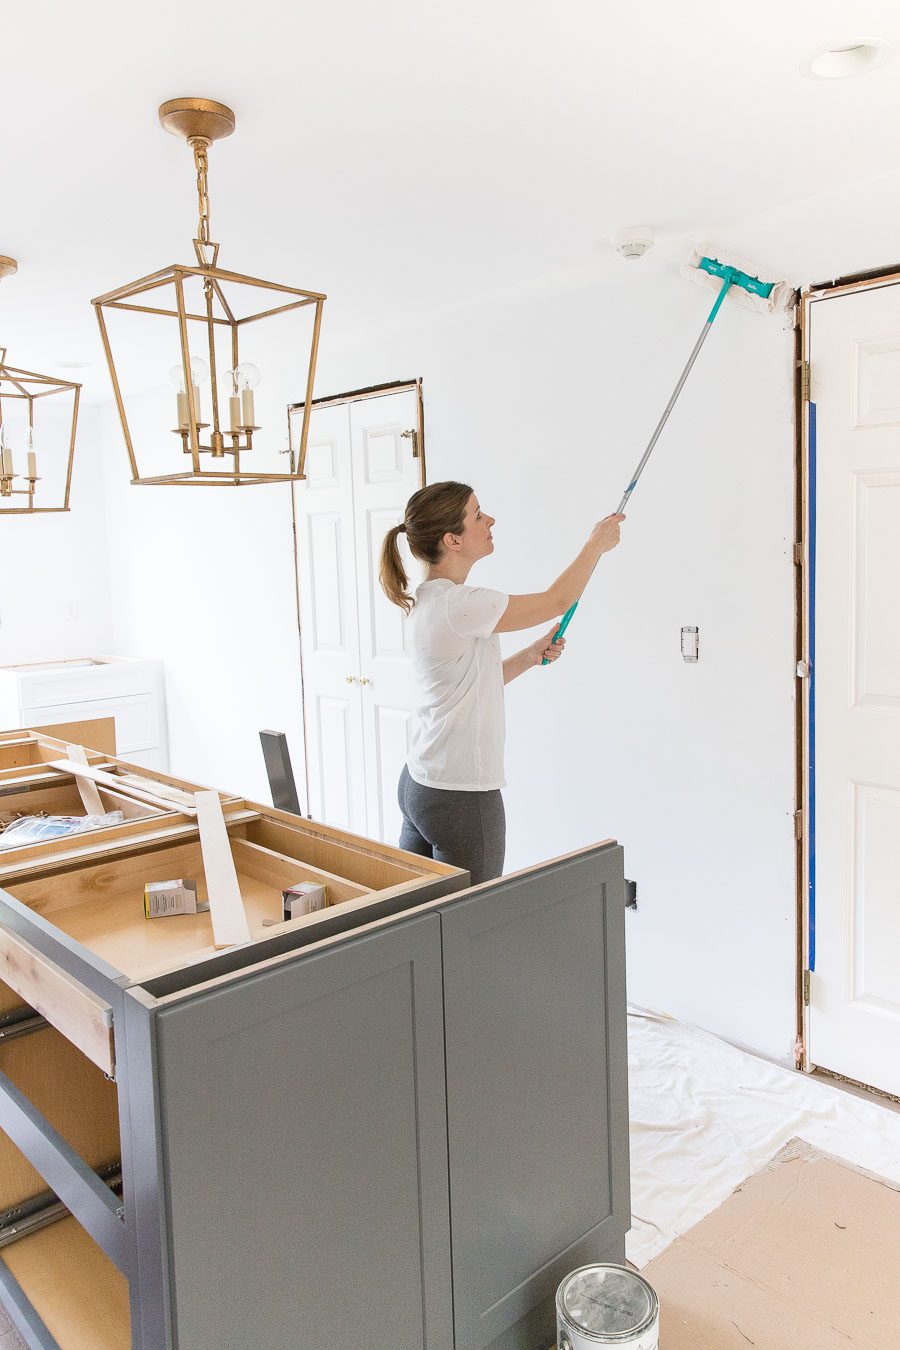
Paint pads FTW
No one wants to clear out the entire room just because you’re going to paint it. There’s a slew of problems with the move; there’s the issue of putting said room stuff in another space. If you live with a roommate, that’s an unnecessary disruption.
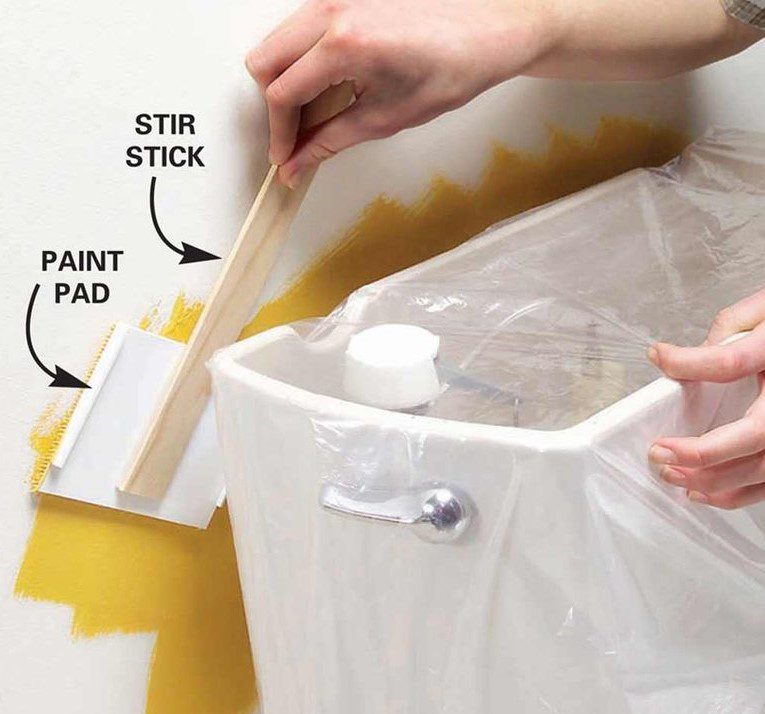
A paint pad attached to a stick is the best tool for the job if you choose not to move stuff around and disturb everyone in a ten-meter radius or have a tight spot. A paint stirring stick will do the job quite nicely.
Make your own spray can
Imagine you have a few decoration pieces you want in a specific color, but the current shades don’t match the energy you wish your room to exude. Painting them is an option, but spending that much time on tiny, tiny paint strokes? Shudder.
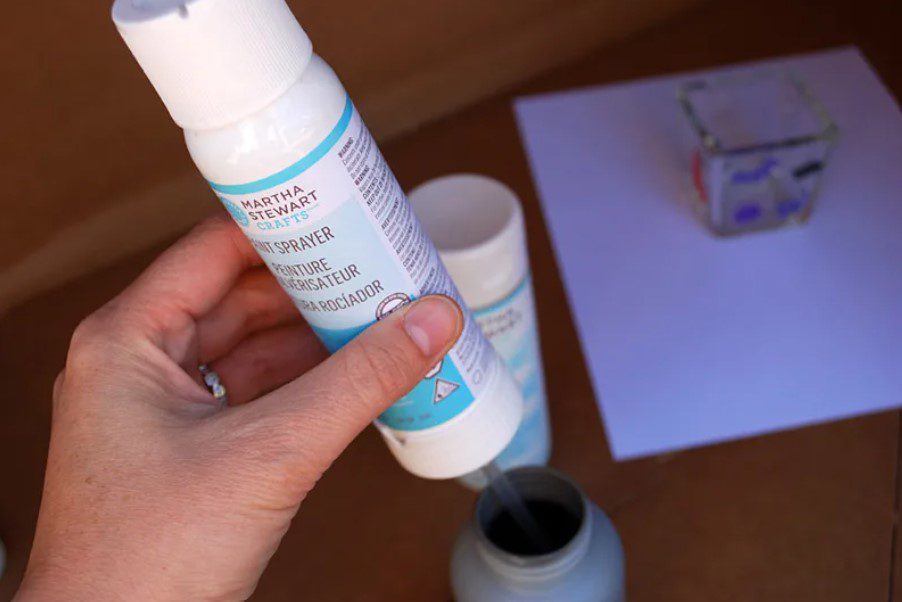
Then you realize they don’t even have the spray paint color you need. Fear not! Martha Stewart comes to the rescue with her brilliant DIY spray can solution. Simply mix the color to get the shade you need, follow the instructions to use the kit, and spray everything all in one go. Easy peasy.
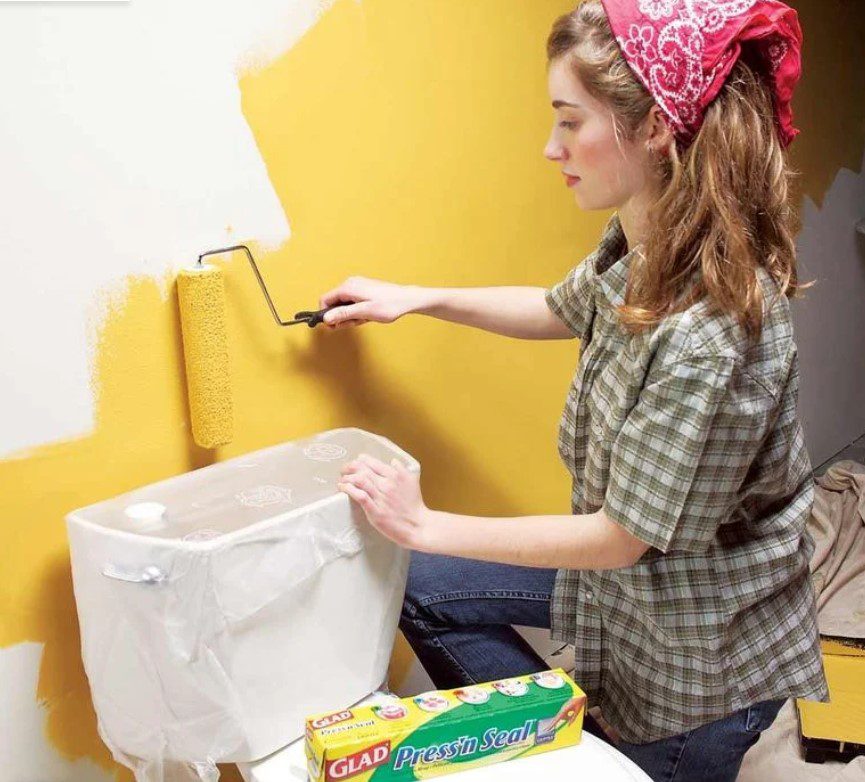
Wax on, wax off
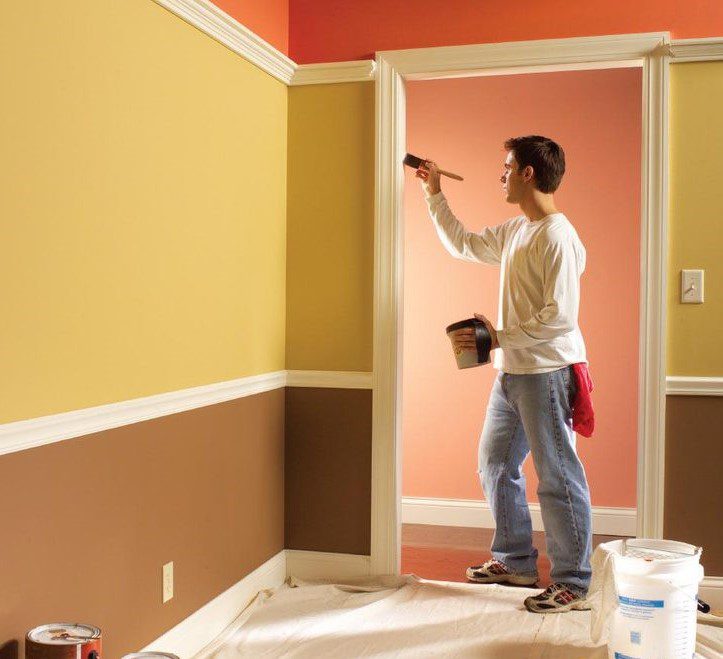
While it may be incredibly tempting to start chucking paint as you see fit on a tantalizing blank wall, it is essential to remember that it’s a job, and a job requires technique. We tend to hire professionals for a reason.

One of the many techniques that professional painters know and we don’t, but certainly should adhere to, is the W or Zig-Zag method to apply paint when using a roller. It will result in a smoother finish with minimum effort.
Pro tip: concrete looks great when painted
Yep, you read that right. Concrete, as in the porous, dusty, perpetually grey substance that makes up our driveways and outdoor lounge areas, is a perfectly acceptable medium for a paint job. It looks incredible when given a coat of color.
There are a few caveats, of course. It isn’t the most convenient medium for painting, nor is it the most controllable. You also need a special kind of paint, concrete paint, which is thinner and soaks into the porous concrete.
Dot dot dot
Adding an accent wall to a room is a great way to bring interest to an otherwise drab space. Wallpaper is often used for accent walls, but there is another way to add fun print into the room without having to deal with rolls and rolls of wallpaper.
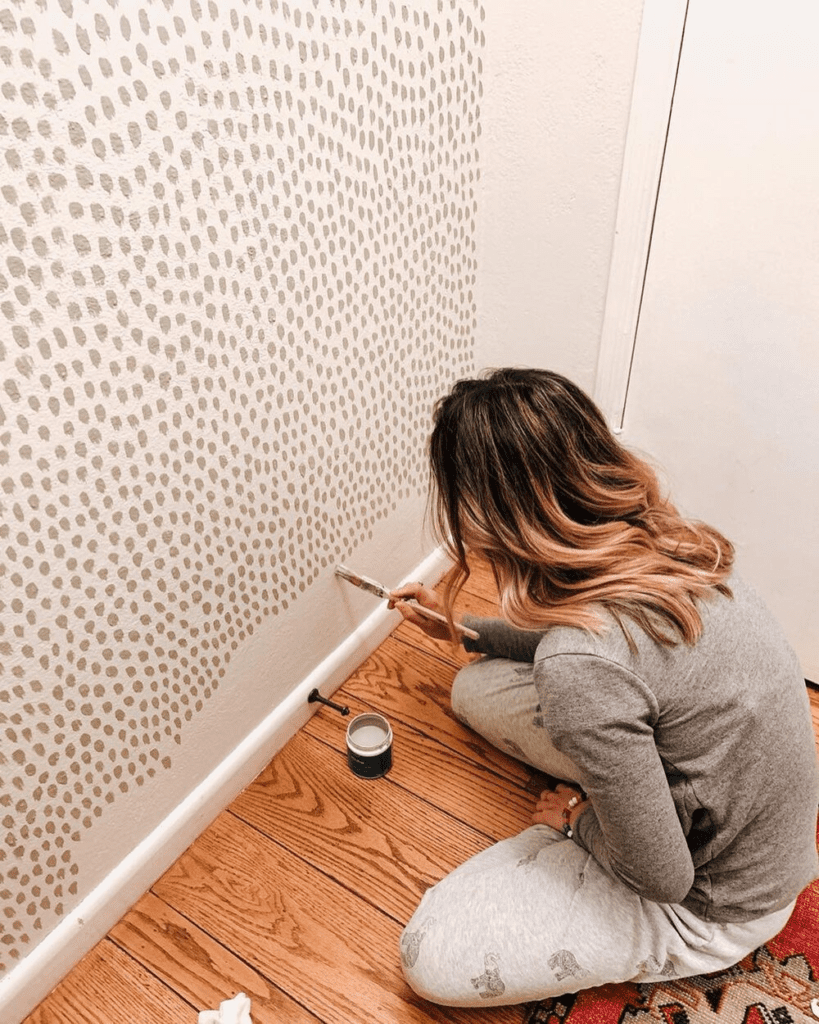
If you’ve got some extra paint lying around, you can create a polka-dot print on your wall using a small paintbrush. You can use a paint color that is just a few shades darker than the wall paint, and that will give you a fun wall that is still chic.
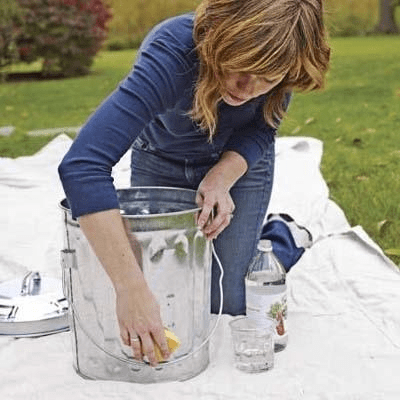
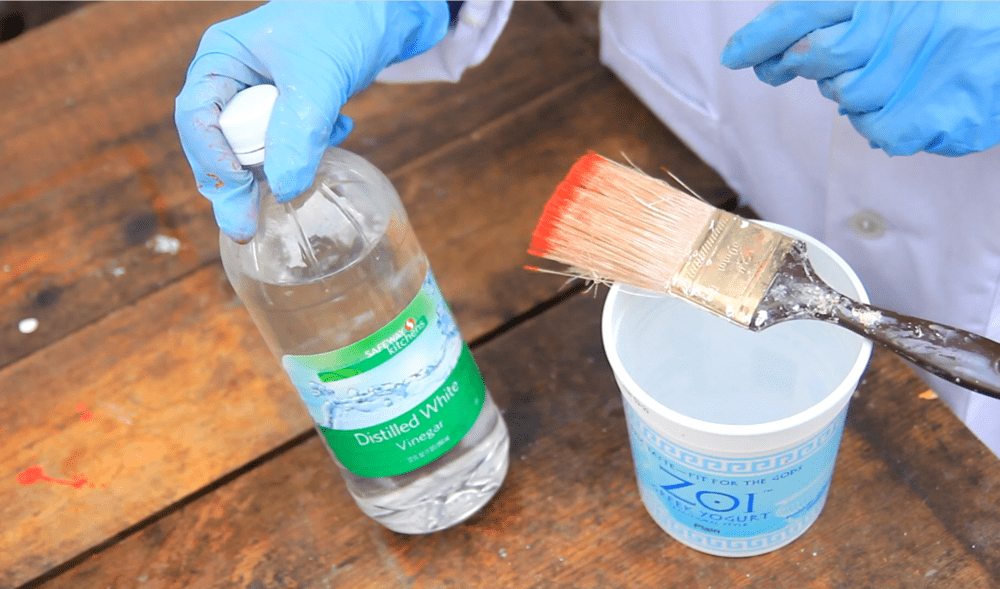
Future proof your concrete
Like any paint job, it is always best to clean and treat whatever surface or object you are painting in any medium you choose so that the lovely color lasts for the longest possible amount of time in pristine condition.
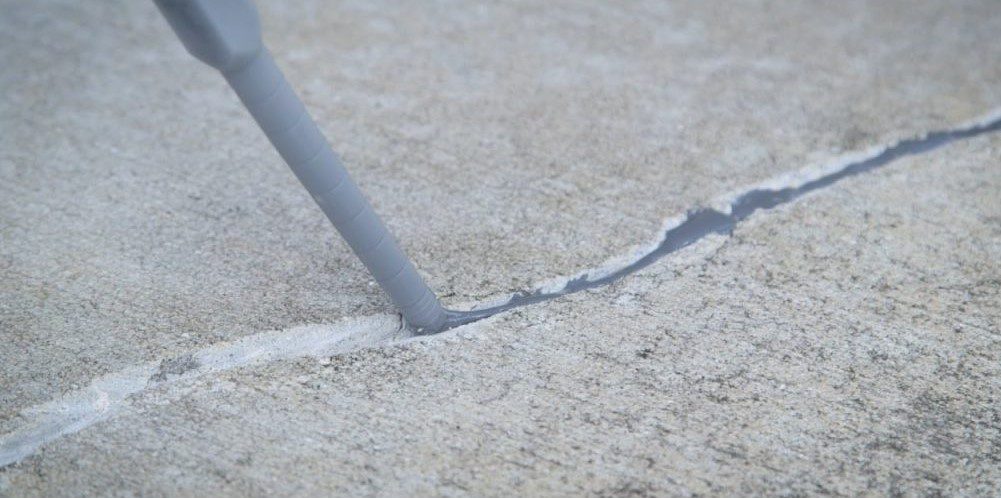
A great tip to that effect would be letting a layer of white vinegar soak into the concrete and dry. This makes for better adhesion of the concrete paint and prevents cracking. Finishing with a layer of concrete epoxy or polyurethane will ensure a long-lasting job.
Saved from the spill
Painting is one messy task; let’s get that out of the way. But just because it will be a messy project that you undertake, it doesn’t mean it has to be a drippy hassle. The mess we all assume is a natural byproduct can be contained.
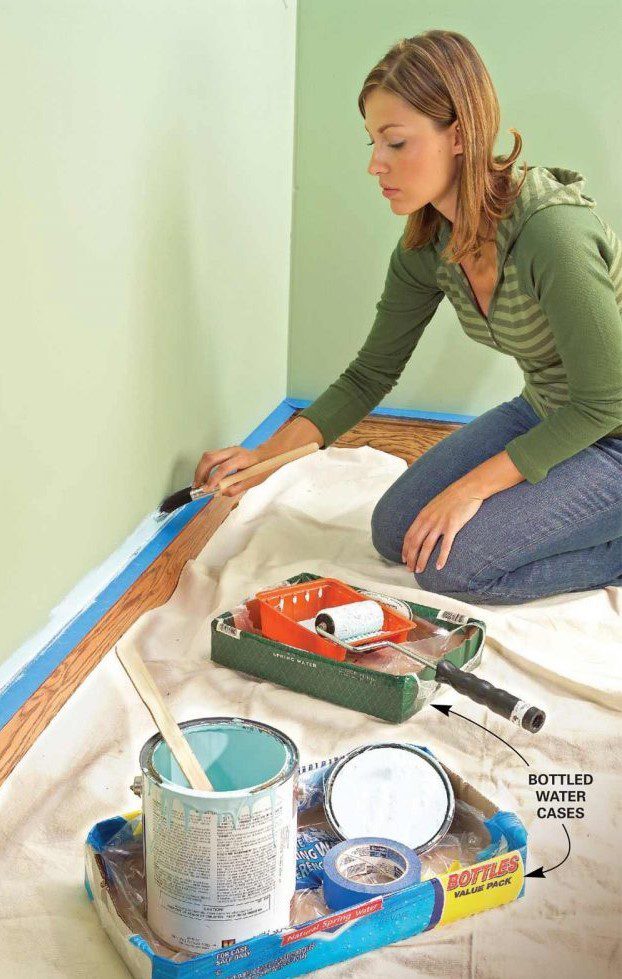
You would probably prefer to look around your finished product lovingly and spend only a few minutes on cleanup. We get that! To make this happen, keep your paint supplies in a water bottle case to avoid unnecessary paint spillage.
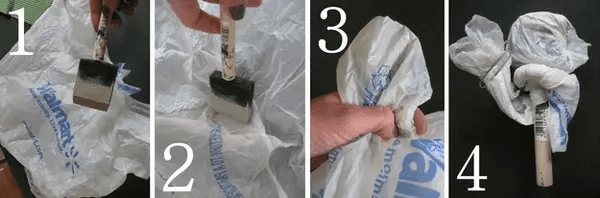
Stripping has never been easier
Stripping furniture is the process of removing the paint or varnish-covered finish from old bits of furniture to restore them. It is usually a time-consuming and arduous job that requires smelly chemical solutions. But it’s necessary to do a good job.
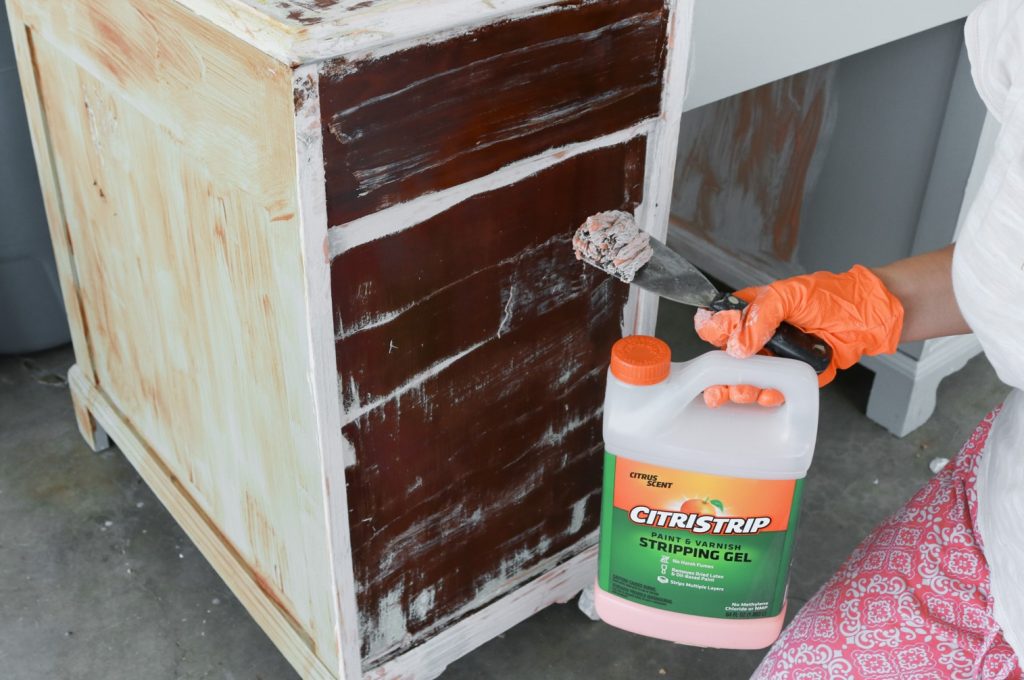
However, this product is called Citristrip that can simplify the process and protect your precious hands from corrosive materials. And great for indoor use as it doesn’t smell. Simply apply the Citristrip, cover the furniture in a plastic bag, and strip it 24 hours later.
Use protection
If you’ve ever applied hair dye yourself at home, you’d know how annoying it is when some of it stains your ear or forehead or something else it wasn’t supposed to. The stuff gets everywhere. It’s the same when you’re painting.

You can avoid weird stains by applying vaseline to places you want to protect. This great little tip works great for hinges, screws, sockets, etc. It saves them from being dotted or splashed with paint. Apply a thick layer of vaseline.
A different angle
Painting trim, or the ornamentation you find around door frames, fireplaces, and the like, is notoriously tricky. The border obviously needs to be painted properly because it is pure decoration, but the creases and patterns make it a challenge.
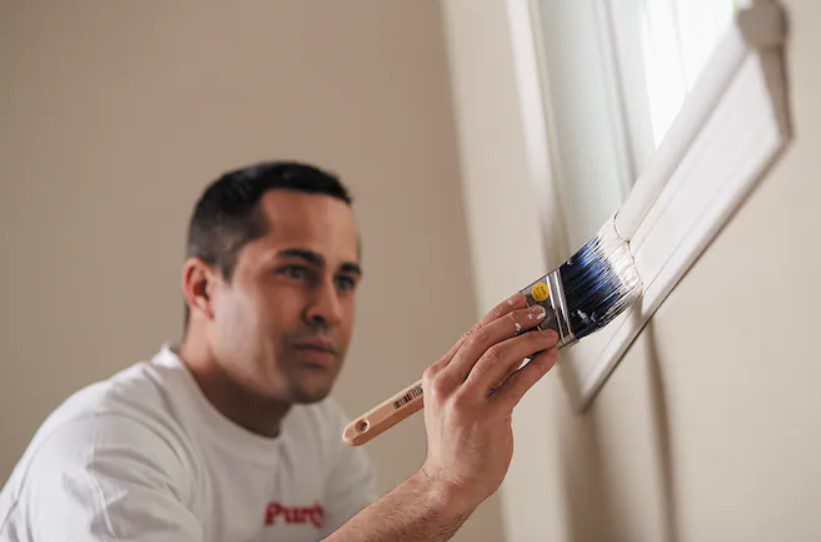
Using an angled brush can help you cover each nook and cranny with the least amount of mistakes and will reduce the need for placing protective tape everywhere. The angled brush helps the paint get into every crevice with ease.
Wipe off the excess
Painting trim, even with the help of an angled brush, can still leave some stains or errant drops of paint that might drip off the brush, or even an accidental stroke of paint on the surface around the trim if you’re not careful.
But there’s an easy fix to any such accidents. The matter’s as simple as keeping a wet rag on you at all times to quickly wipe off any paint droplets or swatches that may make an unnecessary appearance. It’s simple and effective.
Lose the mop
Say, for instance, a wayward few drops of paint do escape your notice and fall onto the floor or something. Rogue paint can be more trouble than it’s worth. Should you step in it, you’d be tracking paint throughout your home.
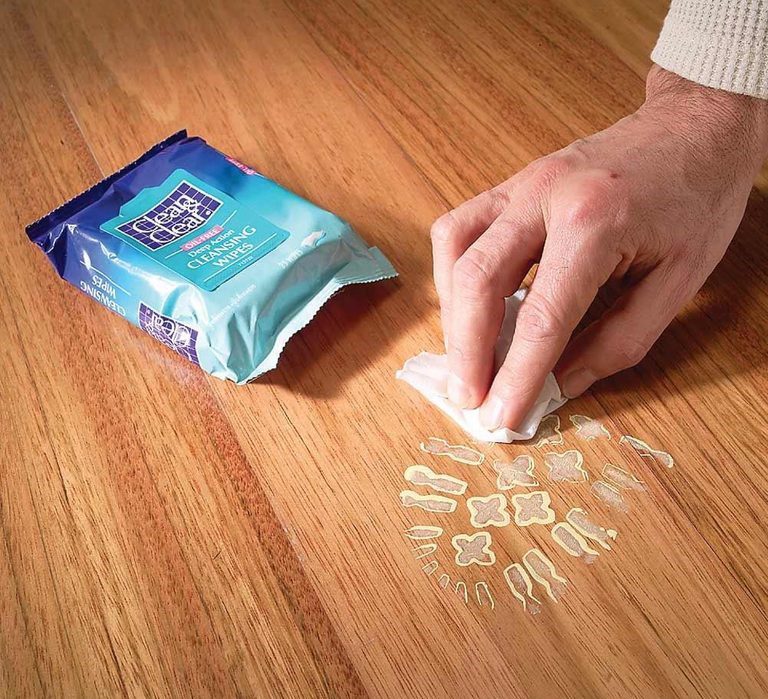
Using a mop might exaggerate the smear as well as ruin the mop. You can use face cleansing wipes for acne- they’re easy to find – and wipe off the paint as the pad solution is alcohol-based. This works on bigger dried paint spills as well.
Surgical precision
Perhaps you are a person who prides themselves on perfectly executed jobs that have fantastic results or just get irritated by the fact that a perfectly painted wall got ruined in your eyes by a few droplets of brown paint in the corner.
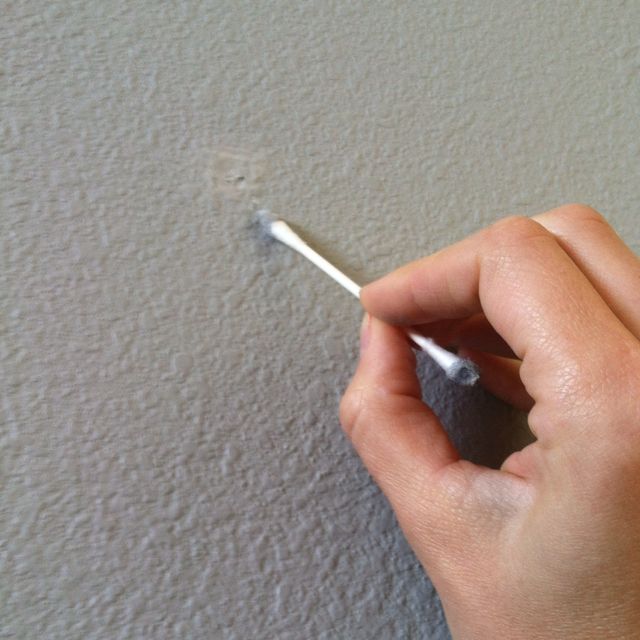
Precision tips are the best for small streaks on the wall. However, if you can’t find them, you can just as easily make your own by wetting the cotton and twisting the cotton to a point. A Q-tip in the right hands is a lifesaver.
Storage can
Let us rewind to the beginning of this list of useful tips. We mentioned that roller brushes have a tendency to dry up around the edges when you set them aside for a while. Perhaps you’re calling it a day or running an important errand.
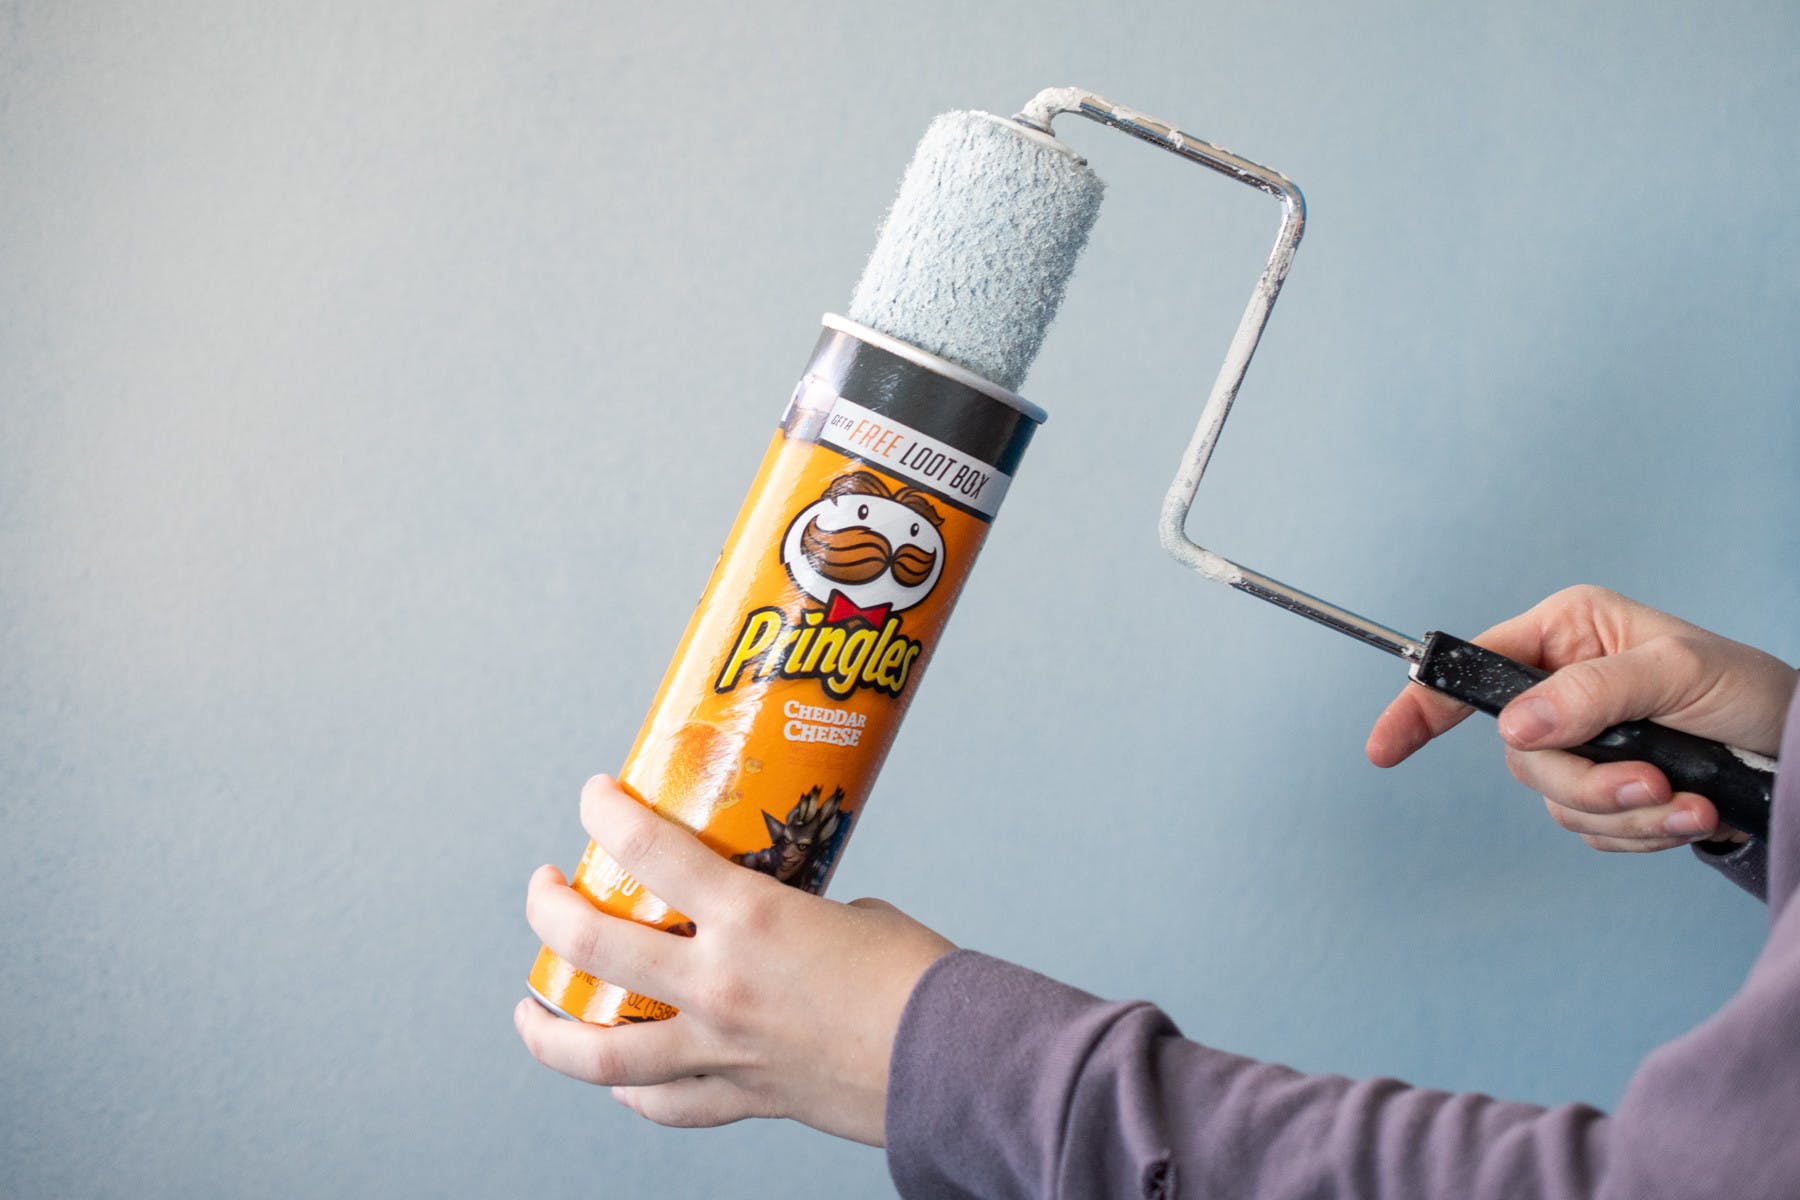
You can rest easy once you learn this tip. Simply detach the roller brush from its handle and stick it in a Ziploc bag. Take a breather and enjoy a can of Pringles. Once you’re done, store the bag in the empty can.
Vanilla goodness
There are some people who really, really like the smell of paint. They’d buy paint specifically for the purpose of having the scent of it around them. It’s weird, but hey, you do you if you’re into it. Others, however, are repulsed by it.

If you’re in the camp of people who don’t like the smell of paint, then mixing a tablespoon of vanilla extract per gallon of paint will not only neutralize the paint smell but will also impart a lovely vanilla scent into the walls.
Make tape sticky again
Tape is one of those things you absolutely need in your paint essentials. It is used frequently and liberally by both amateur and professional painters as paint guides as well as a way of ensuring even and neat paint finishes.
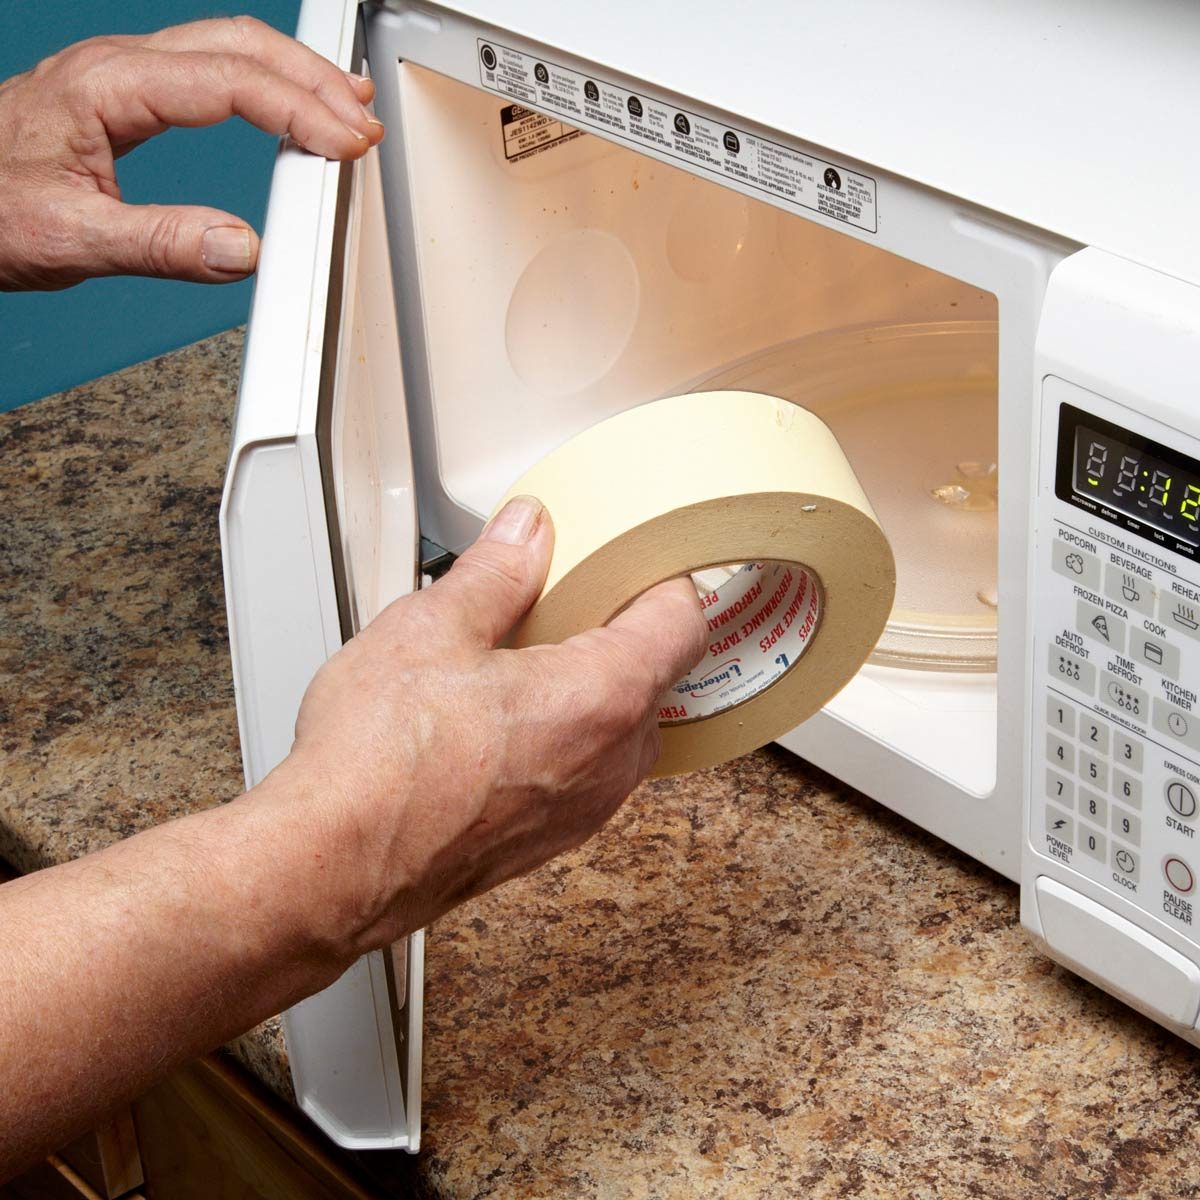
It would be best to have all the tape you could get in preparation. Older rolls tend to dry out and become less sticky. Fortunately, a 10-second stint in the microwave is enough to melt the adhesive and make it usable again.
Crack prevention
While being one of the strongest materials, metal is not exactly the most durable as it is very susceptible to corrosion and rust. Therefore it is essential to paint or coat any metal tools or utensils you have for outdoor use.
There is a technique to painting on metal, and our good friend vinegar comes into play yet again. Paint on metal tends to crack and expose the metal to rusting. But a simple rub down with vinegar before painting the metal can prevent cracking.
Loosen the Latex…or don’t
Latex paint, you might be surprised to know, does not actually contain latex. It is water-based paint that is used for painting large surfaces, often for commercial use. The paint is a great candidate for home jobs. However, it does clump sometimes.

Thinning is the best course of action, but not just any thinner will do, as some might end up ruining the paint’s characteristics instead. Try Flood Floetrol, a thinner specially made for latex paint that thins it out for a smoother finish.
Set up a studio
So the thing about spray paint is it’s effective and gets everywhere, but… it gets everywhere. So with great power comes great responsibility. We try very, very hard not to destroy everything around the object we’re painting, but having some tricks up our sleeves helps.
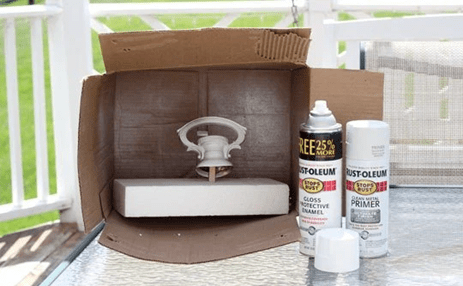
A great way to go about doing that is to take an unused or old cardboard box, reasonably sized, and use that as a studio for your masterpiece. Put anything you want to be painted in the box and spray away, and it stays in the box.
Or pitch a tent
You may want to consider setting up a larger apparatus for larger items. Rest assured, it is well worth the trouble it takes to set up. Spray painting anything without proper preparation just means you’ll have a more significant cleaning project at the end.

A collapsible tent would work very nicely for our purposes here. Anything bigger than what would comfortably fit in a cardboard box can go in the tent, and once you’re finished painting, you simply need to fold the tent back up for cleanup.
Furniture concealer
When you’re painting something, it is best to make sure the surface is as smooth to paint on as possible. Dents, bumps, and cracks aren’t exactly friends of a good coat of paint. Old furniture is like a mixture of all of those.
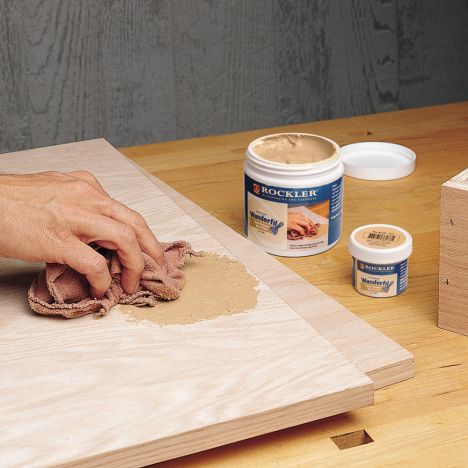
Elmer’s Wood Filler is a great product to treat old furniture before painting on it. As the name suggests, the product fills out the dents, chinks, and crevices on the surface of the wood. You’ll have a lovely smooth surface to paint on once sanded down.
Shake it off
Whenever we start painting something, it is common practice to wipe off the excess paint off the brush before we begin. The brush is usually wiped off on the rim of the paint can/container, and over time, it cakes up.
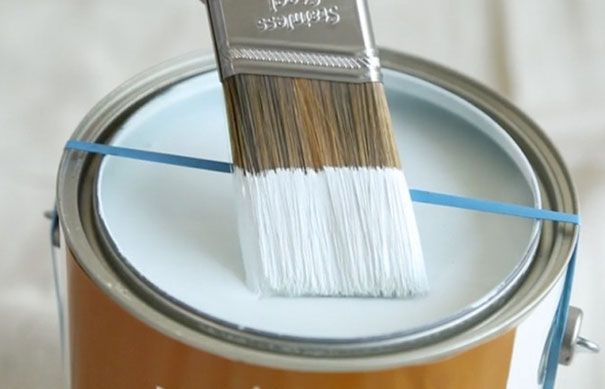
There’s a really handy trick to minimize the excess paint and splatter. Rather than pressing the brush to the rim of the paint can, put a rubber band across the top of the can to wipe the brush on instead.
For all it’s worth
If you are someone who loves to save money wherever you can, or simply love knowing all the hacks and tricks related to household maintenance, then this is the tip for you. Hold onto your well-earned pennies, and save that extra paint!
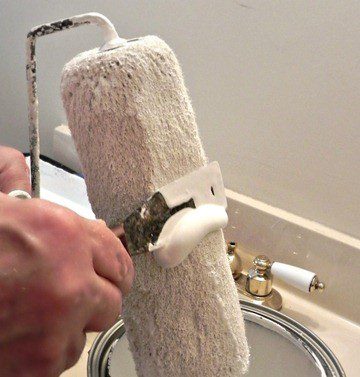
Roller brushes do soak up quite a lot of paint. A large quantity of it is leftover on the brush once you’re done with your masterpiece. You can, fortunately, extract a good amount of paint by scraping the roller down with a bench scraper.
Don’t stray from the path
There are many techniques for painting. In addition to the W or Zig-Zag method for brushing paint on walls, there are also a fair amount of tips and tricks available for painting other items around the house, like furniture, the correct way.
Bold and confident paint strokes are encouraged when one is painting; it lessens the chance of needing to paint over extra layers of paint and gives an even finish. It is recommended to paint in only one direction for furniture to avoid roller marks.
Cut the grease
Time and time again, we have recommended that you should make sure that any surface you are painting is as clean and dust-free as possible for painting. Greasiness is also an issue with walls because, as we’ve established, no one scrubs them down.
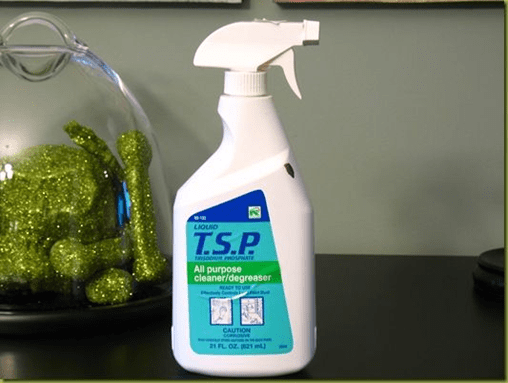
A recommended product for degreasing surfaces is liquid TSP, a heavy-duty all-purpose cleaner that cuts through heavy deposits of greasy dirt and grime from interior and exterior surfaces. A good wipe down will remove grease and make the paint stick better.
Use paper bags
Once whatever you’ve painted has dried and is ready for the finishing touches, it is always good to do a last quality check before setting things in order. A smooth surface is necessary for a high-quality finish. Grit or bumps are not welcome.
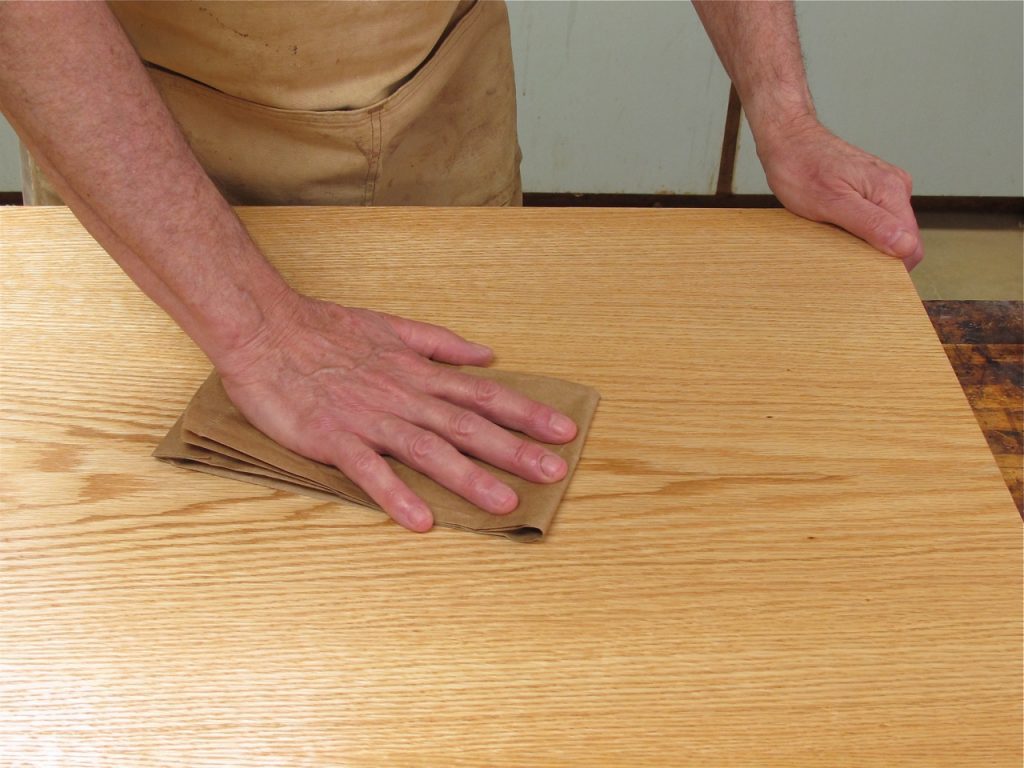
Sanding down the surface with sandpaper isn’t exactly the best route as it would also strip away the paint. A brown paper bag works rather nicely for this sort of work. Rub the surface down with it, and you’re good to go.
Best buddy for life
Aftercare is just as important as the initial paint job if you want to keep your home pristine. If you have kids of your own or pets of a more destructive nature, we would recommend having a quick fix on hand for any incidents.

The Rubbermaid Paint Buddy is great for touching up scratches, dents, and scrapes after the fact. It is also an excellent way to store your leftover paint. If you’ve chosen a particular shade that’s hard to replicate, that might be your best bet.
The power of the pen
For the damage to your paint job that requires more intricacy, more specialized tools will serve your purposes more efficiently. The Rubbermaid Paint Buddy is suitable for significant corrections, but what if you need something more discreet for smaller issues?
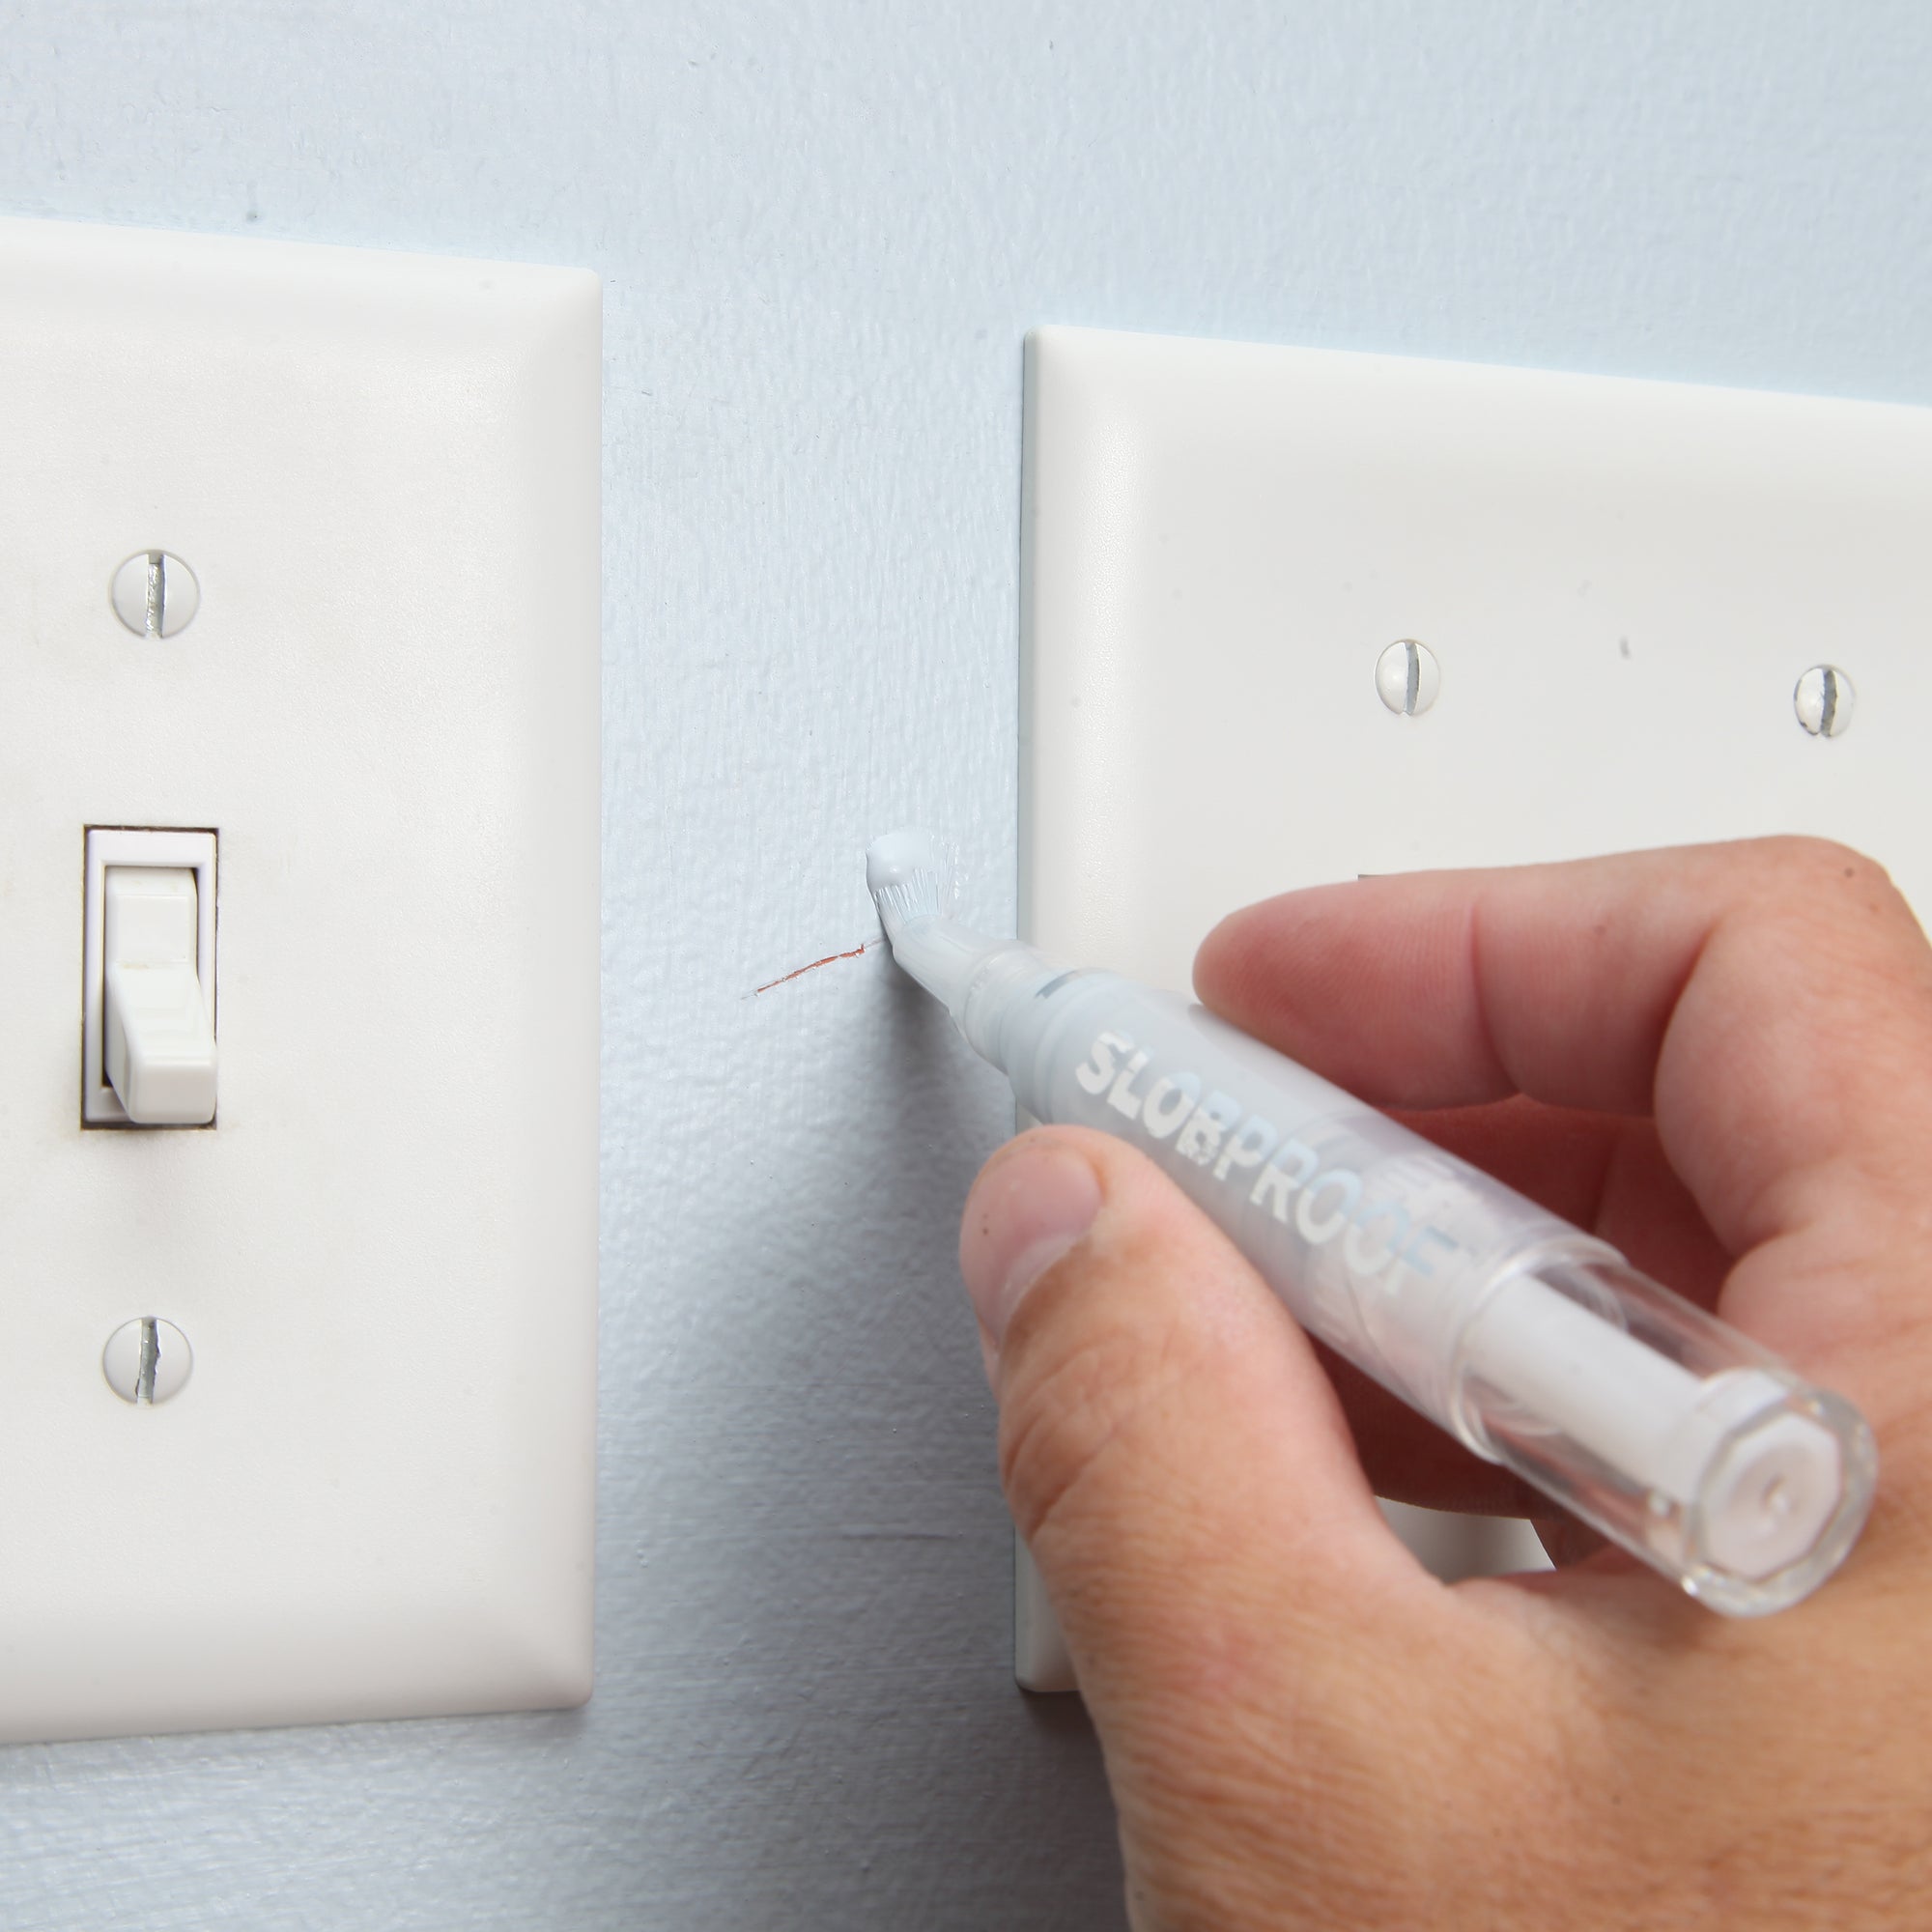
There is now a handy product for you called the Slobproof pen. You can fill it with any latex paint you’d like and use it like a Sharpie to fill in any chips you might find between now and the next paint job.
Level headed
Plaster is a material used for covering walls. Even though it is now not as widely used as it used to be, it is still an option. It forms a chalky exterior on walls, and during application, it has a pasty, gummy texture.
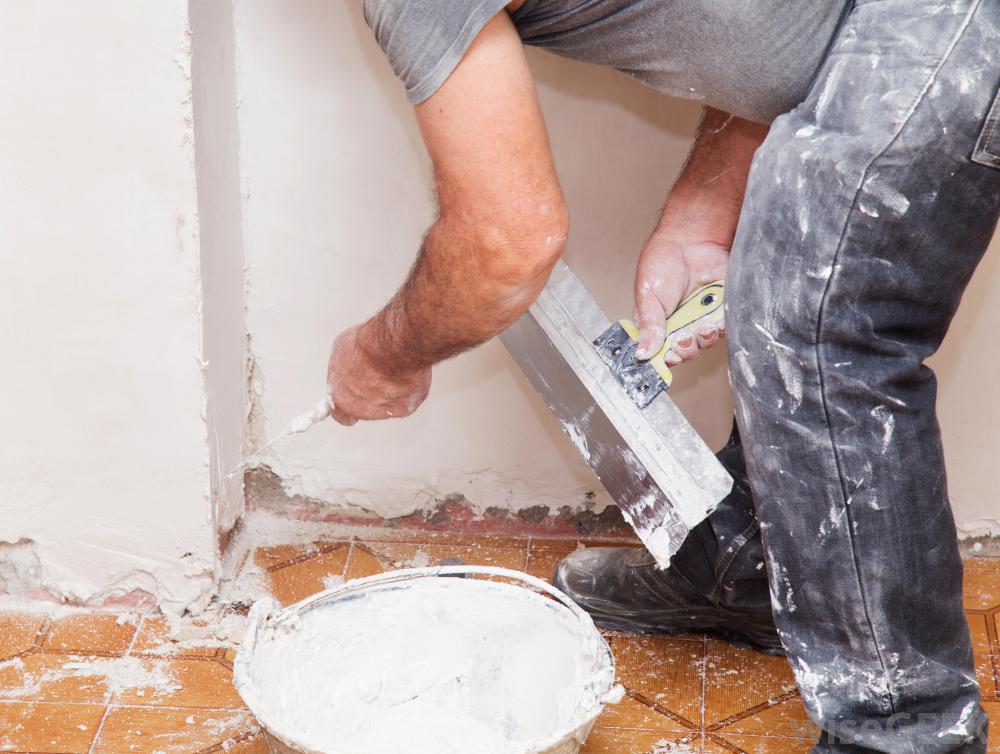
When painting such a medium, self-leveling paint is a great equalizer (pun intended). As you might gather from its name, it is designed to level itself out once applied. So the uneven surface of plaster poses no problem for its smoothening effect.
Check it before you wreck it
We could argue that paint is basically makeup for a house. Like makeup, you need certain combinations of products to make the finished result outstanding. SO how can you tell if you have oil-based or latex paint in your home?

You’ll have to check what sort you have already in your home. Soak a cotton ball in rubbing alcohol and wipe your wall with it. If the paint comes away on the cotton, it is latex paint; otherwise, it is oil-based.
Wrap it up
You know what plastic wrap can do? Solve 90 percent of our daily problems. Well, that’s an exaggeration, but we’re sure if we try hard enough, we can get to a good dozen or more. It’s a very versatile household item.
Plastic wrap is a very cheap, very convenient way to protect anything you don’t want to be painted over. It clings to the object without taking up extra space. And once you’re done, it’s effortless to dispose of as well.
Airlock
The enemy of paint is exposure to air. The paint dries when you don’t need it to, and it becomes a pain in the neck to rectify any mistakes. Paintbrushes are no exception and often dry up quickly if you’re on a break.
A plastic bag and rubber band will work wonders in a pinch for storing away a paintbrush. All you need to do is wrap the brush in a plastic bag, tie it off with a rubber band, and it’ll keep for weeks.
Not a stickler
We’ve covered how to store and preserve different types of brushes, everything from angled brushes to roller brushes. You can store custom shades in smaller containers, but what about the tins of paint we have leftover, the base coats, and latex, etc.?
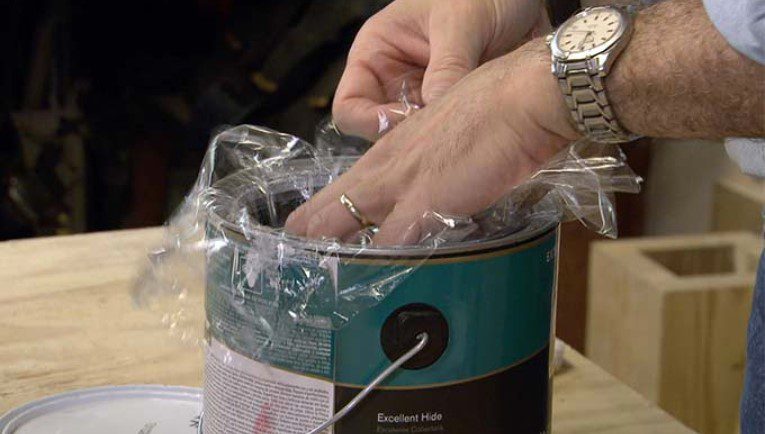
They can be easily dealt with using a bit of plastic wrap. If you close the tin without it, the paint will dry and seal it. The plastic wrap seals the can and keeps it fresh till the next time you need it.
Reach a dissolution
Say we’ve finished our paint project and are in the process of cleaning up. We’ve sanded down every surface, we’ve wiped up all splatters and cleaned up all the supplies, but what of cleaning out all the brushes? Sounds like a hassle!
Usually, one would try and dislodge some of the paint with thinner or an appropriate solvent. However, 30 minutes in a tub of hot vinegar will work just as well. Rinse them off with soapy water, and they’ll be good as new.
Give the roller a trim
There’s quite a lot of prep work that goes into making sure your paint roller doesn’t mess up your wall instead of improving it. There’s lint rolling the surface, so it doesn’t mess up the finish, and then there’s post-paint maintenance as well.
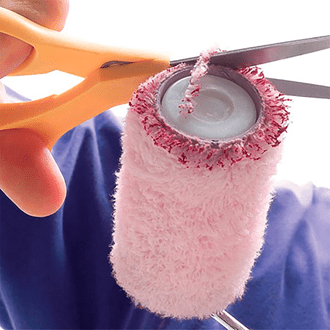
You can’t exactly use a new roller brush after every use, whether you take a break or just call it a day. The edges tend to get crusty rather quickly. No worries; just trim that pesky edge, and you will have fewer annoyances to deal with.
Midas touch
Just the slightest hint of gold accents can add a lot of class to your remodeling efforts. You can opt to take a small brush and painstakingly add details to everything, or you can take some gold spray and paint in one go.
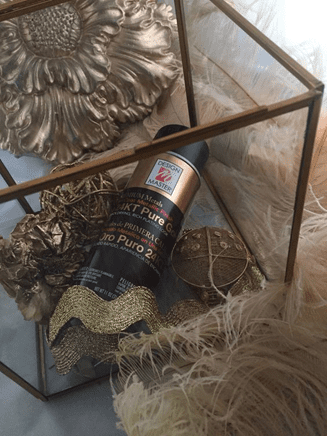
Add class and elegance with gold sprayed accents with your new paint project. We’d recommend a metallic gold spray to get the most realistic gold effect; the graininess that spray paint tends to have will also work in your favor to further the effect.
Painter’s sense
Painter’s tape, i.e., the blue one professional and commercial painters use to ensure clean and uniform lines on the paint job, is one of the most valuable weapons in your arsenal if you’re just starting out on your paint journey.
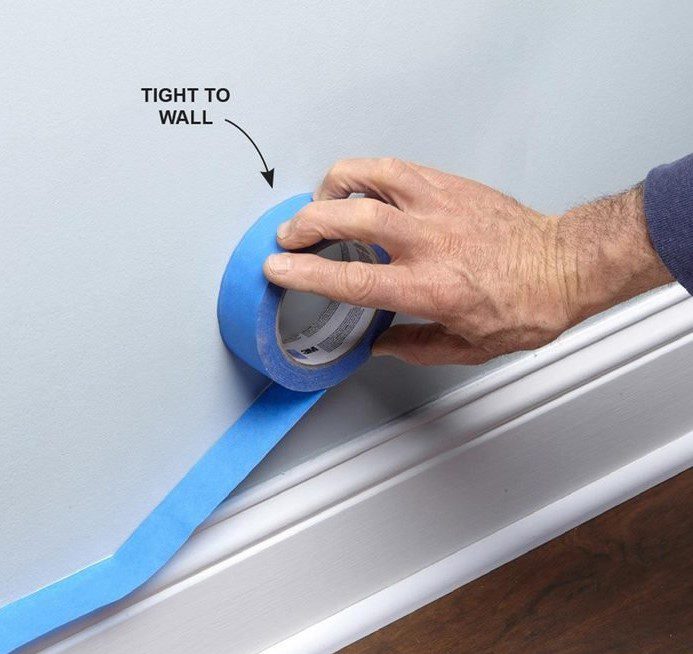
The tips for applying painter’s tape for newbies are endless; guides for painting a clean line, making stencils for funky patterns, even labeling. Just be sure to peel the tape off before your paint has dried to avoid the paint chipping on the edges.
Right angles
Just like anything in life, there is an art to using and utilizing painter’s tape the proper way. It’s not a matter of slapping on the tape, slathering paint on, and ripping the tape off with abandon as soon as you’re done.
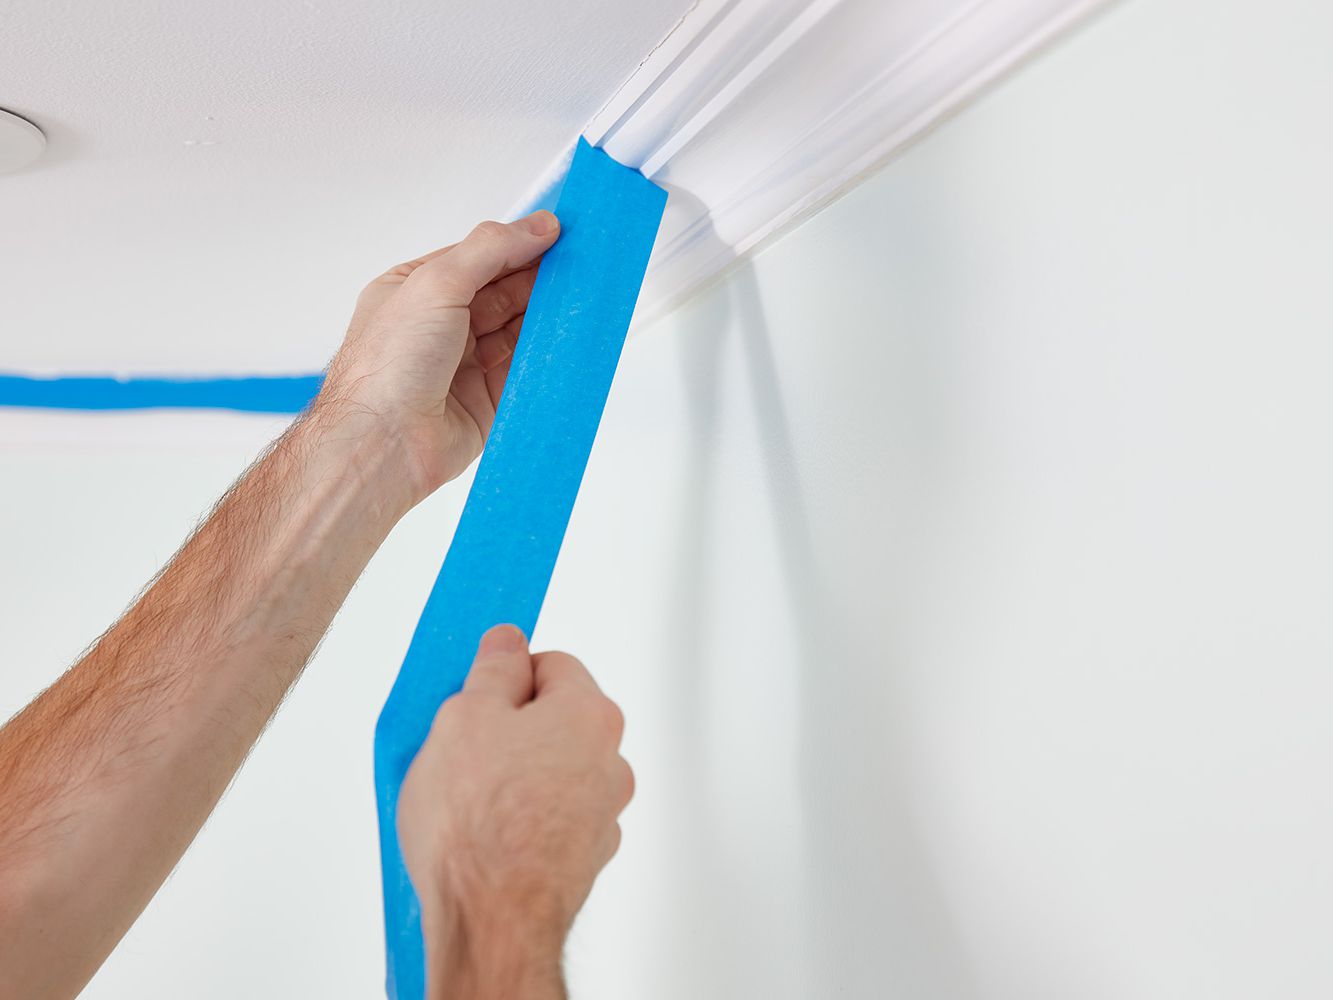
The tape needs to be removed slowly, without rush, and at an angle to ensure the cleanest lines and best results. A forty-five-degree angle is recommended; 90 degrees if the tape is too sticky. Either way, slow and steady is the way to go.
Blending in
Caulk is used to seal joints or seams against leakage in various structures and piping. It is a very versatile material that can be used in any number of repairs to ensure good protection. This is often used to seal tiling, etc.
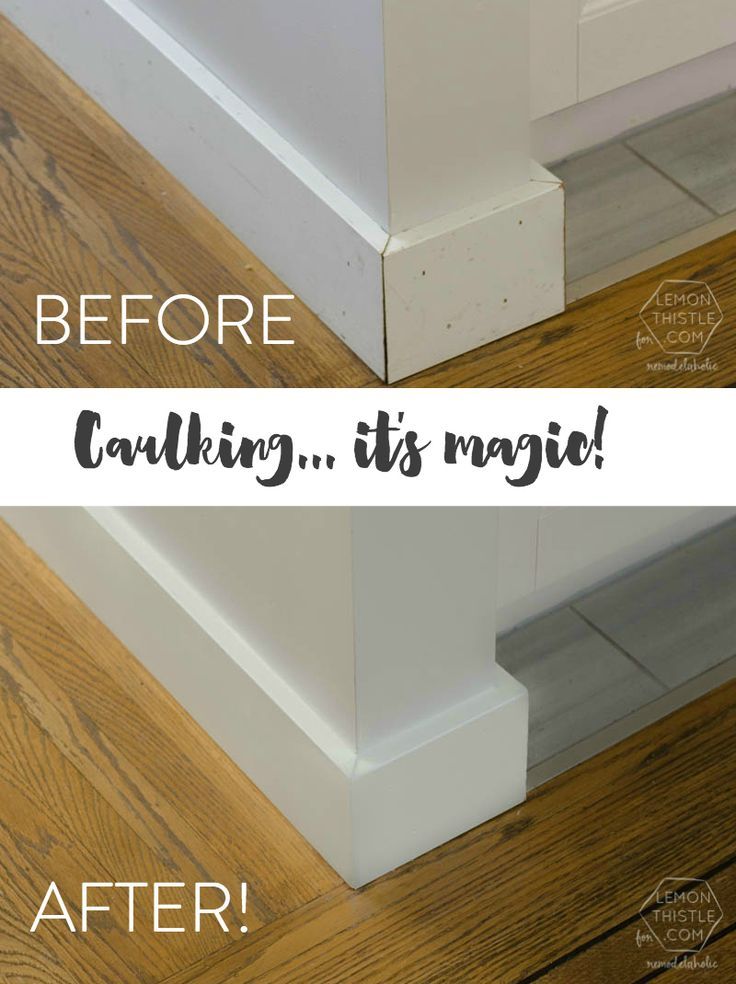
Caulk can be an excellent way to stop up uneven baseboards or trim that didn’t quite fit right. As the caulk shrinks as it cures, it can pull uneven surfaces with it to fall back into place and fit correctly as well.
Shabby chic
This tip is purely ornamental, and even then, it is not everyone’s cup of tea. If you like to have your home look a bit “lived in” even as your current furniture is getting a do-over, then you might want to give this trick a try.
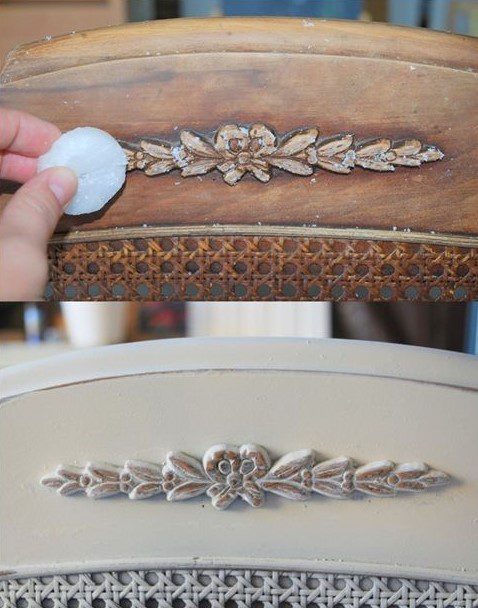
You can achieve the look with a bit of wax. Candle wax will do nicely. Rub it over parts of the furniture and then lightly wipe some off, so the wood shows through. Those areas will remain unaffected by paint and give the desired effect.
Anti-grain filter
Anyone who has the barest knowledge of commercial painting or even large-scale canvas painting knows that the rolly brushes that come with the process aren’t always the tool that provides you with the smoothest experience. There is a prerequisite step.
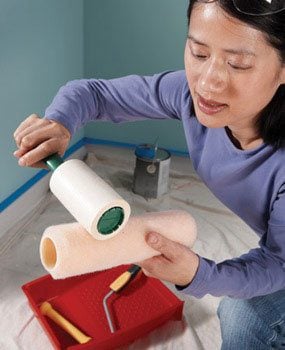
A new rolling brush has the unfortunate tendency to be riddled with annoying little fuzzy bits that get stuck on the wall or leave marks on an otherwise smooth brush stroke. Fortunately, using a self-adhesive lint roller on the brush before use is a quick fix.
Painting around light switches
Anyone who has ever painted a room on their own knows that one of the more taxing parts of that exercise is painting around outlets. No one likes to see streaks of the wall paint on their switches. To avoid that, there are a couple of approaches.
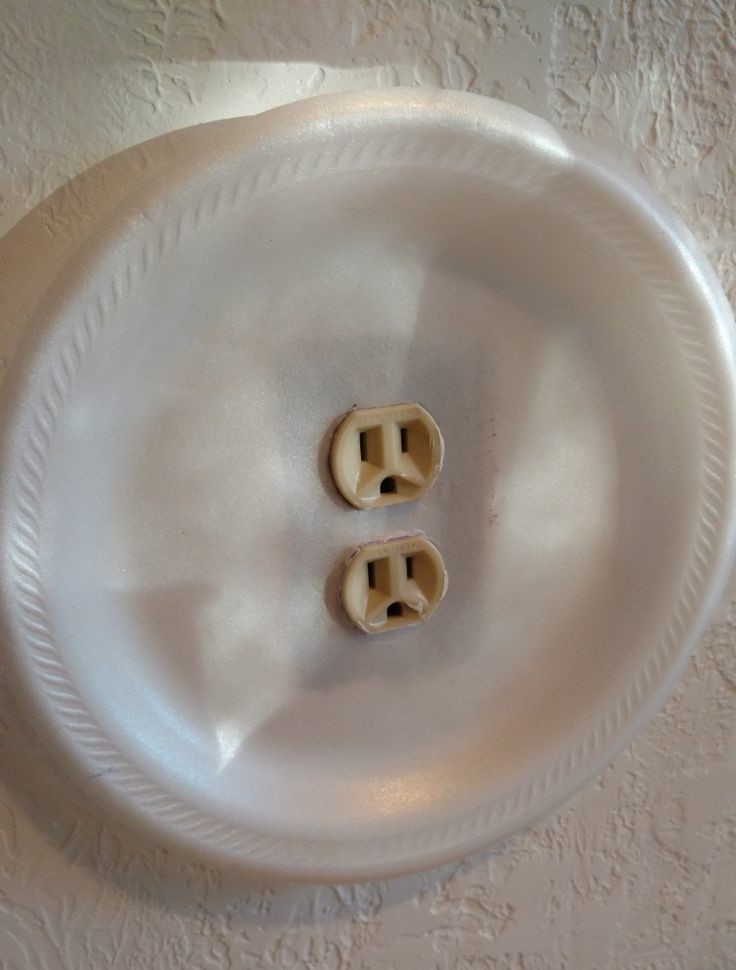
If you’re using a brush, go around all the sides in slow and smooth strokes. The other way to go about it is to remove the cover entirely, tape up the inside of the outlet and go over the area with a roller. Once you’re done, remove the tape and screw the cover back on.
Making a paintbrush holder
As everyone knows, painting can get very messy very easily. A little splatter here and you will find yourself in a sticky situation that needs your immediate attention. One of the most common ways people get messes during the process is with the brush or roller.

It’s especially hard to keep things neat when you don’t have a proper way to set the brush when you want to set it aside. Luckily, you can make a holder using a pool noodle cut into the size of your tray. Once you place it there, make a few slits to hold the brushes/rollers.
Simple circle patterns
Plain walls have their own allure, no doubt, but why not try this beautiful pattern for a small room in the house, say, the half bath? With some paint and a toilet paper roll, you can instantly change the look of your room in no time!
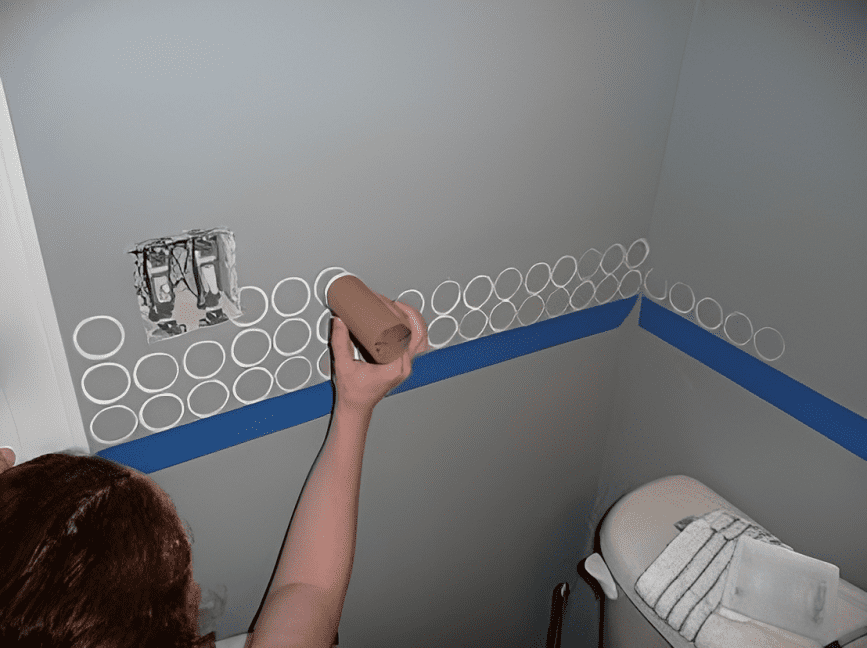
If you’d like white circles like the ones pictured above, try to paint the room in a darker shade. All you need to do to get the patterns is dip the roll in some paint and paste it on the wall. Three rows are enough to get the desired effect.