
35+ Sewing Hacks That Everyone Needs In Their Kit
The priceless skill of making fabric come together using a needle and thread will always be valuable as it requires a lot of patience and expertise. Even though you can buy ready-made clothes from the market, making them with your two hands is always more satisfying. With so many sewing resources and supplies available, it can be troublesome for a beginner to understand the value of each one. While some sewing tools are essential, others are just fun and optional. For all the sewing lovers out there, we have compiled some hacks that you can use to prevent your threads from getting tangled and your stitches from becoming wonky. These tricks will help you with various sewing projects, whether it’s as simple as keeping your sewing materials organized or keeping your scissors sharp, we have a handy tip. So, let us explore resourceful ways to make the sewing process easier than ever before.
Keeping Scissors Sharp
Cutting the fabric evenly and smoothly is an integral part of any sewing project If you have dull scissors, the fabric will tear and fray, leaving you with less to work with, or ruining a project altogether. Hence, keeping your scissors sharp is vital.
The best way to keep your scissors sharp is to clean them frequently and dry them off immediately if they get wet. Also, ensure that you only use high-quality fabric scissors that you do not use for any other purpose. These tips will surely keep your scissors sharp for a long time.
Pipe Cleaners to Clean Machine
If you want to keep your sewing machine running smoothly, you must always ensure it is taken care of and cleaned relatively often. Pipe cleaners are a secret weapon here, as they get into all the nooks and crannies of your machine and clean it in an efficient and effortless way.

A pipe cleaner cleans the bobbin case meticulously and removes all the built-up lint in no time. The tiny parts that you can’t clean with your hands are able to be perfectly cleaned with pipe cleaners. Isn’t it amazing!?
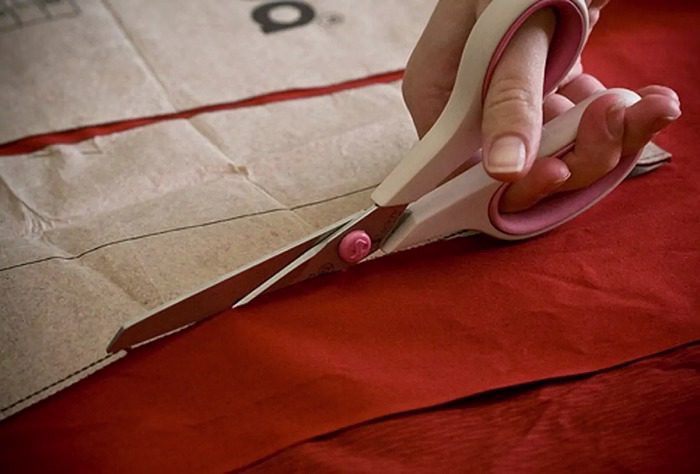
DIY Weights
Holding light fabric down while trying to trace out a pattern can be challenging, especially if you are using those thin fly-away tissue paper patterns, and not a cardboard template. Often, you do not want to use a pen to trace (which can leave marks on the fabric, or to try to hold it in place with many pins if the fabric you are cutting is delicate.
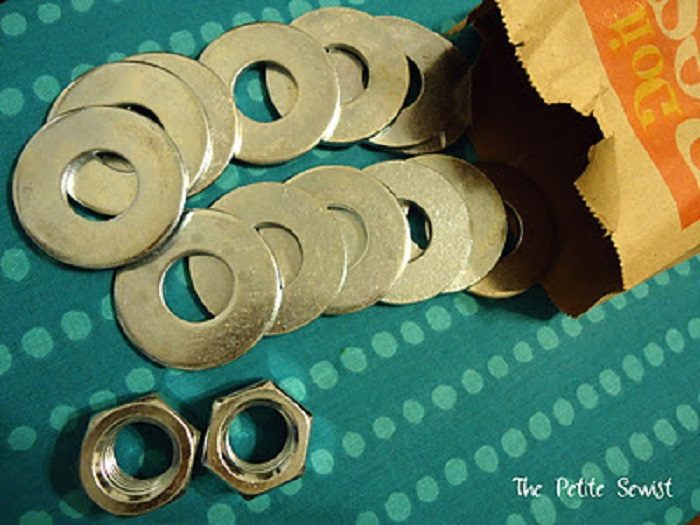
Use heavy metal nuts and washers as fabric weights to hold the cloth in place. These small steel or iron nuts are very handy and are easy to place them wherever you wish. Plus, they will not damage or mark the fabric underneath, allowing you to trace the pattern cleanly and easily. Use a small tin container to keep them stored and ready to use as needed.
Staystitching
All those who sew professionally or frequently know the importance of staystitching. It is a row of stitches on a piece of fabric to keep its shape intact, and it’s especially used on curved edges or on any jersey or stretchy fabric. This amazing hack will help you with this task!
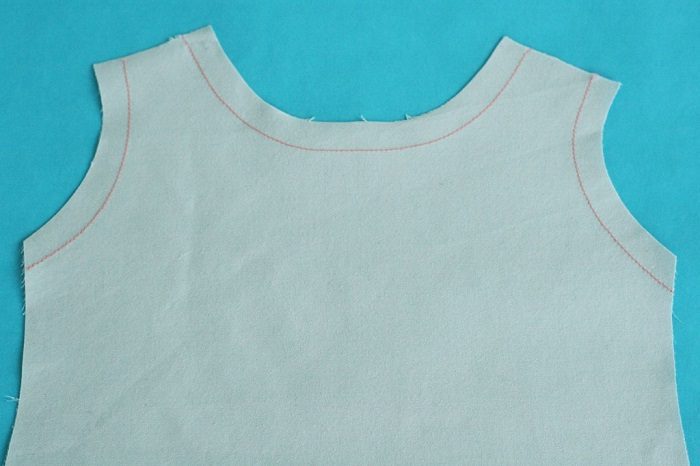
Staystitching also helps to keep the grainlines esp on curves, although it takes a bit of extra time, it will help ensure that your sewing project will be a success. Just like notches that help align and join two pieces of fabric in exactly the right places.
Fray Prevention
If you are tired of finding loose frayed edges on your fabric while stitching and want to stop it immediately, try to use a pair of pinking scissors that have serrated edges. These pinking scissors are spring-loaded and pop open after every cut just like regular scissors.
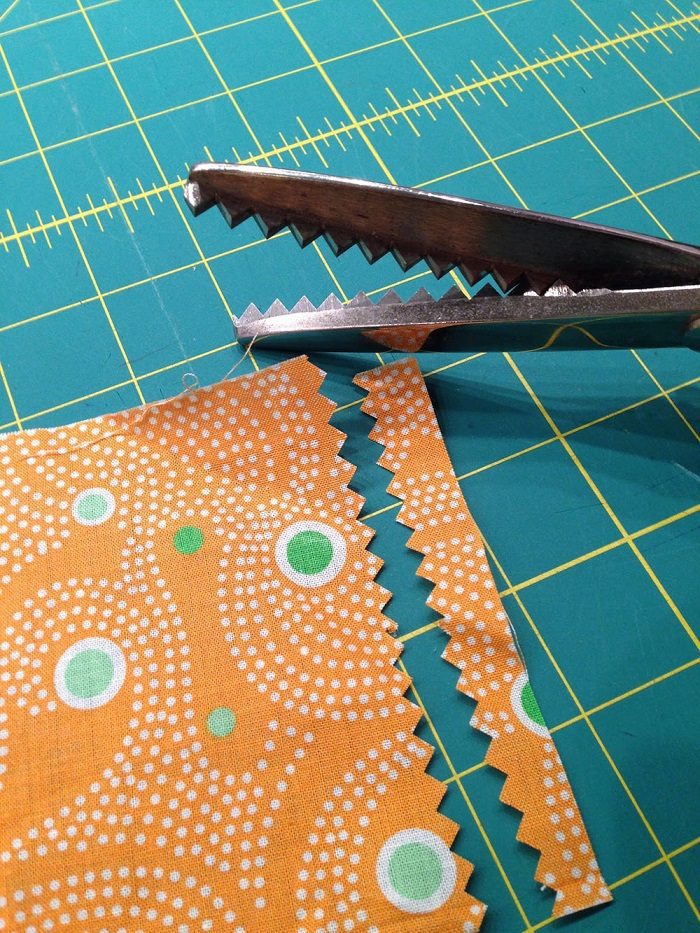
Their blades cut a zigzag pattern in the fabric and which makes it less likely to fray. If you have ever tried this hack, you will find it really helpful, especially with chiffon and other loosely woven fabrics that tend to fray just by looking at them.
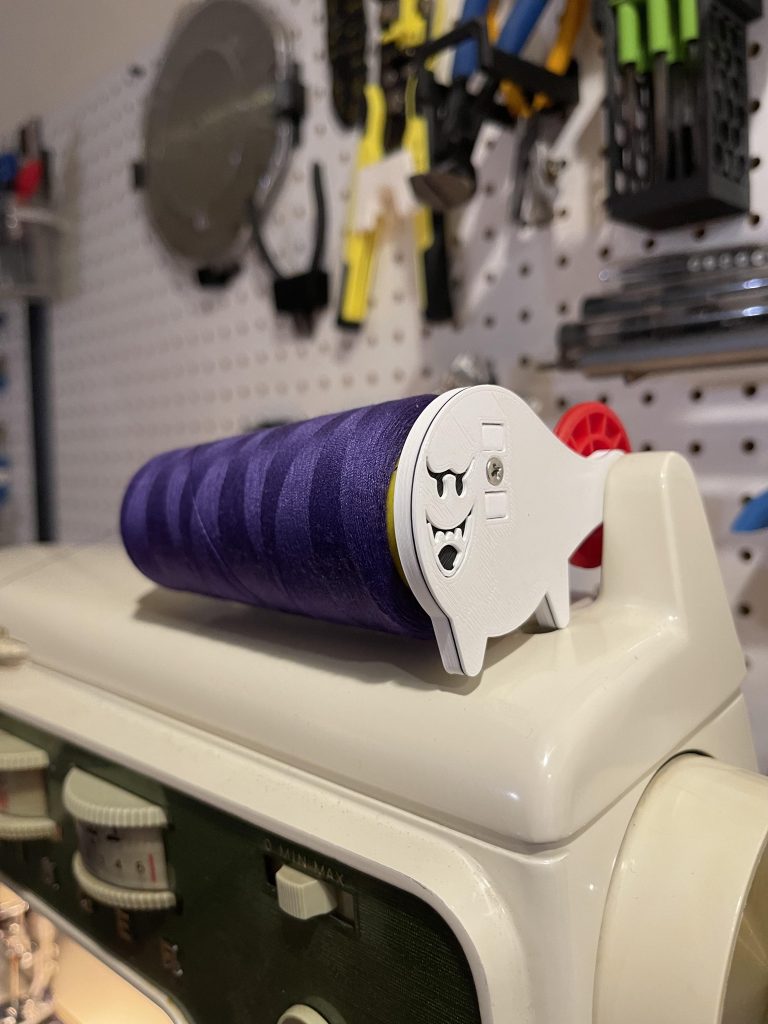
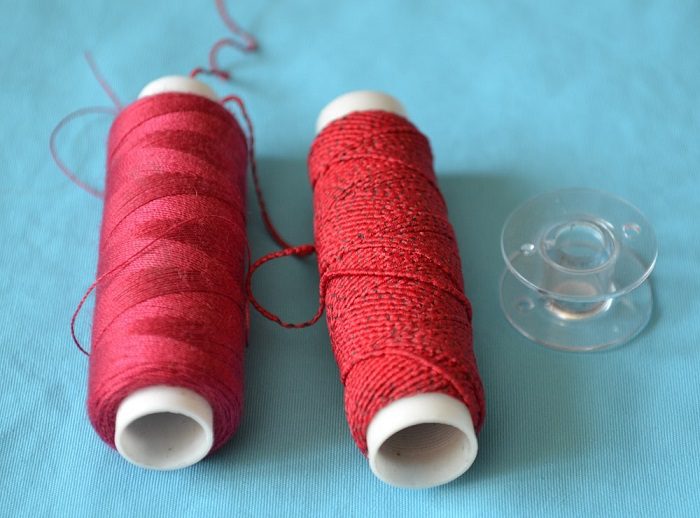
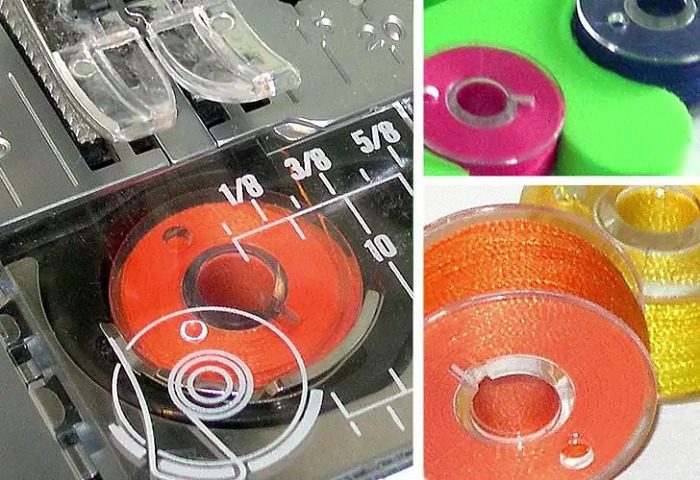
No More Thread Tangling
Threads might tangle a lot while sewing. But, don’t worry, as we have a hack for helping with this annoying scenario. If you have ever taken a look at your tailor’s professional sewing kit, you would surely notice a circular beeswax within easy reach.

Run your thread through the beeswax and see how easy it is to work with! The wax makes the thread effortless to use and helps prevent it from tangling. The notches in the plastic are there to assist you in getting the thread easily through the wax.
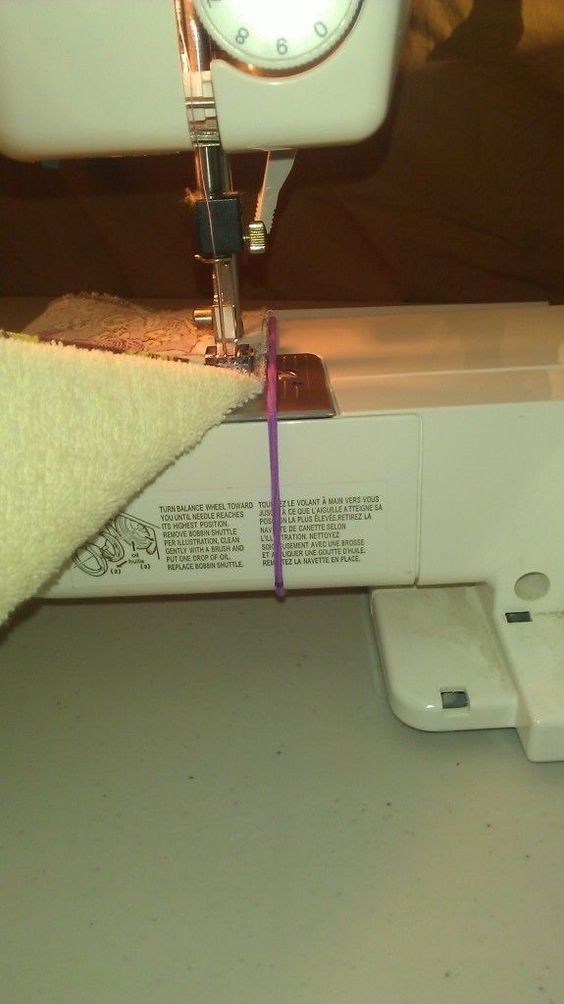
Avoid Pin Hitting
If you are an avid sewer, we can guess that you are exhausted from hitting the pins you use to keep the fabric in place while sewing with the needle of your sewing machine. This is the reason for many needle changes and can slow you down. You will want to try placing the pins horizontally. This way, the pins will not be in your way while you work, plus they will be visible, and easy to remove.
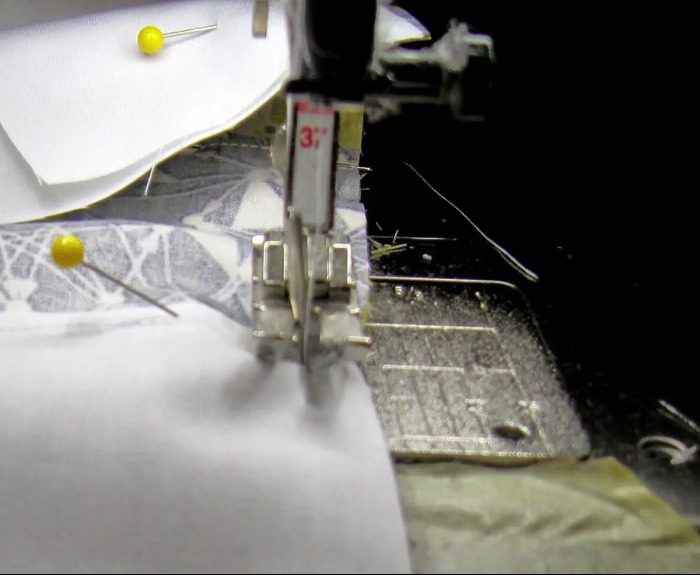
By doing this, first, you won’t hit the pins with the needle, and second, they won’t damage your machine. It is a simple trick but becomes very handy when you are working on intricate sewing projects that require many materials.
Making Scissors Handy
To say that scissors are only required when you need to cut the fabric in the initial stages of your sewing project is wrong. They are an essential sewing aide needed throughout the sewing process. However, many times, you might forget where you put your scissors.

Tie a string or fancy cord or ribbon through the loop of the scissors and ensure that the string is long enough so you can place it around your machine or attached to your table edge. This way, they will always be reachable by your side when you need them. Simple!
Use Binder Clips
The most common problem while sewing a lightweight or really stretchy fabric is holding the two pieces in place without them moving. There is a fantastic hack that will help you when the situation arises. Use a binder or office clips to hold the layers together without them being able to move or distort.
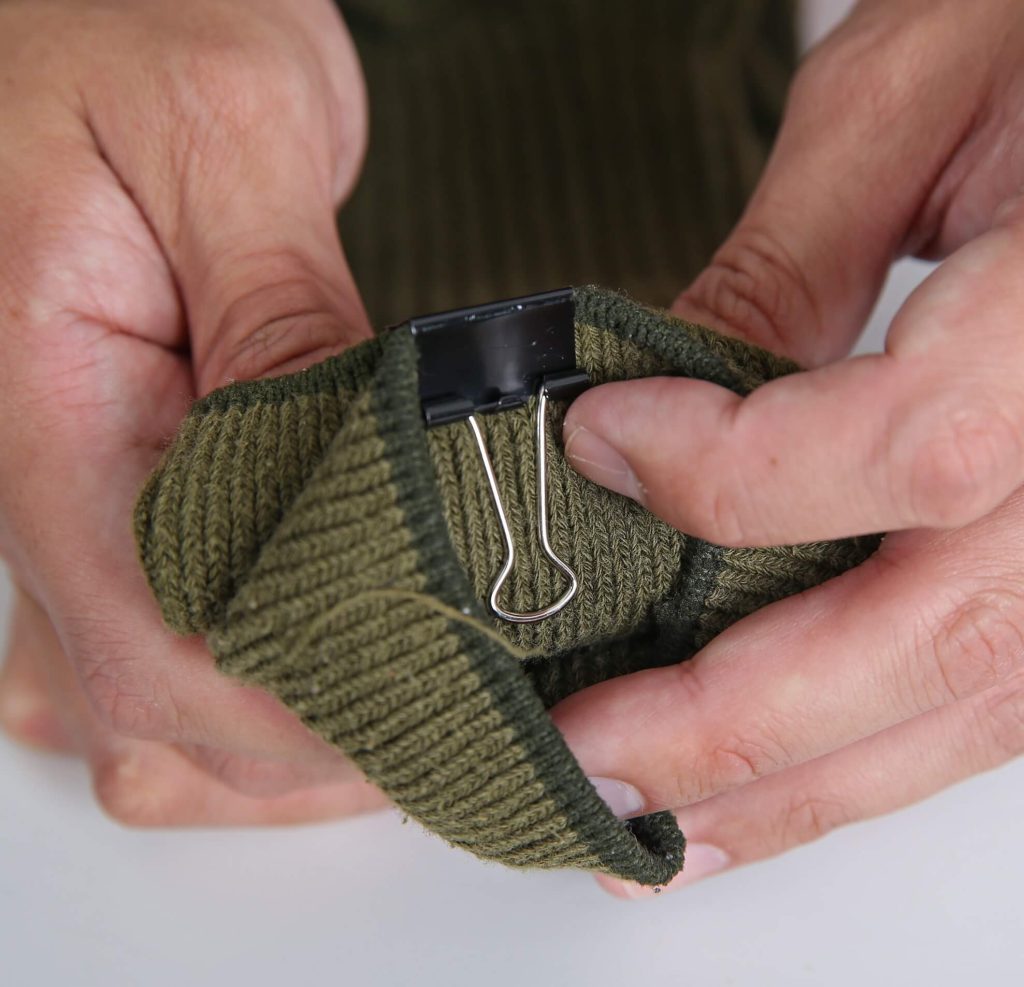
These handy clips will surely let you keep the layers of the fabric fixed in one place together while you are maneuvering them through your sewing machine. Please remember to remove them though just before the needle is about to sew through that area of fabric to ensure that you do not damage your machine’s needle in any way.
Steel Wool to Sharpen your Needles
Overusing needles and pins can make them dull over time. But don’t worry since this hack will surely help you out with this problem. We suggest you keep your needles and pins in a steel wool cushion. The stainless steel wool will never let your precious needles rust.
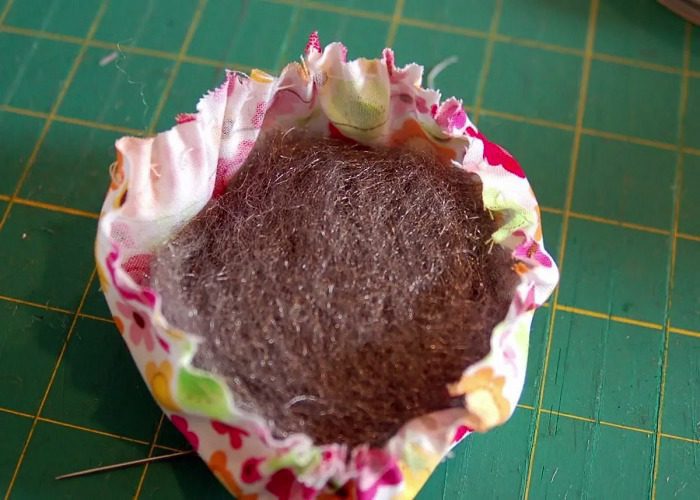
To make a perfect steel wool pin cushion, place a ball of steel wool in a piece of cloth and secure it around the edges. Place and store your needles in the steel wool when you don’t use them, and keep them sharpened with no effort on your part.
Push the Needle Eye
Whether you sew by hand or with a machine, the most taxing task is surprisingly, the supposedly simple threading the needle because often the edge of the thread frays, making it hard to use. It becomes annoying for you to cut the end of the thread over and over again.
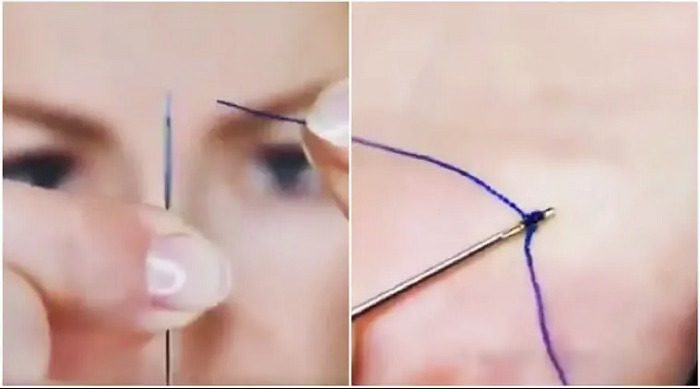
Push the needle eye onto the tip of the thread instead of pushing the tip of the thread into the needle eye. Also, try to pinch the tip to compress it into a shape that can easily glide into the needle eye.
Magnet Hack
Having all your tools and equipment at hand when you need them the most is what everyone wants, especially when they are very tiny yet extremely important, like pins and needles. But there is a hack other than a pin (or steel wool) cushion to keep your needles and pins in one place.
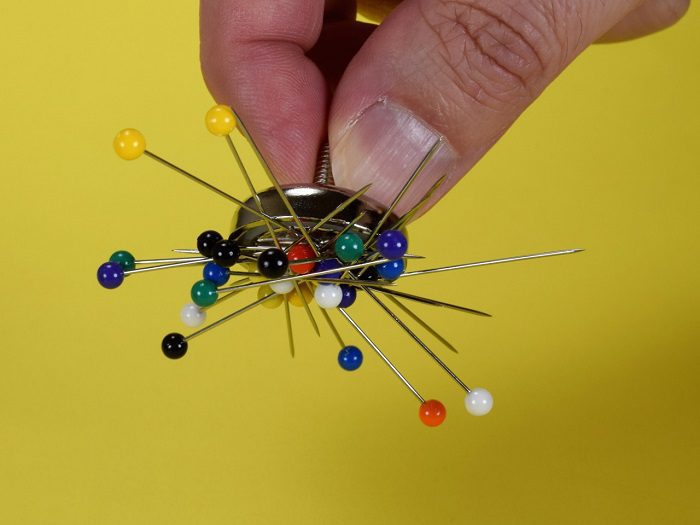
A nifty way is to keep a magnet in your sewing kit to “attract” all your pins and needles neatly together in one place. Also, after you have finished working, simply run the magnet over your entire work area and watch the power of attraction before your eyes! No one wants to step barefoot on a forgotten pin!
Soap Pin Cushion
As we have already established, pins are crucial for the sewing process, whether you are using a machine or just doing a quick repair to a pair of holey socks! And it’s important to keep all your pins within easy reach, as you don’t want to have to stop what you are doing so that you can search for the much-needed pins.
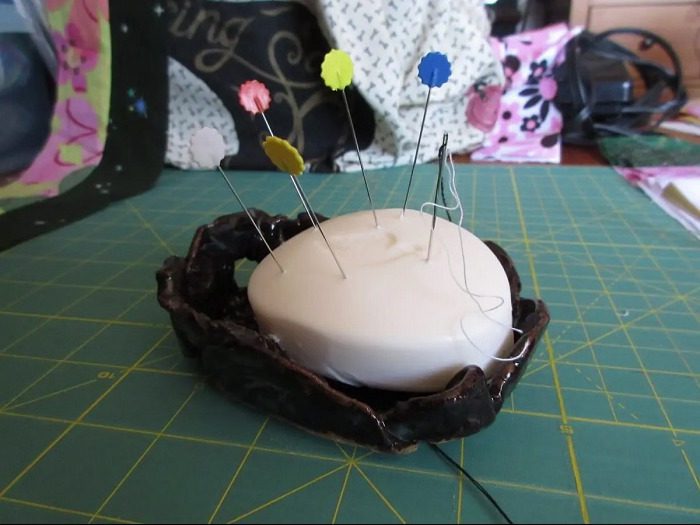
Try using a soap bar to help you keep your pins and supplies within easy reach. You can also cover it up with a spare piece of fabric as it makes a perfect cushion for your needles. The soap will also spread, adding a light fragrance to the room and will keep all your pins together.
Old Blankets for Batting
Soft, wooly blankets are still preferred these days as they are warm, breathable, and are made up of natural fibers. But with time, they loose their “newness” and start becoming not as welcoming. However, you don’t want to discard them. Here is a way you can use them efficiently!
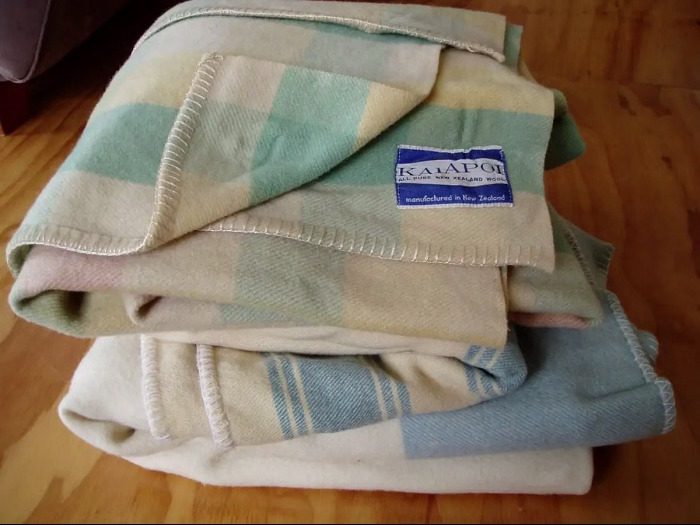
Instead of buying costly new batting for your next quilting sewing project, you can also use the old blankets as the batting because they are very soft and are the right thickness for the perfect quilt. Plus, they are easy to fold as well.
Hold the Drawstring
We all love to wear hoodies in winter since they are super snuggly, and you don’t have to worry about putting on a beanie or earmuffs. Yet, sometimes the most frustrating task with a hoodie is trying to fish the drawstring through the tiny hole if it has gotten lost in there somewhere.
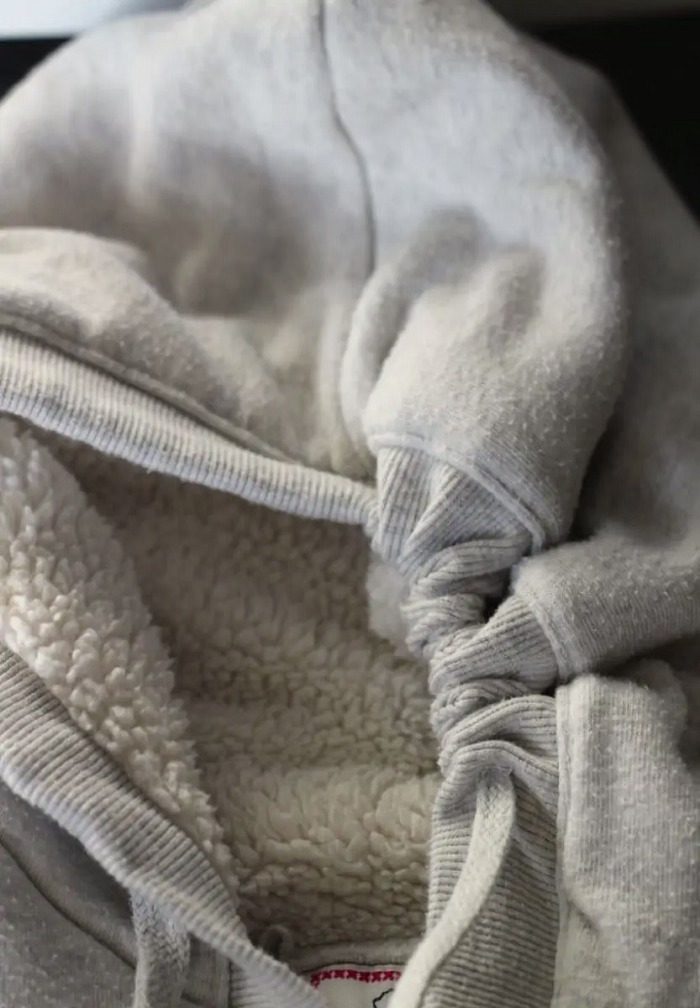
We have something you should try! Make a stitch in the middle of the back of the hood to hold it in place securely. With this, the front of the hood will look the same, and the drawstring will remain intact in the loop of the hood.
Serger Spool
While sewing on a machine, some people have a hard time dealing with the task of needing to change the thread over and again as the spool empties, and you might not know that you can use more oversize and long-lasting serger spool on a non-serger-type, regular sewing machine. Yes, you can do it!
You can use an old parmesan cheese container to store the bigger spool in, and if it sits behind your machine as a makeshift cone stand, you will be able to use the thread easily, the real hack here is to check the tension of your machine, and to use a larger needle, due to the different quality of serger thread!
Seam Allowance
Seam allowance is the exact measurement in from the edge of the fabric that you need to stitch on to ensure straight, and perfectly sized items. To get the seam allowance accurate need not be a daunting task, especially if you take into consideration this simple hack.
A rubber band secured around the surface of your sewing machine is the best way to clearly mark a visible and even a broader seam allowance. Plus, you can also measure and move the rubber bands into place exactly where you need them. Simple!
Make Your Bias Tape
Bias tape is very much needed in many sewing projects, including quilting as it allows you to place a neat and professional-looking border around the rough edges of your creation. However, ou don’t need to run to the market when you’re in need of expensive bias tapes as they are very easy to make at home.
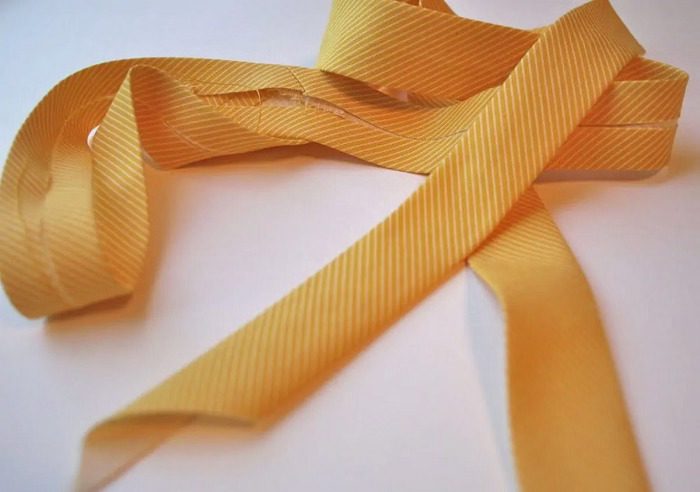
Measure and cut strips of fabric as needed. You may choose the width depending on your preference and the project at hand. Make a template in cardboard the desired width needed, and fold the fabric around the template and iron it into place. Your bias tape is ready. You can make it as creative as you want.
Stitching Tip
Whether you are a beginner or a professional, you must ensure that your sewing machine is executing proper stitches, with the right tension, and thread length. Otherwise, your project can get ruined. So, always do a trial run on a piece of scap in the same fabric before actually working on your main item.
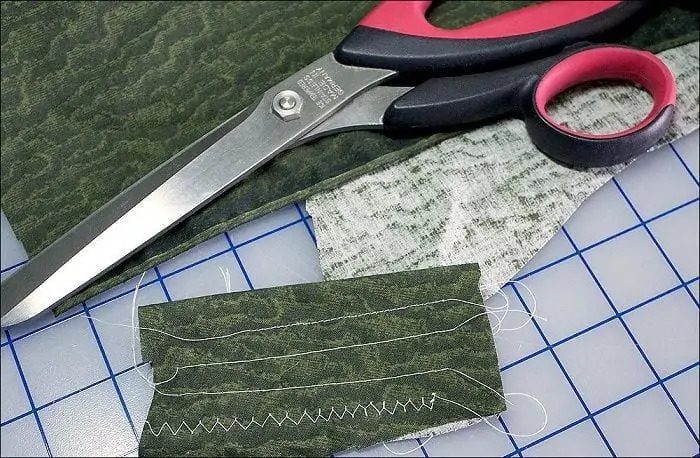
Take a piece of leftover fabric (after you have cut your pieces) and ensure that your machine is set up correctly. Try a few stitches on it and see if they are coming out well. If not, you might end up ripping out the stitches and having to start over.
Elastic Threads
Custom pieces and one-of-a-kind clothing items add charm and can enhance your personality. Instead of always using regular thread, you can also try using elasticated threads as they are perfect to sew shirring smocking and gathering on loose lightweight fabrics for all kinds of garments and home decor.
Shirring your fabric shrinks it by around half of its original size and gives it a perfect shape when you put it on another garment. Smocking adds a touch of sophistication to your clothing. Elastic threads also give you the liberty to make ruffles.
Wash Your Fabric Before Stitching
Those who sew frequently know how different fabrics can be from each other, and some need special care. In many cases, it is vital to pre wash your fabric before you start to avoid it shrinking afterwards. Pure cottons and other natural materials are prone to shrinkage.
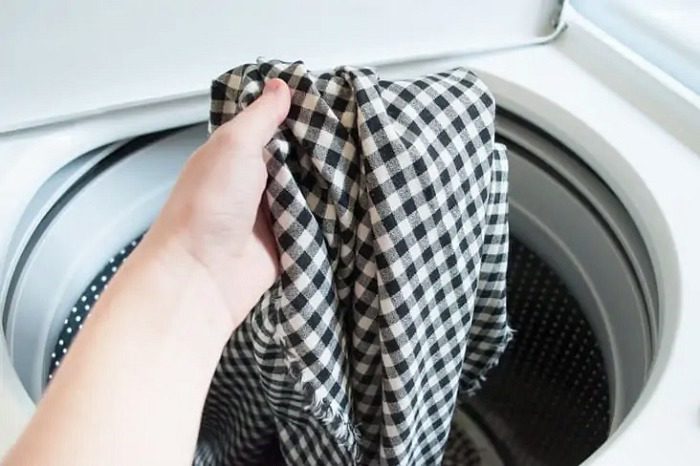
We suggest you wash your fabric before sewing it because by washing the material, you avoid any kind of shrinkage that you might run into after you finish the project. This trick works well with almost all kinds of fabric, except 100% polyester.
Safety Pins for Bodkins
While stitching loops in hoodies and waistbands, you need to make sure that the loop is wide enough to get the string to glide easily through it. However, there are many times when your strings do not have bodkins.

In the absence of bodkin, you can use safety pins as their easy replacement options. The hard steel of the safety pin helps you pull the string easily through the mouth of the loop in no time while holding it in place till you get it safely through the other side.
Thumb Marker
Making evenly spaced stitching patterns is very important, especially when you’re sewing by hand, as these things are already customized in sewing machines. Besides, these even spaces show your expertise and result in a professional-looking item. We have a fantastic hack that will help you a great deal!
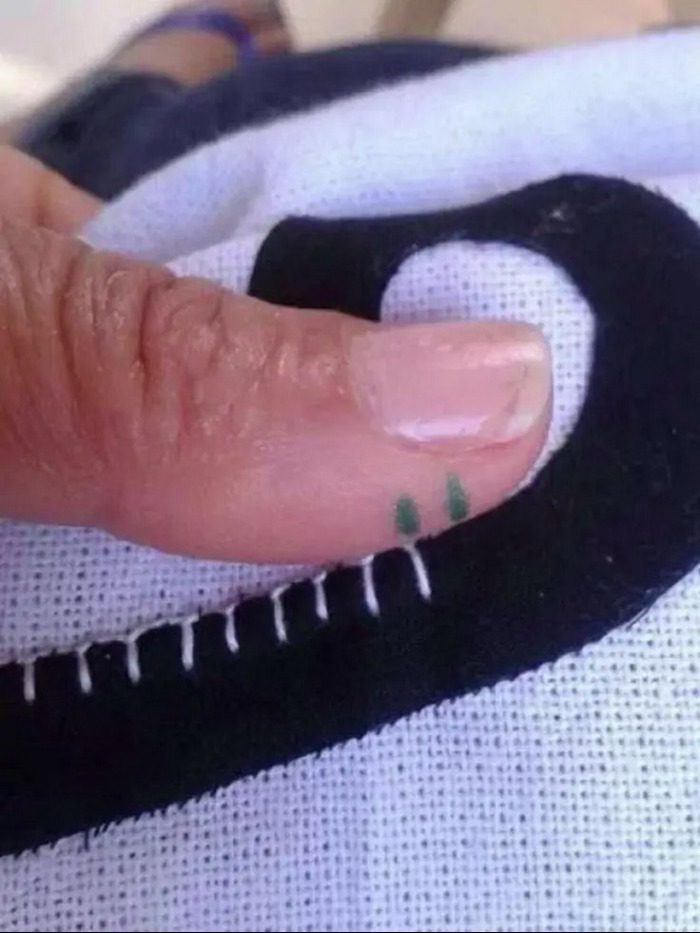
While sewing by hand, your thumb already plays a great role in holding the layers of fabric together. To use it even more, make even marks on your thumb using a Sharpie as a stitch guide. It will make you stitch evenly without any hassle.
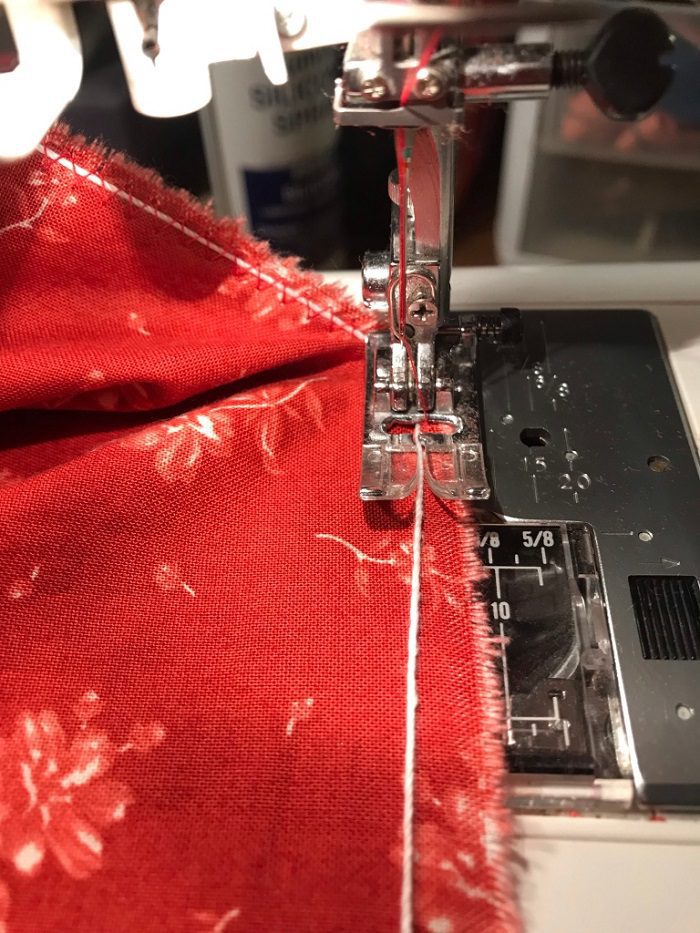
Jean Repair, No Tailor or Seamstress Required
A high-quality pair of jeans will actually save you money in the long run, because after all, jeans were originally designed to take a beating and are a hard-wearing, and durable fabric. Nevertheless, there are a few hot spots that wear out faster than others. Fear not, you’ll simply need a sewing machine and a matching-color fusible interfacing for this fix.
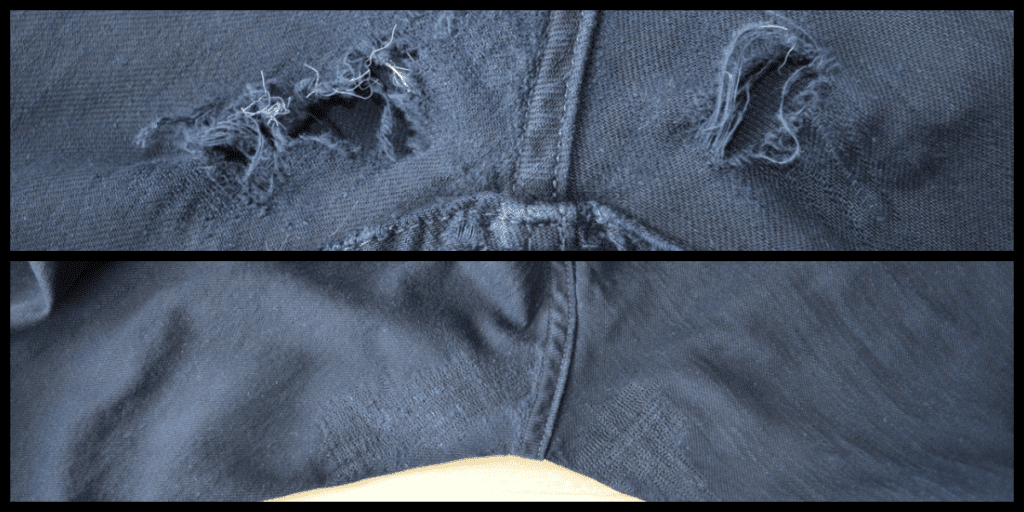
All you need to do is sew fusible interfacing over the holes while making sure to follow the grain of the original fabric. A stitch length of 1.5 should do the trick. The result isn’t fully like new, but it’s sure as heck better than putting those perfectly-good trousers in a landfill.
Make Skinny Jeans
Sometimes, that good pair of jeans don’t have holes in them but, instead, aren’t quite your style anymore. Fashion trends come and go, and it can be difficult to keep up without buying into fast fashion. So, why don’t you try this trick?
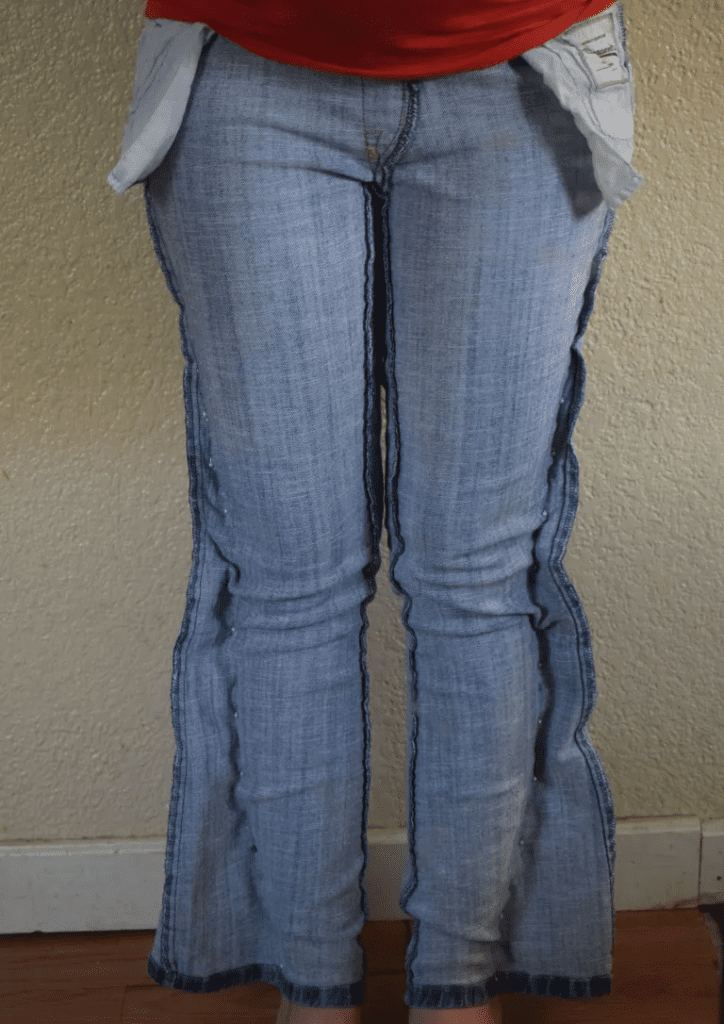
To give your jeans a trendy face-lift, take those baggy jeans that you aren’t wearing anymore. Put them on inside out and then pin them according to your preferred fit. Then, sew along the pins and cut off the excess fabric. Turn them inside out, and there you have it—a new pair of skinny jeans.
Make Ruffles with Fork
Ruffles, lace, and other decorative details are often used to embellish the wrist or neckline of a dress as they enhance the look of the outfit. If you are fond of sewing, you can learn to make them by yourself.
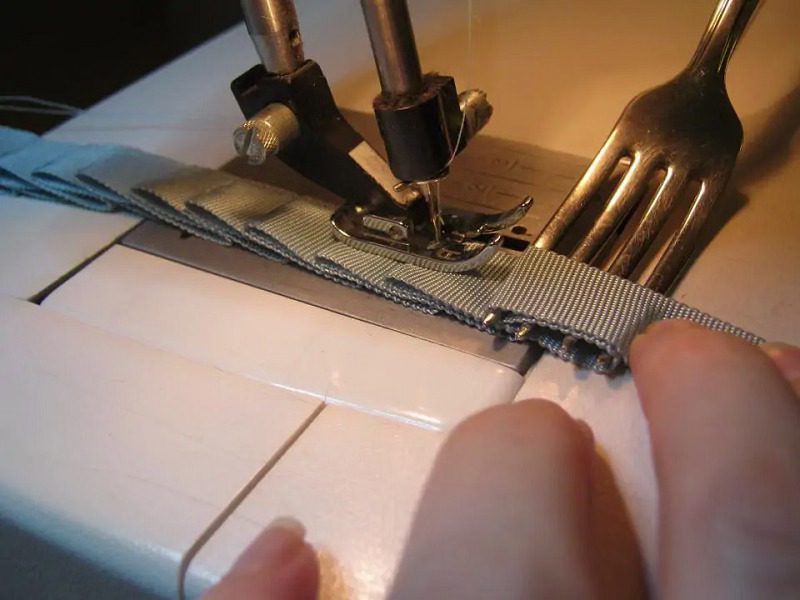
Believe us that you can make perfectly spaced ruffles using a fork! The fork allows you to efficiently fold the fabric to make proper and even pleats in your material. With this hack, you can also make stunning ruffles from satin, chiffons, and other materials.
Seam Ripper
It’s natural to make mistakes. With sewing, it’s easy to fix some accidental mis- stitching. Whether you pieced together the wrong fabrics or don’t like how it came out, you can easily undo the stitching and give it another try.
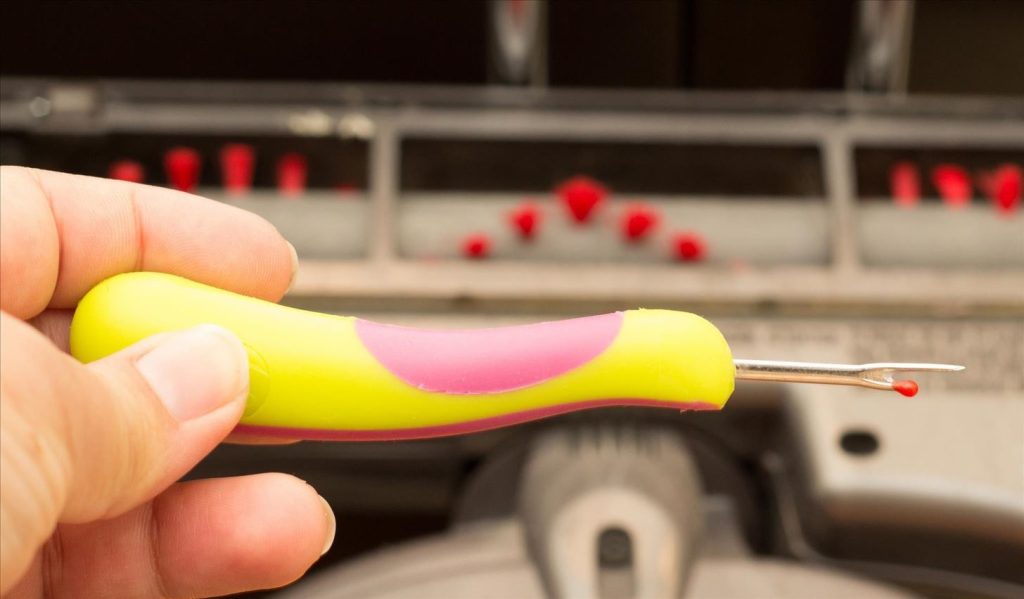
Don’t use scissors to undo stitching errors. Get a seam ripper from a sewing supply store for this delicate job. The thick steel is sturdy enough to slide in between even the narrowest of stitches, and the sharp blade in the bend will cut through the threads with ease.
Easy way of Using Serger
Many prefer sewing with this machine since it speeds up the entire process. The credit goes to the serger that makes sewing easy! But you must know the right way to use a serger to ensure the edges are neat and the tension and stitches look good.
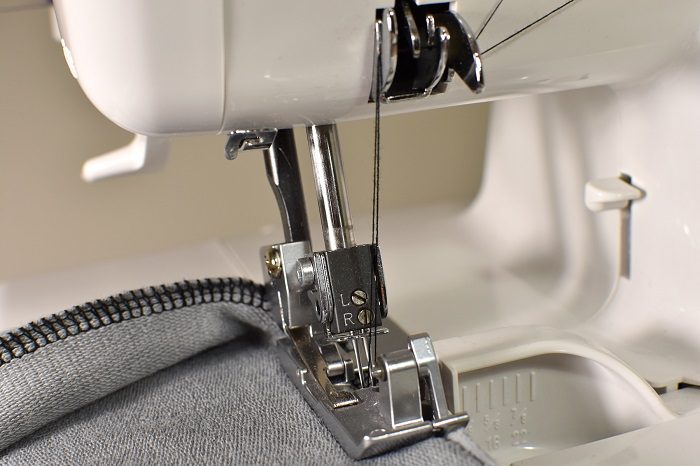
To deal with jersey fabrics correctly, lift the top knife of the serger by pulling the upper blade to the right and then turning it upwards. Fold the corner of the knit fabric twice and press the folded hem. Now, let’s finally hem knit fabric perfectly.
Sewing Buttons
When you have to sew only a few buttons, it is ok to do it by hand, but you need a machine when there are many buttons to attach to a given article of clothing. Sewing many buttons with a machine is not as hard as it seems. Let’s find out our next sewing tip.

Lower the feed dogs so that the needle can repeatedly stitch in one particular location. Usually, the feed dogs get lower automatically when you choose the button sewing function. You can also check the machine manual for better clarity, and remember to use the foot specially made for this purpose.
Install Zipper Easily
If you think that putting in a zipper is hard, that’s a myth. Now, you can install a zipper very easily with this trick. Keep the needle on the left-hand side and begin sewing along the right side of the seam.
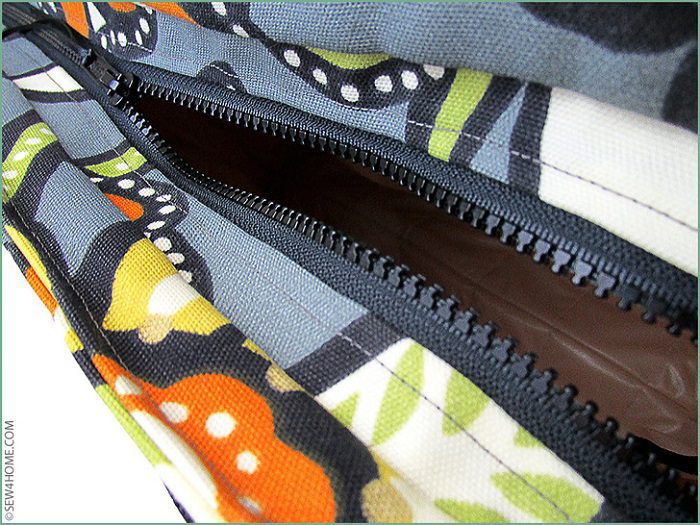
Slide your fabric underneath the presser foot and mark the bottom of the zipper. Backstitch a couple of times and then start sewing. Keep sewing the zipper until you are about two inches from the end. It’s done!
Stitching Bulky Fabric
You love to sew home decor at home. However, the fabric used is often too bulky to be sewn smoothly. Don’t worry, as this amazing hack will sort out your problem in seconds, leaving you ready to tackle anything.
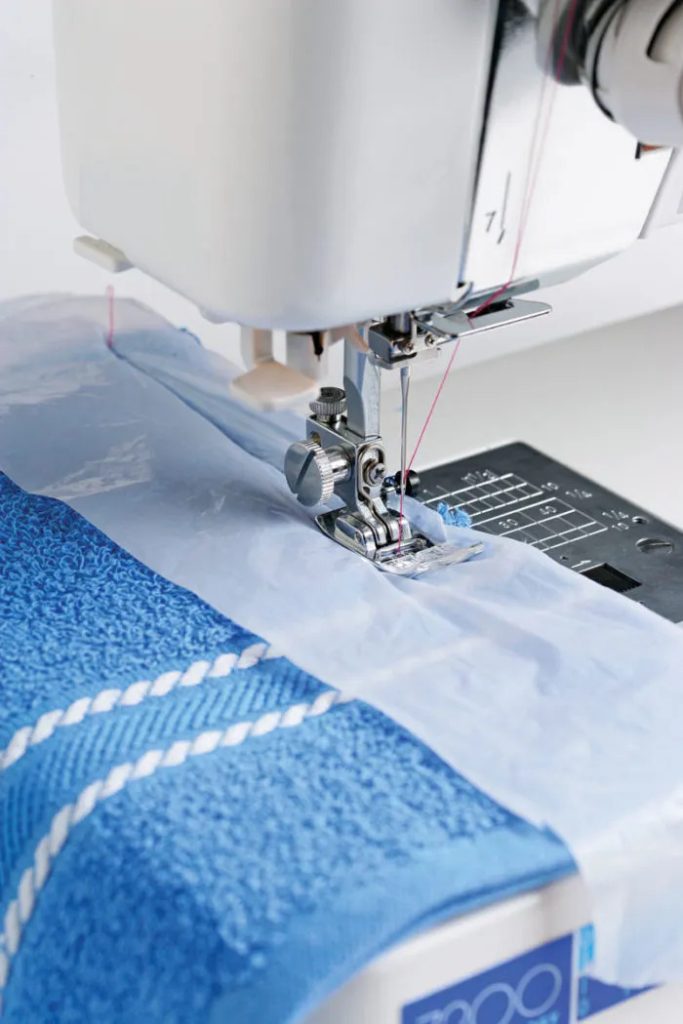
Try adding a plastic strip on top of your main material when you start sewing it. This will help any material such as toweling or roughly textured fabric feed easily under the foot of your machine allowing for smoother and more even stitching.
Sewing Buttons by Hand
Sewing buttons by hand is a helpful skill. You may be all set to go out, and all of a sudden, a button from your dress falls off. It’s very annoying, but we can surely let you in on a trick that will help you sew a button back on in no time.
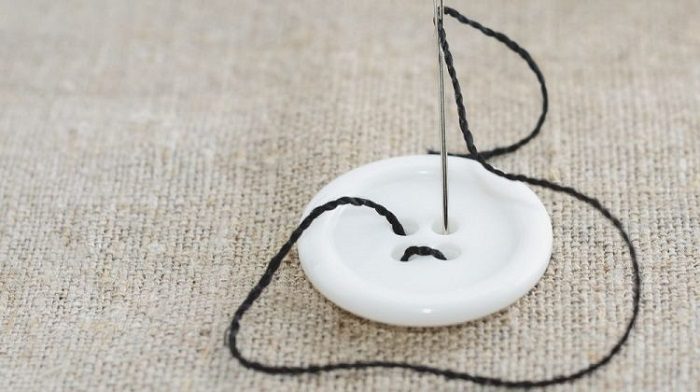
Just make sure the thread is the right length before you start and is not pulling the fabric along with it. Keep the button static in one place and sew it along with the pattern of the button like the picture. Isn’t it easy?
Making Crisp Corners
While sewing shirts, you might become anxious about making crisp corners as they make the garment look neat and professional. Let’s discover some ways of making sharp corners. You can always turn the fabric inside out when sewing for a perfect corner.
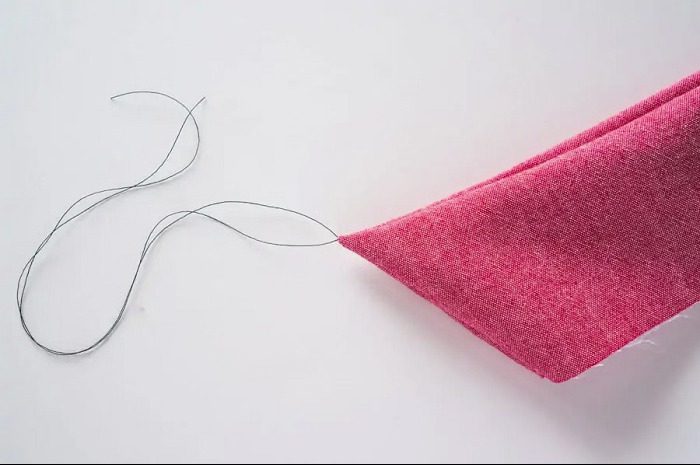
Besides, you can use a short stitch length to square it off with 1-2 shirt stitches as you approach the corner. You can also sew the corner stitch over a piece of thread and then use that thread tail to pull the corner. Another tip or two is that it also helps to trim away the hem allowance and use a blunt object to push out the corner while the item is inside out before it is attached to the garment.
Remembering Skirt Length
When making skirts, it is very difficult to remember the length as each skirt has specific measurements. And of course, you can’t remember all the things. Let us go back to our school days for a perfect solution to the problem.
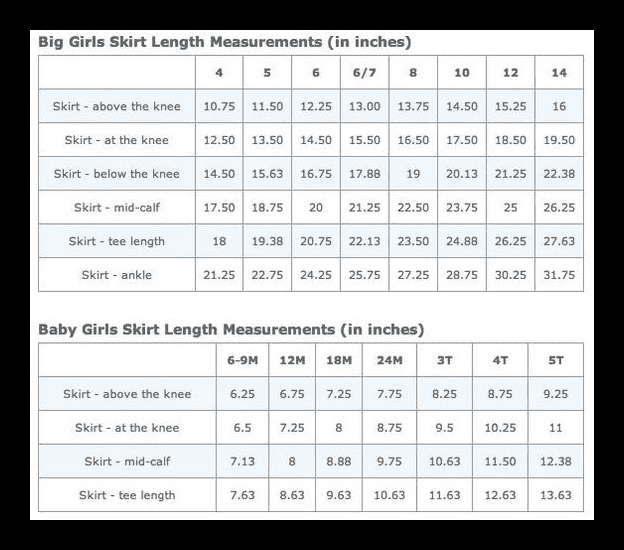
You can always refer to a cheat sheet by printing out the required length measurement for various kinds of skirts and keeping it close when needed. This way, you can refer to it whenever you need without having to do any additional research.
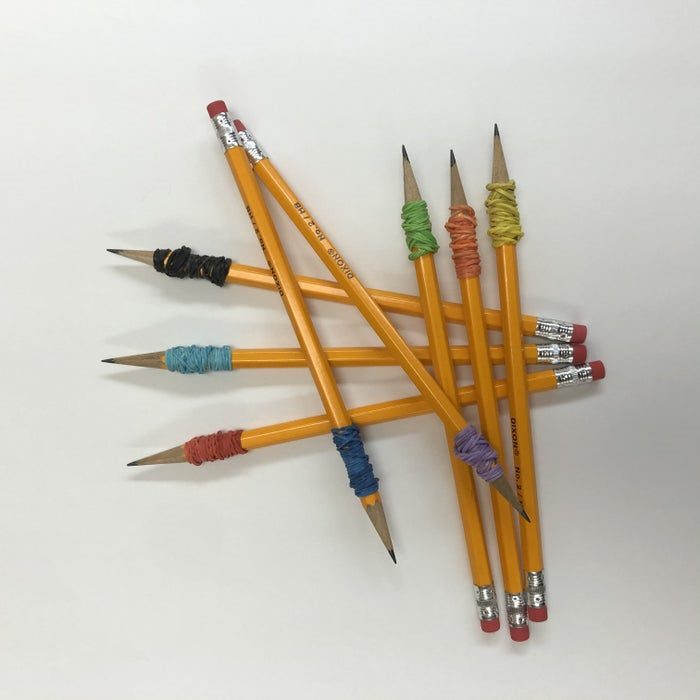
Toe Separator for Bobbins
You must have a collection of bobbins if you sew with a machine. However, they are very tiny. Reeling them when you are in a hurry is not ideal. Let us share a simple hack to keep your bobbins well organized and ready for use.
The best way to keep bobbins handy in one place is to secure them by using pedicure toe separators which are easily available in dollar stores or sewing shops. They keep the bobbins in one place and make them visible and easy to select. You can color code them too – now that handy!
Stitching the Perfect Quilt Line
Those who are fond of stitching quilts at home understand the struggle of stitching perfect quilt lines, as the excessive width of the quilts makes it tough to stitch proper lines. We believe this hack will help you with this problem.
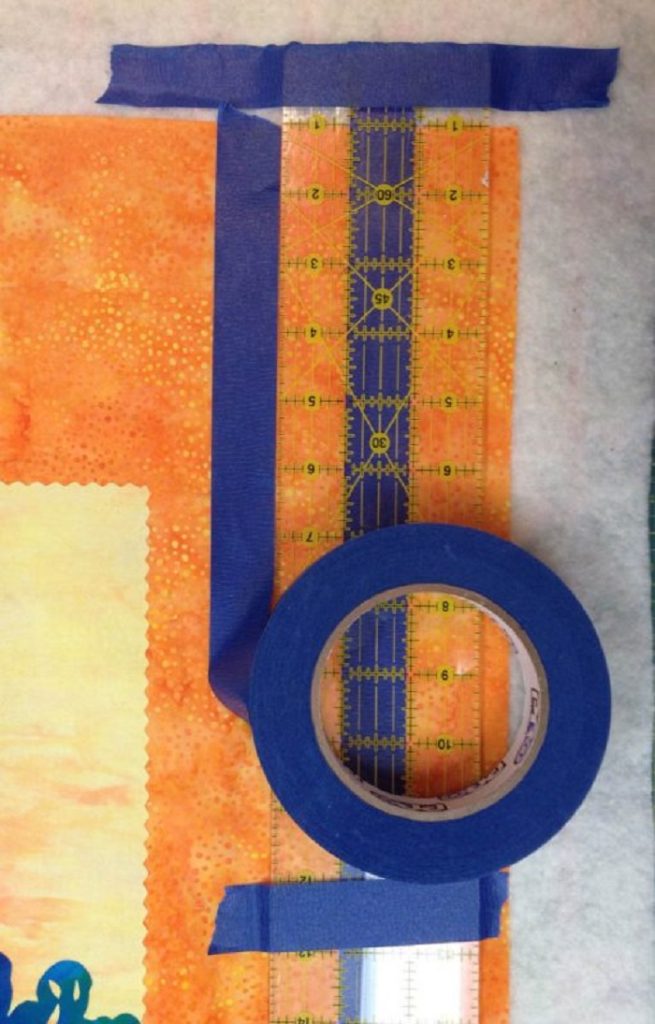
You can use masking tape at the place where you wish to draw lines and then mark the edges of the tape with a pencil. The tape will not let the squares move, which will help you create the perfect margin to sew.
Marking Perfect Seam Allowance
While stitching the edges, you always ensure that the seam allowance is the proper width. In the beginning, it makes it easy to loosen the garment if you wish and provides double protection to your stitches. This hack is simple yet very effective.
The best method to mark a perfect seam allowance is by tying two pencils with a rubber band and then drawing a seam allowance. You must ensure that both the pencils should be around 3/8-inches apart from each other.
Secure Your Buttons
Buttons can make any piece of clothing look fabulous. And losing a button is losing a lifeline of your dress. Don’t get tense, as this hack will surely help you out in keeping your buttons where they are meant to be for longer.
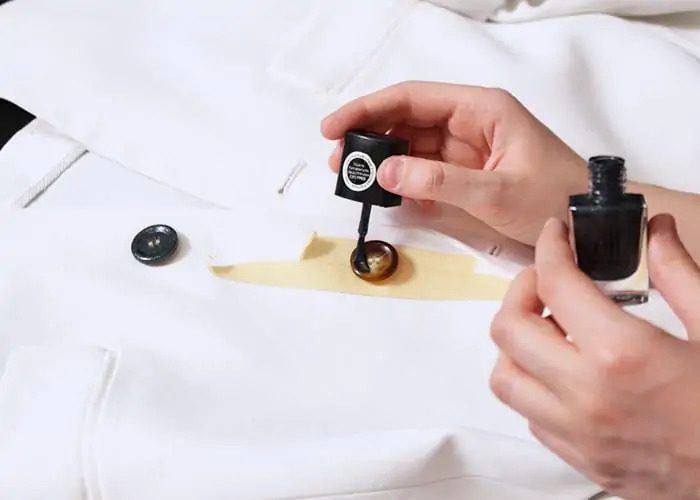
The best way to keep from losing a button is to paint a thin layer of transparent nail polish on the top of the threads of your button. It will help prevent the threads from wearing down to fast, and help keep them in place better.
Organize Your Trim
Trims are applied notions and haberdashery, such as gimp, passementerie, ribbon, or ruffles that you use to enhance the overall look of an item of clothing. Most of the time, they are very thin, and you need to keep them safe so they won’t get tangled.
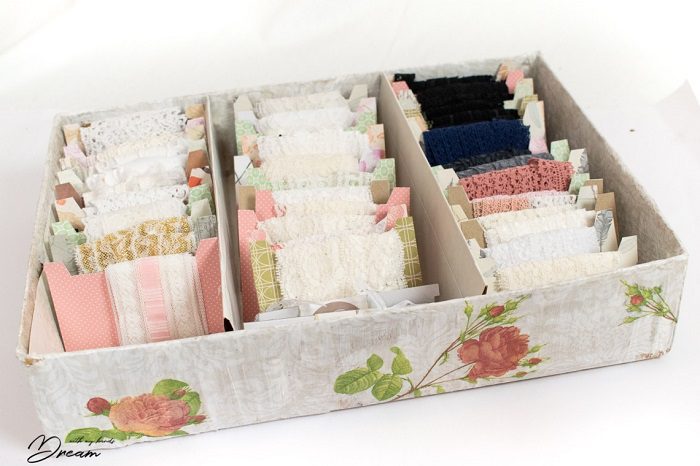
The best method for keeping your trim organized is cutting up a rectangular piece of cardboard. You may take the cardboard either from a shoebox or a cereal box. Now, wrap the trim around it and keep it safe from tangling, secure the ends with a pin of some tape.
Gathering Fabric Easily
When you are making a garment with many gathers in it, such as a skirt waistband or a vest neckline, you need to gather fabric very quickly. And the fabric used for these garments is usually too hard or stiff to be manipulated easily.
You can use a thick and durable crochet thread here since it is less fragile, so you don’t have to worry about it snapping. It helps tremendously to hold the fabric in place when creating ruffles and pleats. It is a must-try hack!
Organize Your Sewing Pins & Needles
Pins and needles are the tiniest yet the greatest equipment for sewing. You can’t replace them with anything else. However, keeping these pins and needles safely in place is very challenging. This hack is here to save the day.

Stick a small steel or iron bowl to the top of your sewing machine to keep your pins and needles in one place. You can even glue two small magnets to the bottom of the bowl and then keep them on your machine.