
35+ Ways To Repurpose Old Tin Cans Into Unique And Useful Household Necessities
Tin cans might seem like trash, but in actuality, they are far more useful than we ever imagined! You can easily repurpose and transform them into unique decorations or nifty storage containers. Many people have a stockpile of canned foods already, but they have no idea that that can extend the life of each and every can if they have some inspiration to do so. We are happy you stumbled upon this article because we are here to show you all the nifty ways you can transform that empty, silver can into something you can either use or simply enjoy forever! From making cute decorations to useful storage containers, there are so many options to revamp those otherwise boring tin cans. We know there is something here for everyone!
Tin Can Decoration
Let’s start with the simplest way to repurpose tin cans, and that’s turning them into decorations. This tin can project requires a few tin cans and empty shelves that need filling, especially if you are going for a vintage look.
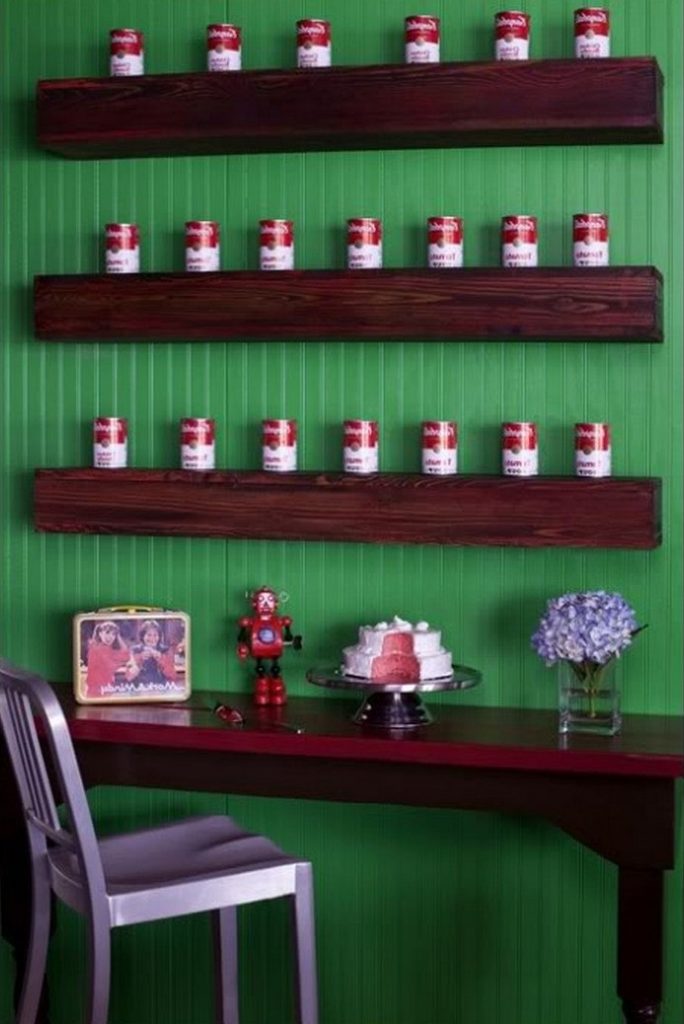
All you need to do is collect a bunch of empty Campbell’s Soup tin cans. We love the design of these classic labels, but you can use any brand you want! Once that’s done, place them on top of the empty shelves as decorations.
Tin Man Decoration
Fans of the classic children’s movie, The Wonderful Wizard of OZ, must be familiar with this silver Tin Man, a popular character from the film. For all you fans of this particular character, here’s how you can make a Tin Man decoration out of those empty tin cans you were about to throw away.
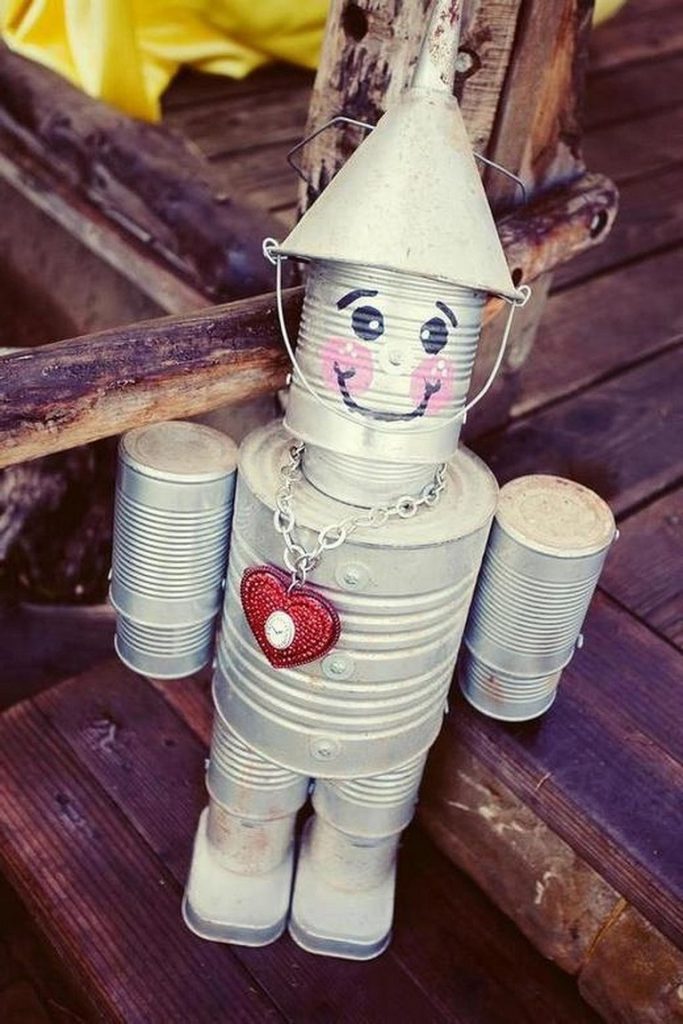
The body of this Tin Man is made of one large tin can, while the other body parts are made of smaller ones. His arms, legs, and head consist of smaller tin cans that are stuck inside a slightly larger one. To finish him off, add his signature pointy hat.
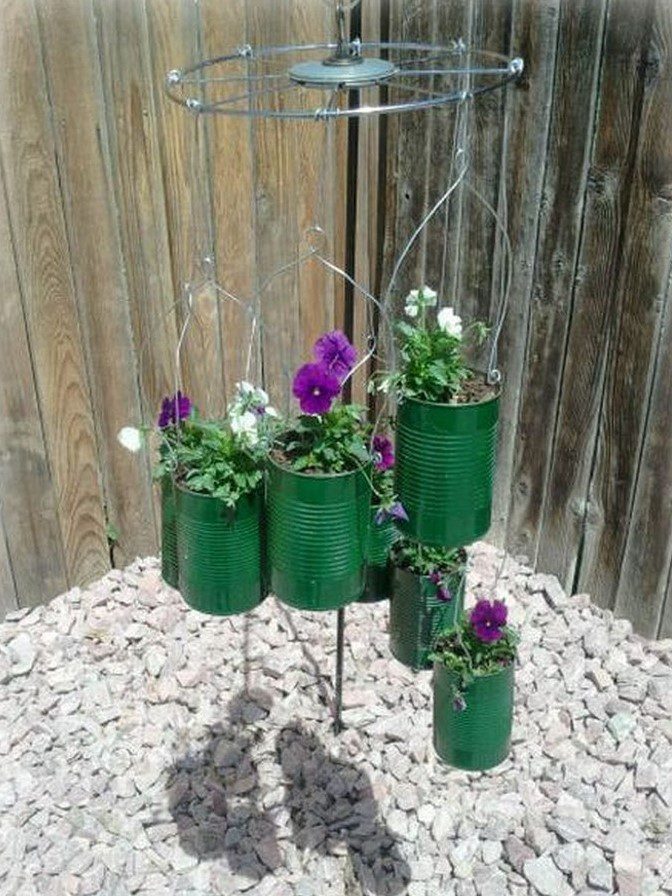
Garden Tin Man Decoration
Alternatively, you can create this garden “scarecrow” decoration that resembles the shape of a man; this is a slightly easier and modified version of the one above, but it doesn’t look as similar to the actual Tin Man. Instead of his pointy hat, this person used flowers.
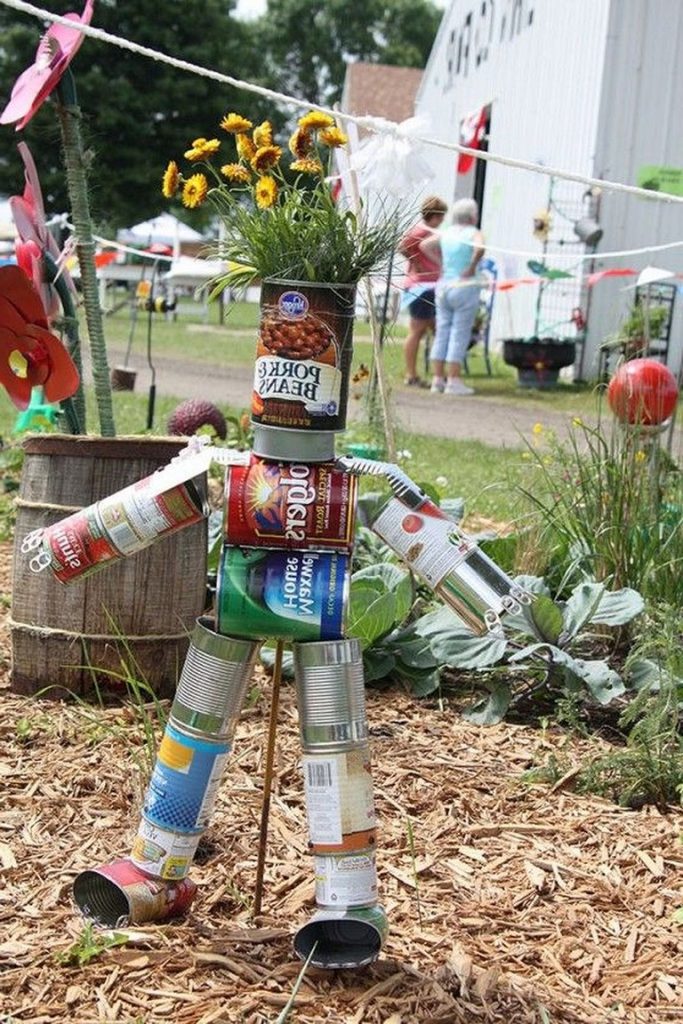
This garden tin man decoration is made entirely of small tin cans; its head is made of one upright standing tin can, whereas the body is made of two horizontal ones. The tin man’s arms and legs consist of a few small cans that have been glued together.
Owl Decoration
Furthermore, you can also repurpose tin cans into adorable owl decorations. This project is a little more complicated than some of our other ideas on this list, but with a little patience, you’ll be able to recreate this one-of-a-kind piece!
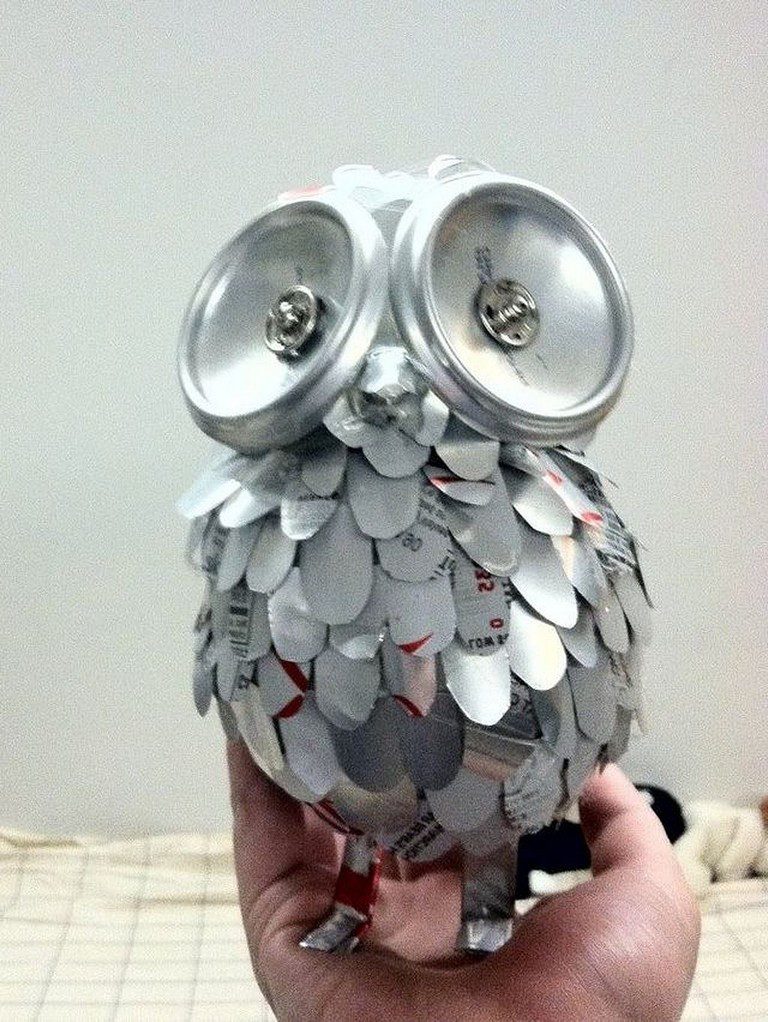
To make the owl’s body, start by cutting off the tops and bottoms of the tin cans. These will serve as the owl’s eyes. Then cut down the sides of what’s left and flatten them out with a hammer. After that, cut them into scale-like pieces and start gluing them around another tin can.
Tin Dog Decoration
Next up, we have a tin dog decoration that can actually move! This is a neat “toy” for younger kids who are dog lovers. Additionally, this is an easy DIY project, so pamper your little ones with this special gift!
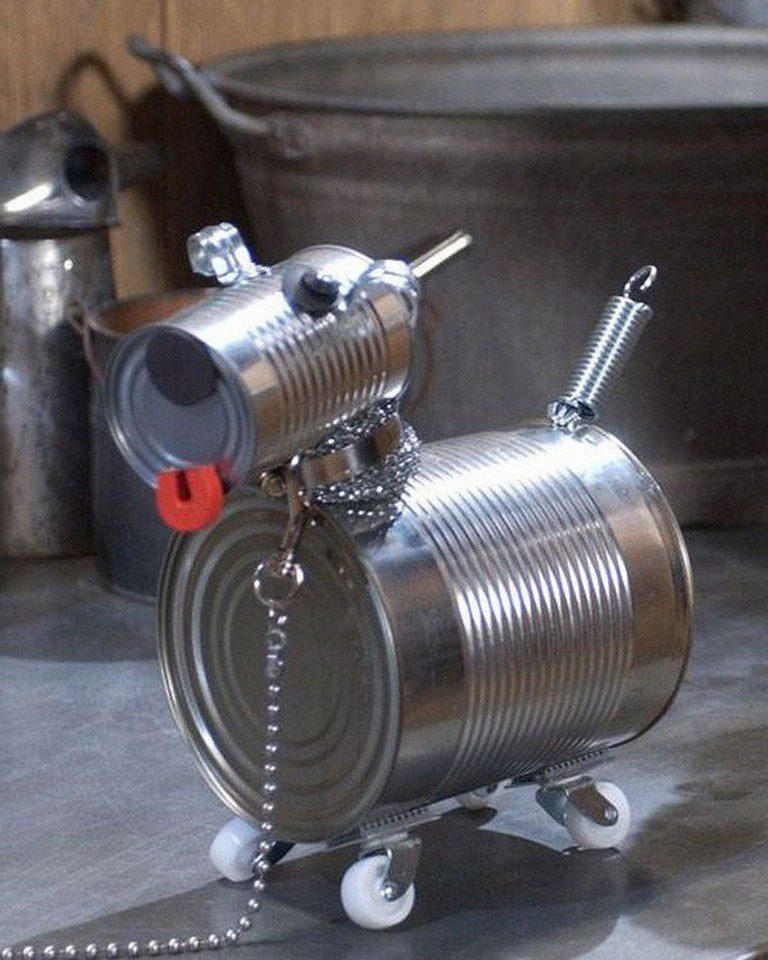
Use a large tin can for the dog’s body and a smaller one for its head. Then, attach some magnets to create eyes, a nose, and a tongue. Use a spring to create its tail. Finally, attach a leach and some wheels at the bottom.
Fairy Light Lantern Decoration
Nowadays, lanterns, especially those that consist of fairy lights, are a rather popular choice of decoration for both indoors and outdoor settings. Unfortunately, some lanterns are pretty pricey, but that’s not a problem because we can create one with tin cans!
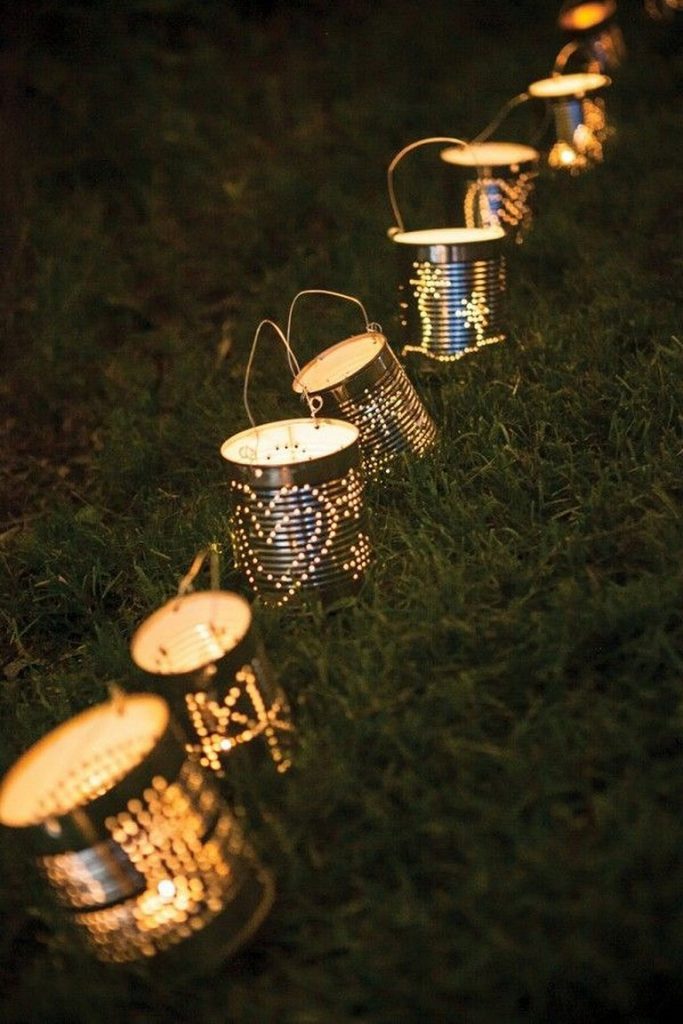
First, remove the tin can rim and sand down the edges. After that, sketch out a design on the body of the tin can with a marker. Then, using a hammer and nail, poke holes along the sketch. Finally, add fairy lights in each tin can.
Candle Lantern Decoration
Not all lanterns are filled with fairy lights. Some use traditional candles. Here, we have an unconventional candle lantern that you can hang on the walls as decorations. With these flat tin cans, this user removed their rims and smoothed out the edges.
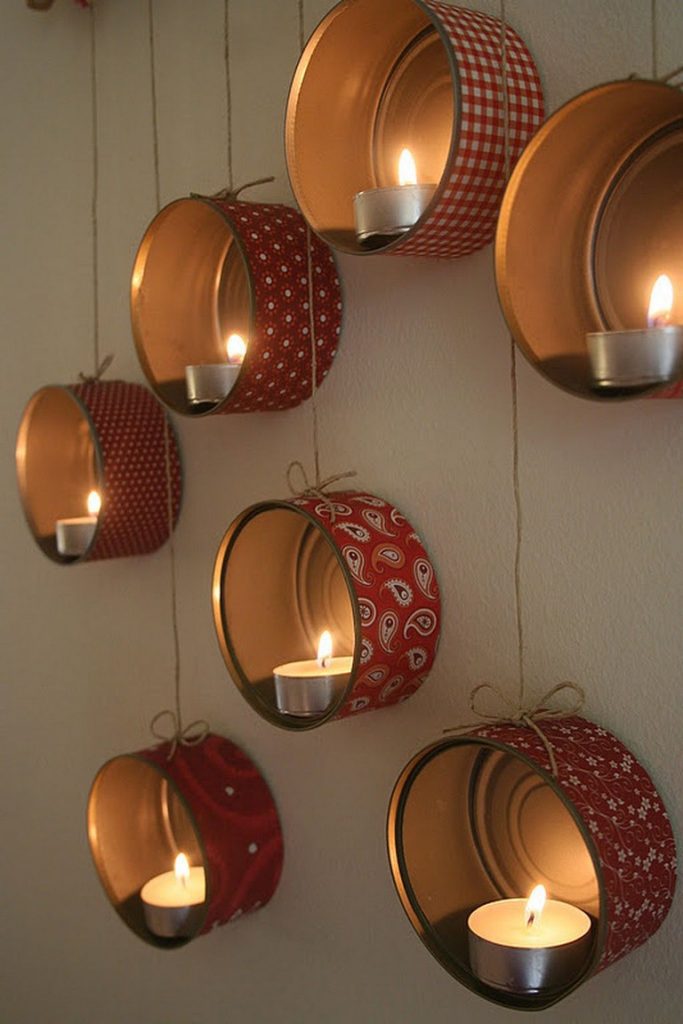
Prop the tin cans on their sides and glue candles to the insides of them. Of course, we suggest decorating the tin cans with patterned wrapping paper of your choice before threading the twine through them and hanging them on the wall.
Flower Decoration
Another easy way of transforming tin cans into beautiful decorations is by turning them into flowers. For this, you’ll need to cut down the sides of the tin cans from top to bottom and open them up. These strips will serve as flower petals.
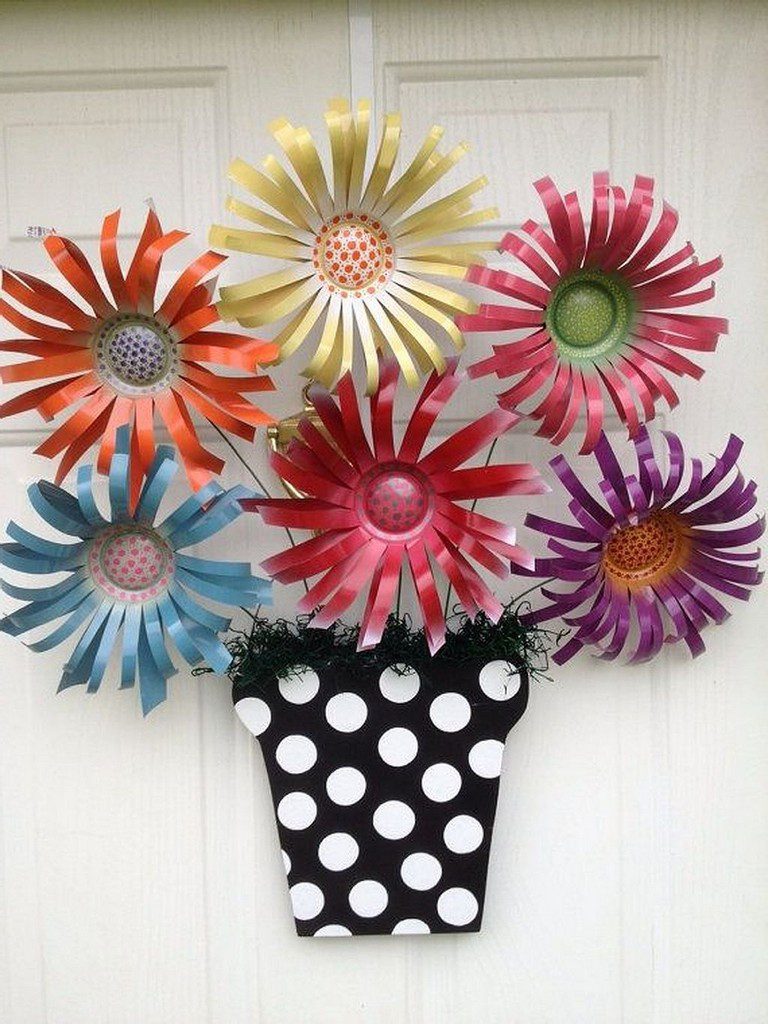
Next, spray paint the flower petals. You can paint a polka-dot pattern in the middle of the flowers to create disk-like florets. After that, apply some heat to the flower petals and bend them slightly so that the flower doesn’t look too rigid or stiff.
Word Wall Art
We bet you had no idea that you can repurpose tin cans into chic wall art decorations like this one. To create this, first cut the tin can all the way down the side and use a hammer to flatten it out completely. Then, using a marker, choose an inspirational word to write down.
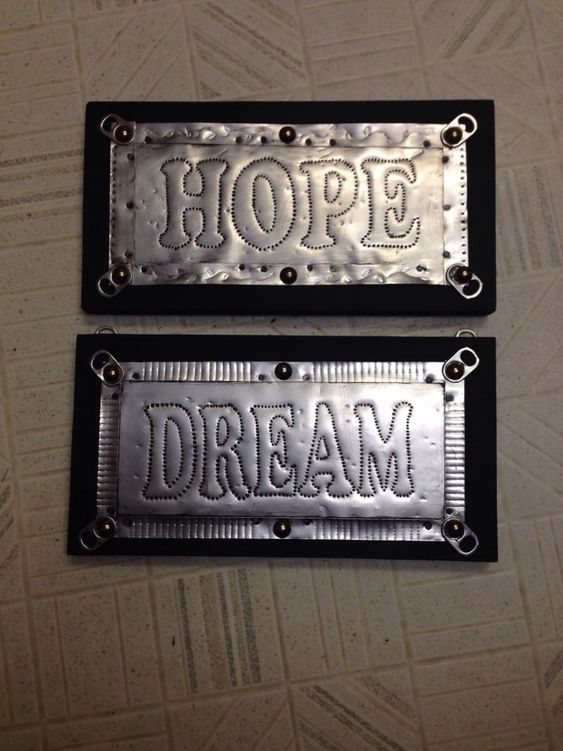
This person decided to use the words “hope” and “dream” on two flattened-out tin cans. After that, they punched holes along the sketch with a hammer and nail. Once this step is complete, attach it to a black wooden plank and hang it on the wall.
Scaly Wall Décor
This next tin can decoration idea is fairly different from the others we’ve seen so far. Unlike the other tin can decorations, this project consists of only the lids of our trusty tin cans. To create this scale-like wall décor, first, arrange the tin can lids beside one another.
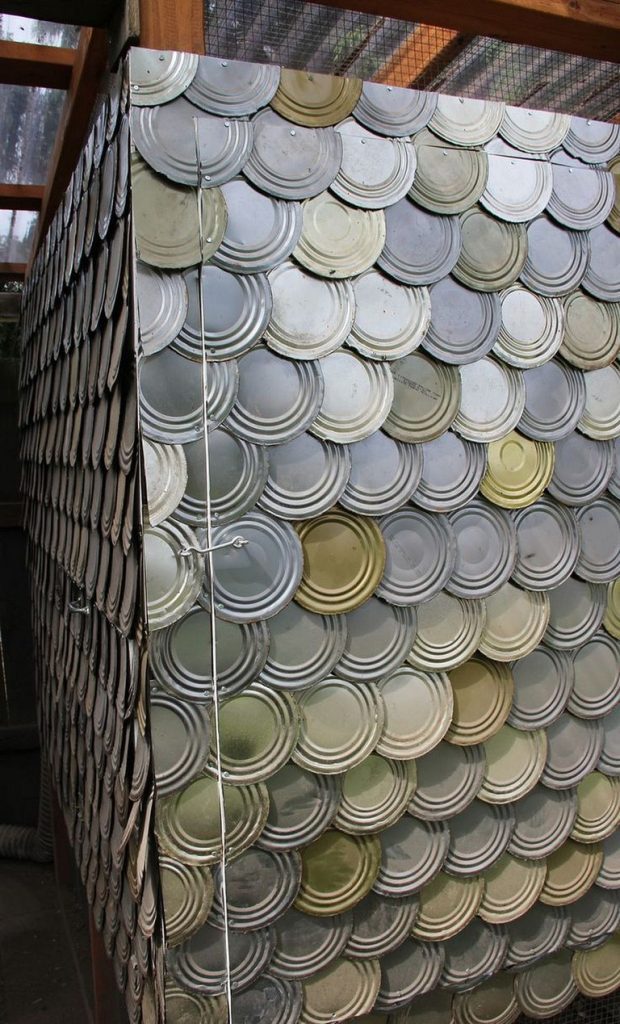
Be sure to arrange them so that the lids on the left overlap the ones on the right, and the top ones overlap the bottom ones. This will give the décor a scaly effect. Glue the pieces together or hammer them onto a wooden plank to secure them in place.
Ombre Chimes
People have used wind chimes for decades to scare away evil spirits and dissuade bad luck from entering the home. They are typically made of metal, wood, rods, or tubes, but did you know that you can create your own wind chime out of tin cans?
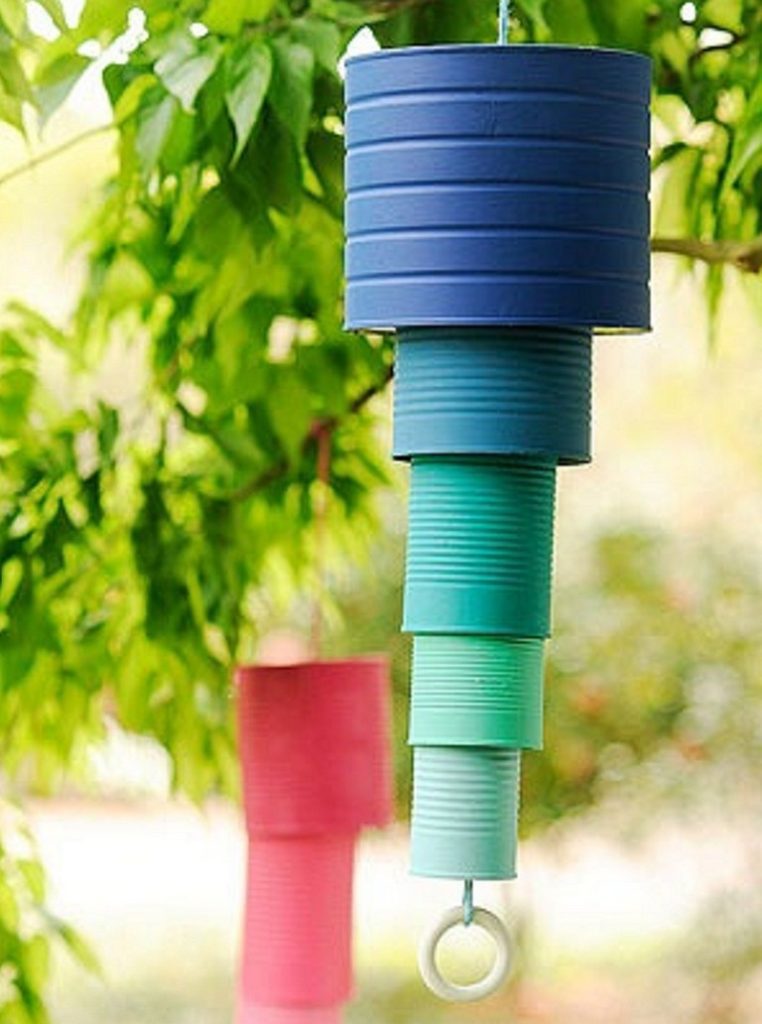
Start by collecting five tin cans of different sizes. Arrange them from big to small. The biggest one should be at the top of the wind chime. Once that’s done, clean, dry, and paint the cans in ombre colors. Finally, attach the smaller cans inside the larger cans as seen in the picture.
Kitchenware Chime
Honestly, there are many elements that you can include in your tin can wind chime. For example, this person made one with colorful beads and kitchenware like forks, spoons, and saltshakers. To make a similar one, you’ll need a large tin can, beads, transparent rods, and kitchenware you don’t use.
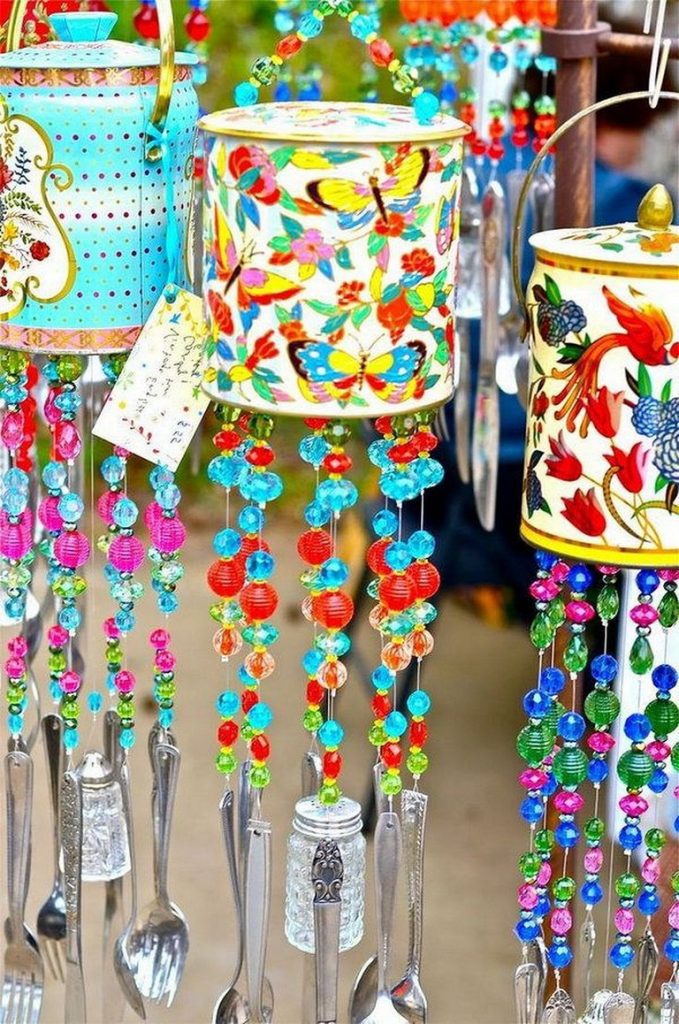
Firstly, decorate the tin can with colorful patterns. Then, thread the beads onto the transparent fishing wire with a spoon or fork at the bottom of the and attach them to the tin can in a circle; in the middle of the circle, attach a wire that’s threaded with beads and a saltshaker.
Makeup Holder
Due to the shape of tin cans, storage containers are probably the easiest and best way to repurpose them. Therefore, making holders out of tin cans is a cheap and sustainable alternative for containers that are usually rather pricey.

Makeup tables tend to get messy as they gradually fill up with products, but you can use a few tin cans to create makeup holders to help organize the mess. Although the tin cans are different in height, the owner painted them in a similar pattern so that they match one another.
Pencil Holders
With the top removed, tin cans can serve as an empty cup that is perfect for holding small items like art or study supplies (or makeup brushed as we saw above). So, why not turn some of them into pencil holders? Of course, you’ll have to start by cleaning and drying the tin cans.
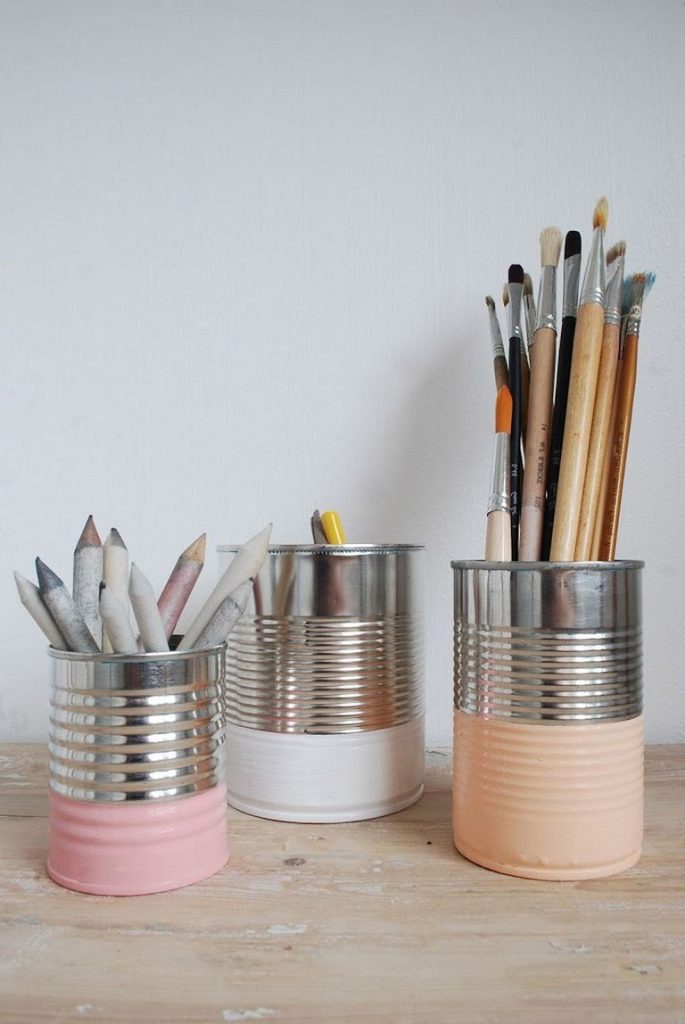
Once the tin cans are cleaned and dried, remove the rims and sand down the edges. This will prevent anyone who uses them from cutting themselves. After that, paint the bottom half of the tin cans in your desired color and pattern.
Magnetic Pencil Holders
Most homeowners have whiteboards on their refrigerators so that they can jot down to-do lists, grocery lists, and daily reminders to prevent themselves from forgetting. But it often happens that these homeowners can’t find the markers when they need them the most!
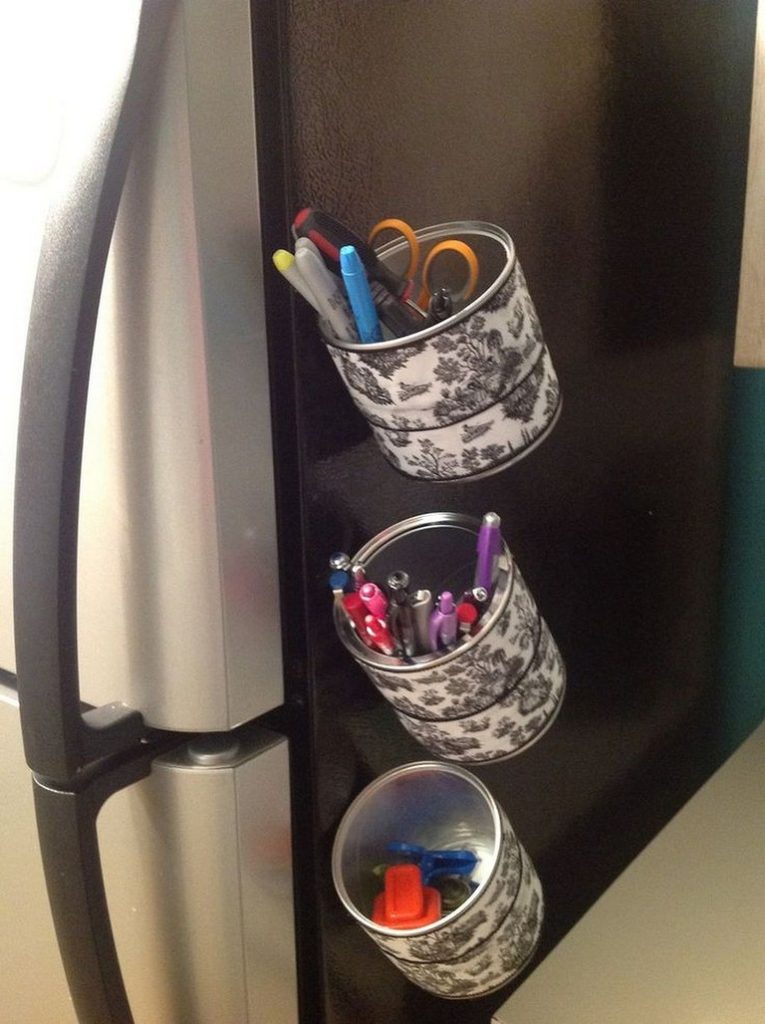
A straightforward way to keep track of all your marker pens is to store them in a magnetic pen holder that you can stick onto your refrigerator! All you need are a couple of tin cans and self-adhesive magnets. Decorate them and attach them to the side of your fridge, and you’re all set!
Tools Holder
Although the shape of tin cans makes the perfect pencil holder, smaller tin cans don’t hold that much, not to mention that things can get quite messy inside the tin can if you use it for many different items. As an alternative, try this tool holder instead.
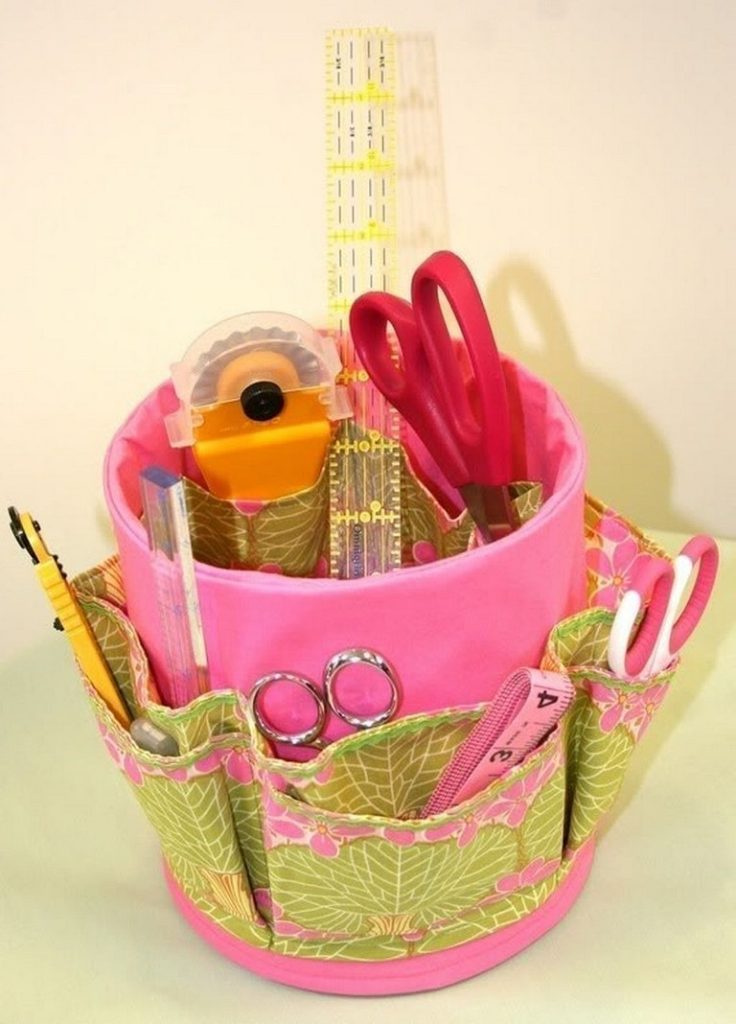
Similar to the marker holder above, use a large tin can as the main component of this tool holder. Then, attach some pouches to the sides of the tin can. Of course, you can decorate the tin can to match the pouches as this person did!
Crochet Tool Holders
Crochet tools are often small, so it’s easy to lose them, especially if you tend to misplace things. Therefore, you’ll need a holder to keep all of these items in place in order to avoid losing them, and we have the perfect way to help you!
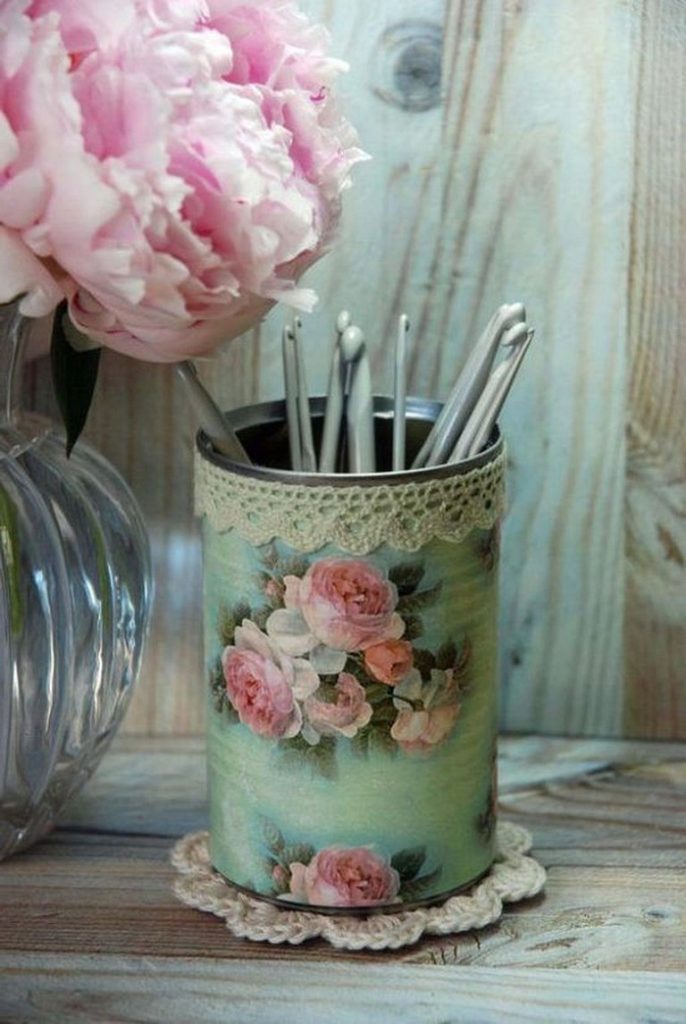
Again, you’ll need an empty tin can. Then, remove the tin can rims by smoothing down the edges to prevent yourself from a painful cut. After that, decorate it as you like; you could even decorate the can with some of your crochet work.
Flower holders
Furthermore, the build of tin cans also makes for the perfect flower holders. Fresh flowers are lovely to have inside the home because they cultivate positive energy and reduce stress. So, be sure to get yourself a fresh bunch and put them in this tin can flower holder.
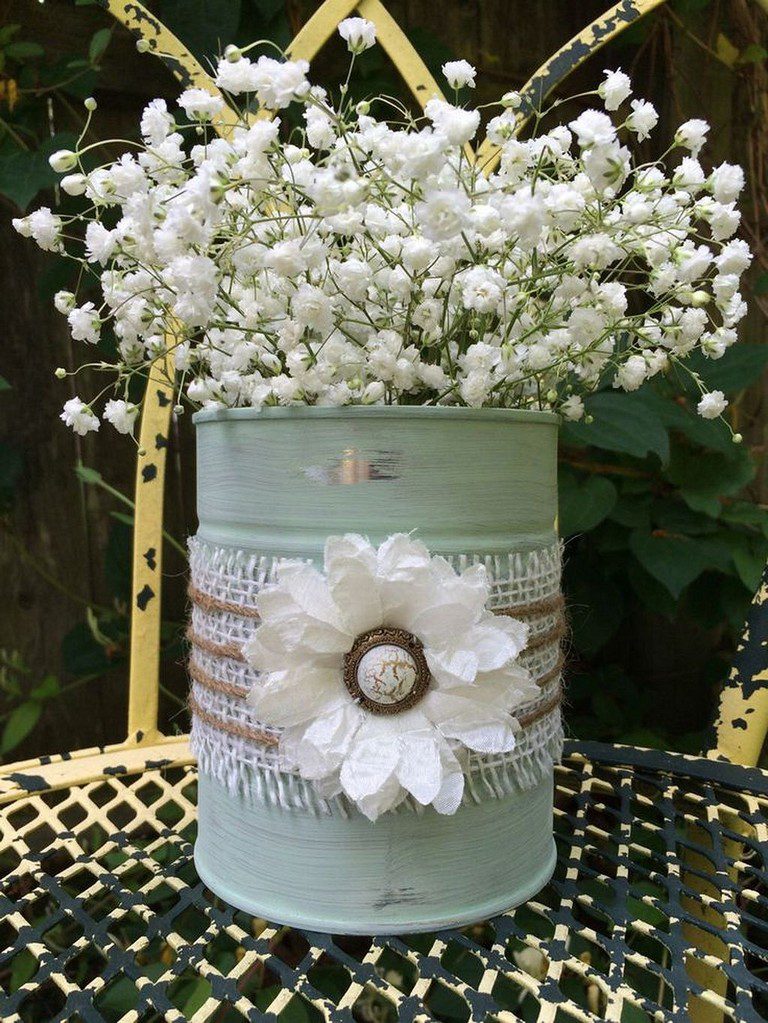
To recreate this flower holder, start by painting a large tin can in a mint color. Then, wrap a piece of mesh along with a few pieces of twine around the tin can, and secure it in place with glue or mod podge. Finally, add a faux white flower in the middle.
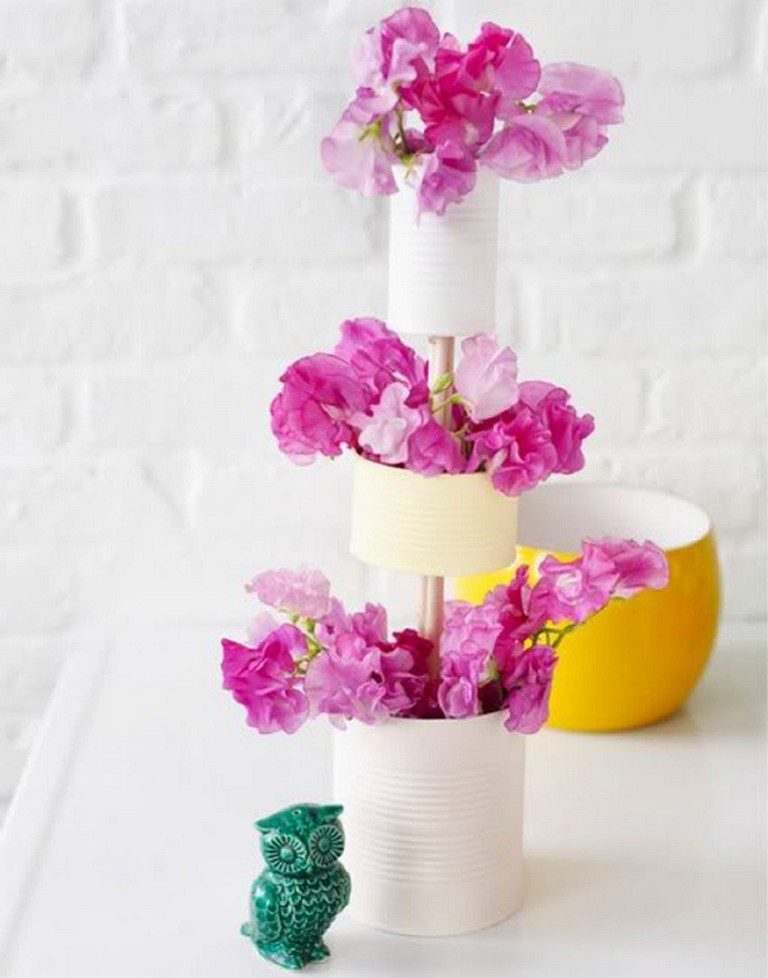
More Flowers, Please!
Alternatively, use a thin and tall tin can as a flower holder if you don’t fancy a big one like the one we just showed you above. Thin, tall tin cans are usually used for drinks, so look out for them if you want to make this unique flower holder.
Once you have a thin and tall tin can in your possession, remove the rims, like always, and sand down the edges to avoid hurting yourself. Then, decorate the tin cans with either wrapping papers or paint, a few decorations, stickers, or ribbons.
Faux Flower Holder
Instead of creating a flower holder for fresh flowers, why not create one for faux flowers too? Again, start by painting a large tin can. If you often buy colorful flowers, paint the tin can in basic colors like white, black, or beige. But if you usually go for minimalistic flowers, go crazy painting the tin can.
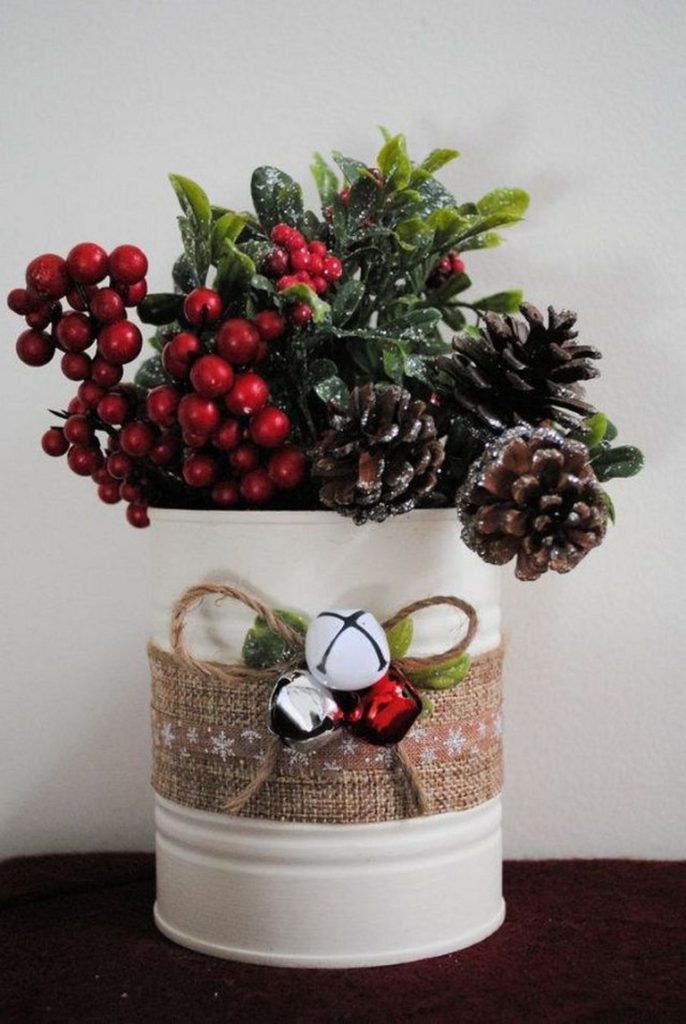
After the paint has dried, decorate it with mesh, twines, or in this case, bells for a wintery theme! If you’ve chosen primary colors like we have, try to decorate with minimal decorations. But if you prefer crazy colors, try to go with simple decorations.
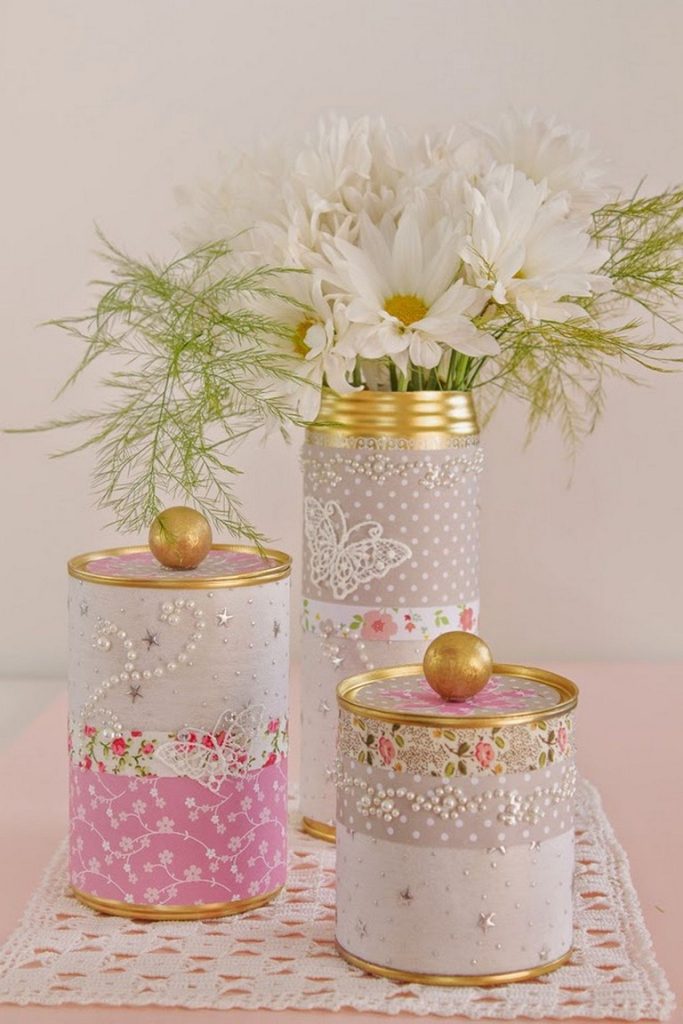
Another Faux Flower Holder
Aside from the project above, you could try this instead. For this, you’ll need to prepare a wooden rod, some faux flowers, and a few tin cans of various sizes, preferably one large tin can and two smaller ones.
Paint the wooden rod along with the tin cans. This person painted their tin cans light pink and the rod gold to match the pink flowers. Then, drill a hole in the middle of each tin can, attach them to the rods with the can opening facing upwards and place the flowers inside.
Kitchen Utensil Holders
Other than makeup products, kitchen utensils, along with kitchenware, also require the use of organizers as they make for a lot of clutter without them. Fortunately, you don’t have to spend a single penny on organizers with this tin can holder idea.
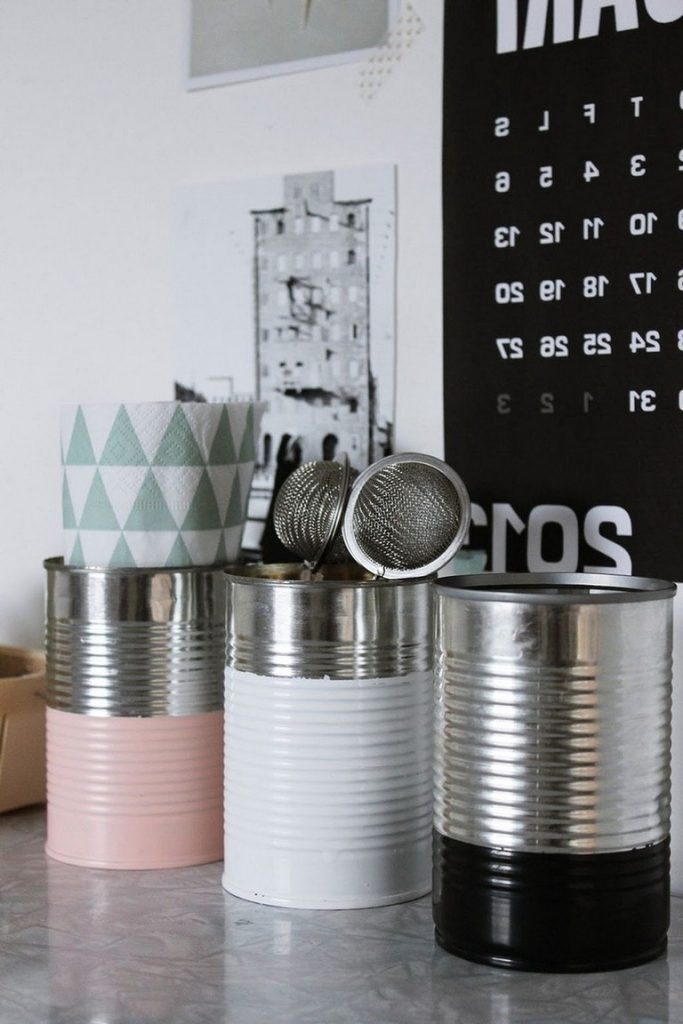
Start by removing the rims of the tin cans and sanding the edges down. Next, paint the tin cans in your desired colors! This person painted half of their cans and left the other half as it is to create a minimalistic pattern.
Bread Holder
This next tin can holder idea is great for holding bread. For this, you’ll definitely need the largest tin can you can find. Once again, you’ll need to remove the tin can rim and smooth out the edges to avoid any accidents due to sharp edges.
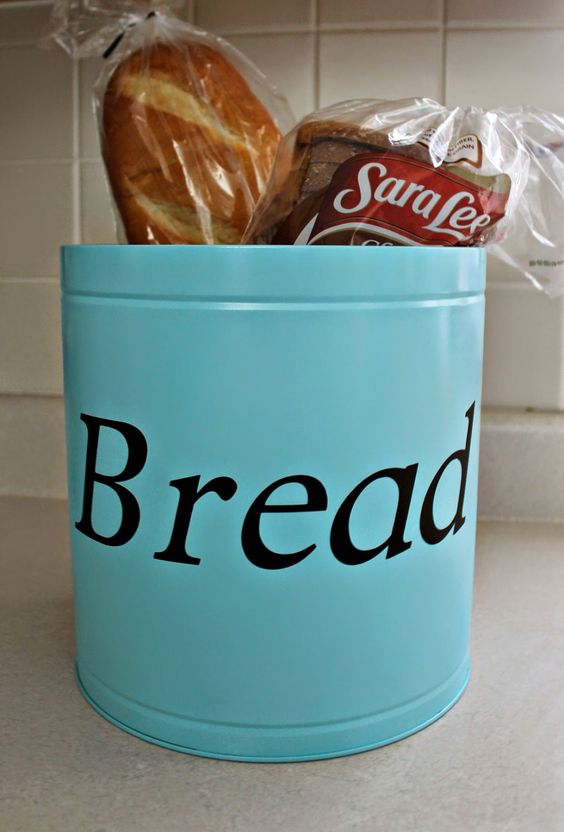
Next, you can paint the tin can in your favorite color! This user chose to paint their in light blue and stenciled on the word “Bread” on top. Once the paint has dried, the tin can will be ready to hold any kind of bread you desire!
Hair Supplies Holder
Hair supplies such as straighteners and curlers have heating properties; storing straighteners or curlers when they’re not completely cooled will probably burn the storage container; therefore, it wouldn’t be wise for us to use plastic organizers that will burn easily.
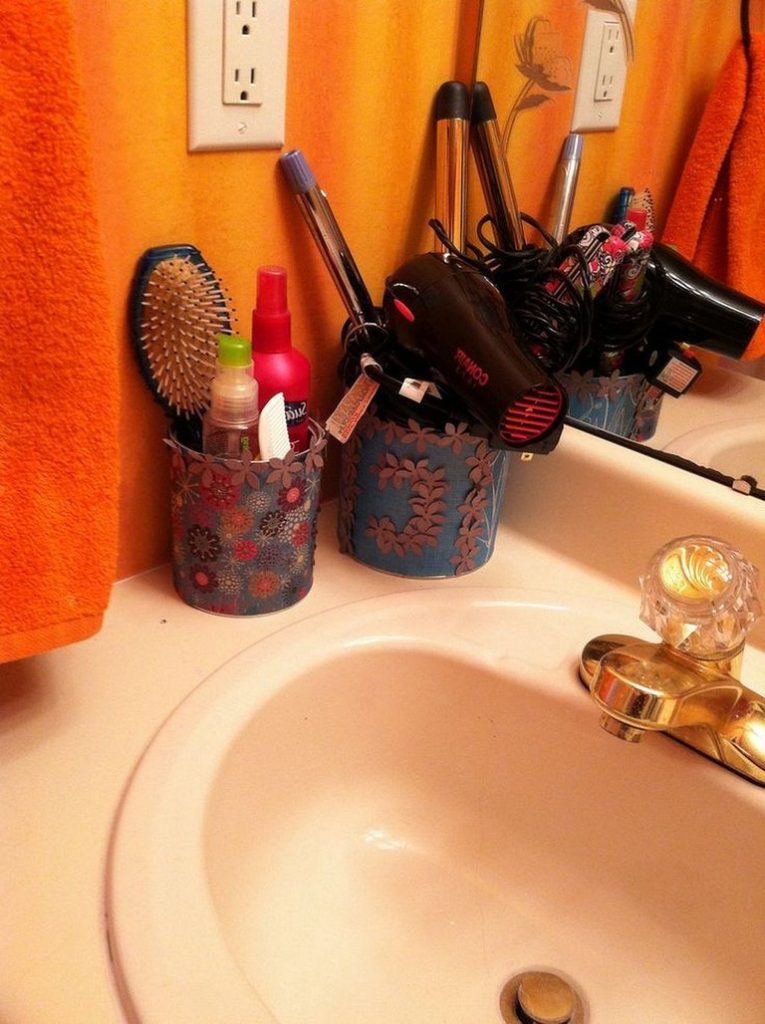
Simply decorate some tin cans with paint or stickers and remove the tin can rim, and sand down the edges before storing hair supplies. Tin cans are obviously made of tin, a type of metal that has a high melting point.
Candle Holders
Other than that, you can also transform tin cans into beautiful candle holders. This is also a great handmade gift idea for your friends and family. First, start by decorating an empty tin can any way you like. You have so many options!
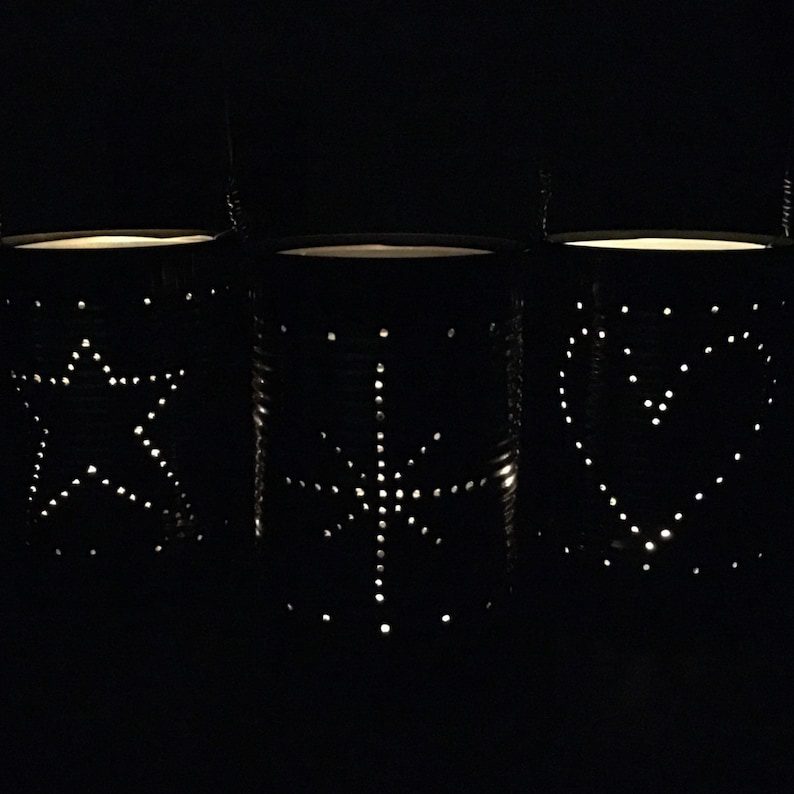
After that, fill the tin can with wax candles. When the wax has dried completely, poke some holes through the tin can, but try to poke holes that form interesting shapes like a heart, square, or circle instead of random ones all over. Finally, tie a piece of twine around it!
Christmas Candle Holder
For these cute snowman candles, you’ll need to as a bit of Christmas spirit to do them justice which means tethering all the Christmas decorations you can find. First, get yourself a flat and wide tin can and empty it out; these are usually used for packaging cookies.
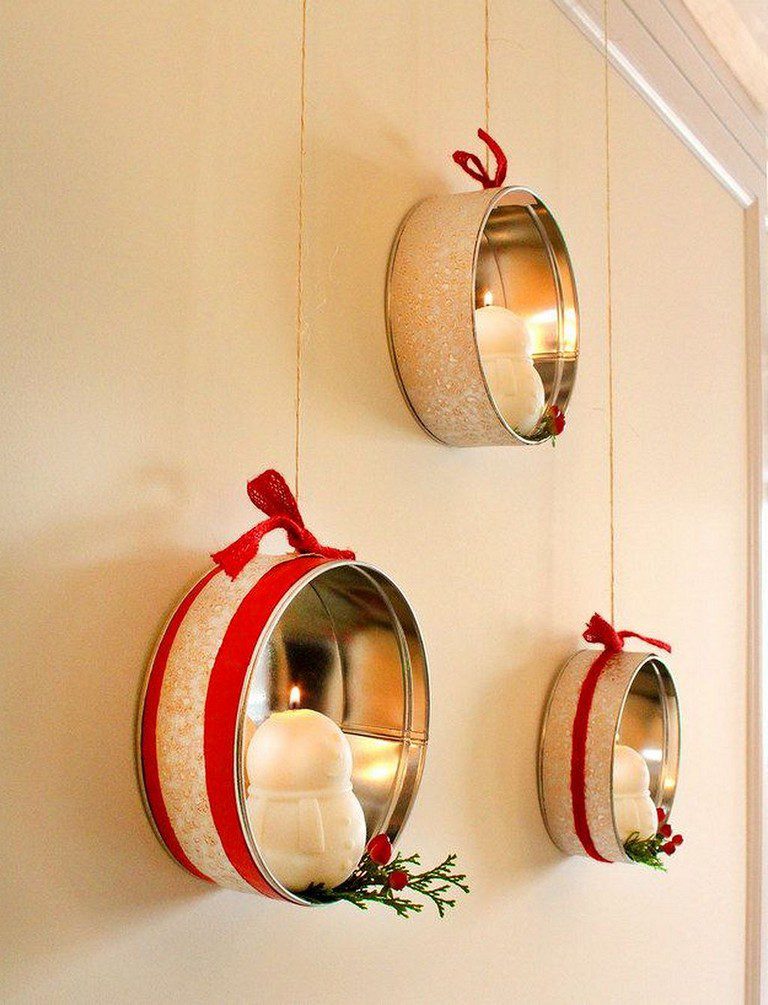
Next, you can either paint the tin can or wrap them in Christmas wrapping; this crafty user went for a white shimmery wrapping paper. After that, attach a piece of red twine to the tin can to hang them. Finally, hang the tin cans and pop the snowman candles inside.
Place Settings Holder
Another great way of repurposing tin cans is to use them as holders for place settings; place settings often include cutlery, but occasionally, they include little gifts or party hats, and placing everything in one holder helps make the table look more organized.
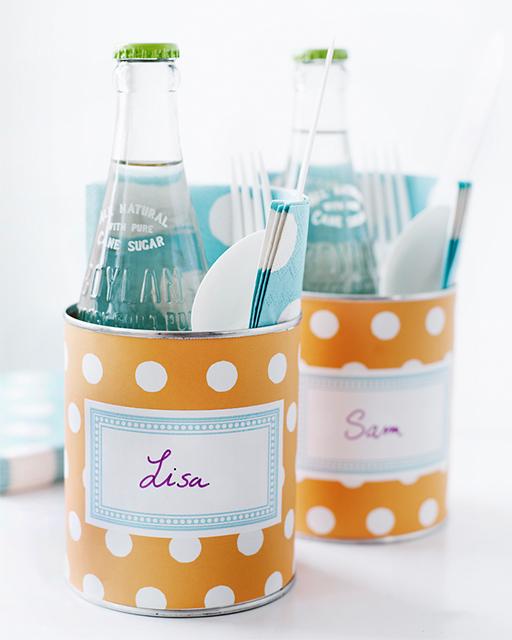
Be sure to remove the tin can rims and sand down the edges like always. After that’s done, decorate them according to the theme of the event and attach a name tag to each holder to keep track of which one belongs to who.
Tin Can Laundry Baskets
Laundry baskets are a must-have because they keep our dirty clothes in one place, so enormous tin cans would make the perfect laundry basket. Obviously, the regular small tin cans wouldn’t be enough to hold even one article of clothing.
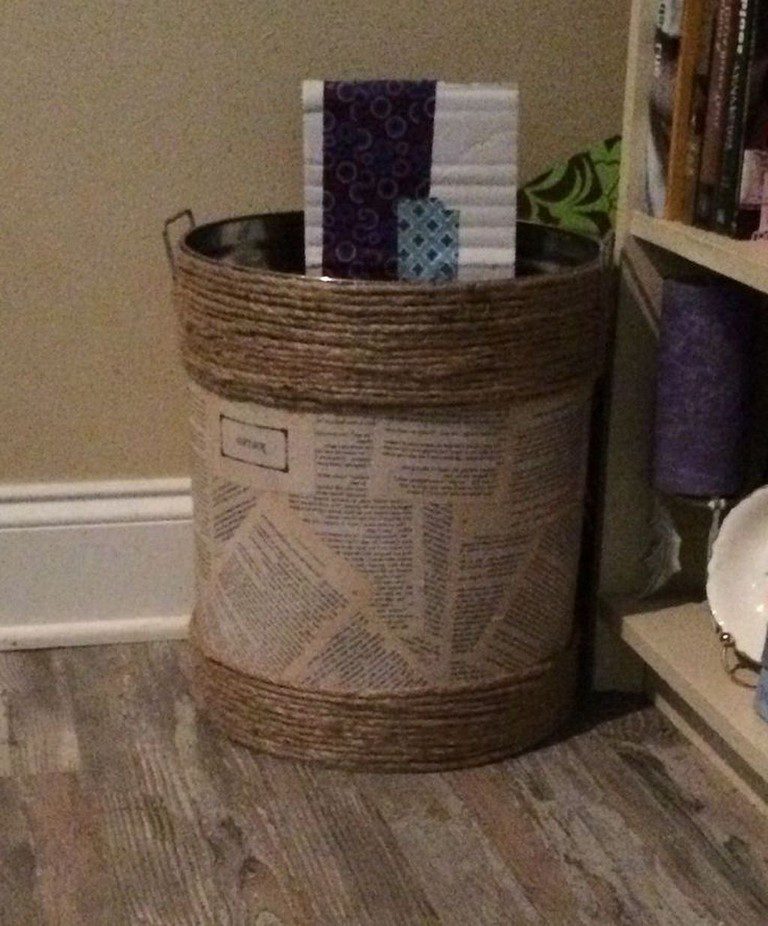
Therefore, you’ll need to get yourself an extra-large one. Then, you can start decorating the “basket.” This person stuck some pages of an old book onto the tin can with some mod podge and wrapped the top and bottom part of the can with a few layers of twine.
Copper Planters
Similar to holders, planters are another easy tin can repurposing idea, and there are no complicated steps involved. All they require are some painting and sanding. To create planters, start by collecting a bunch of tin cans, removing the rims of them, and sanding down the edges.
Next, choose a color scheme. This user opted for a copper color scheme. Once you decide them, paint the tin cans in the colors of your chosen color scheme. For them, that meant a range of different shades of copper and some white.
A Brightly Colored Planter
Instead of creating a bunch of planters in one theme, there’s always the option to create independent planters, each in their own style. They will suit homeowners who like to purchase different kinds of flowers rather than a bunch of the same ones.
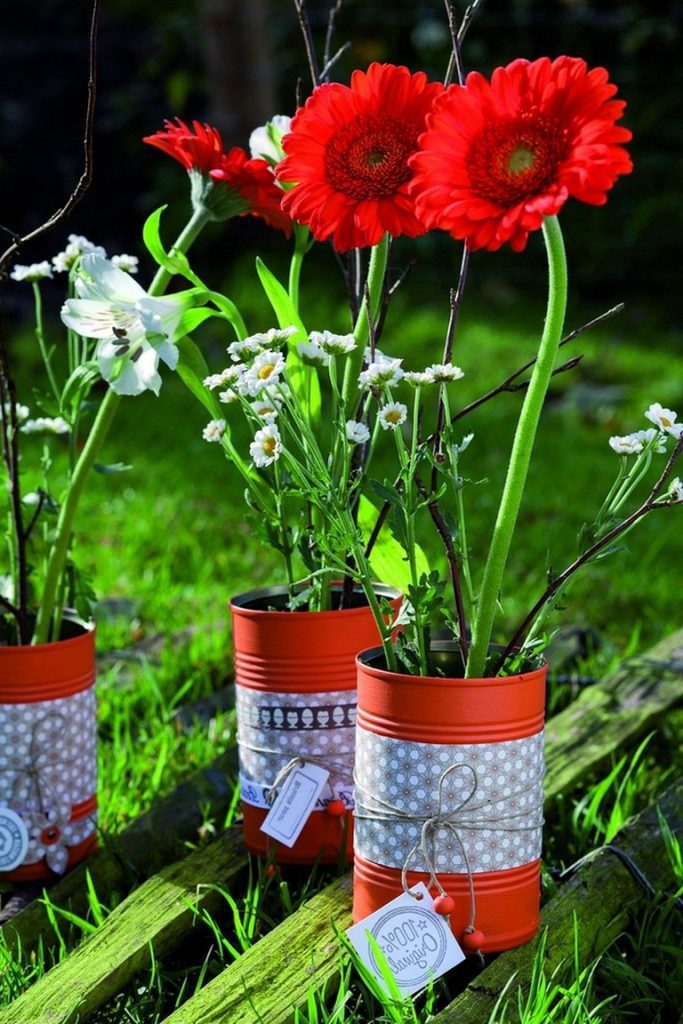
To start, remove the tin can rims and sand down the edges. Then, decorate it with either wrapping paper, paint, or even both like this person did. They used red paint and wrapped a piece of wrapping paper in the middle along with some twine.
Plain Planters
Of course, rather than painting or decorating the tin cans, there is always the option of leaving them as they are. Without the painting process, there’s really nothing left to be done except planting plants in the tin can planter.
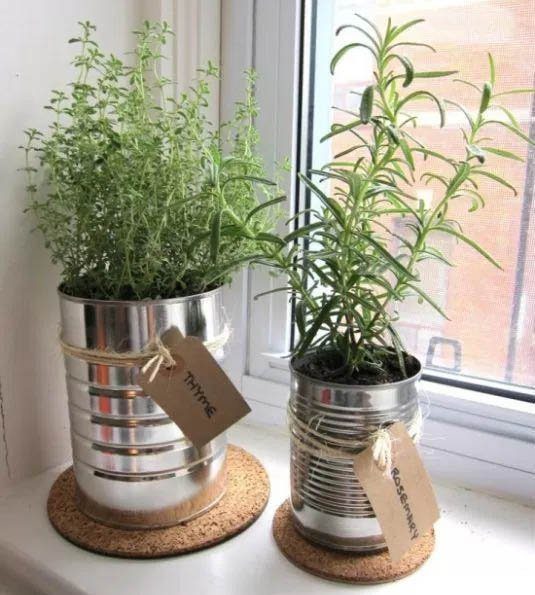
However, unpainted tin cans may look rather ordinary and plain, which is why this user wrapped a piece of twine around the body of the tin can that has the plant’s name written on a brown card attached to it.
Colorful Planters
This next one is a bit more complicated than the one mentioned before. Again, you’ll have to start by cleaning and drying the tin cans. When they’re all dry and clean, paint them in bright and vibrant colors; this user painted theirs with a few different neon colors.
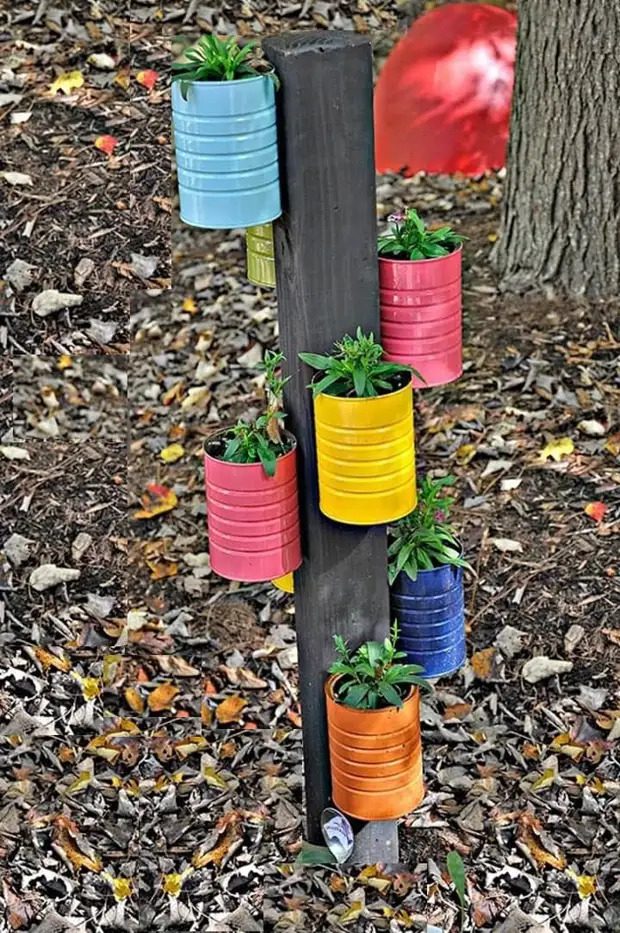
Then, they sanded down the edges of what used to be the tin can rim. After that, they hammered the tin cans to a black wooden plank and stuck it in the garden. Now, the planter is ready for herbs and other small plants.
Tin Can Planters
Instead of hammering the tin can planters to a wooden plank stuck into the ground of your backyard, you could hammer them directly onto your fence! This way, not only will you have a unique DIY planter, but your fence will look ten times more beautiful.
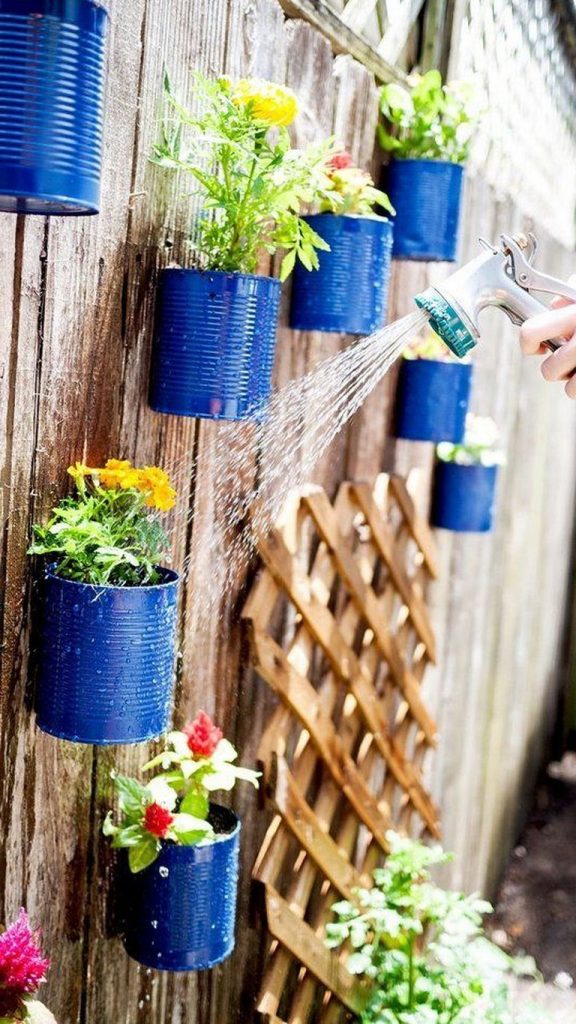
For this planter idea, this person painted their tin cans in a bright blue color and planted vibrant and colorful flowers in them before hammering them onto the fence in the shape of an X. Of course, there are many other ways you can arrange your planters.
Fingerprint Planter
Moving on, we have a tin can planter idea that doubles as a great sensory activity for younger kids. If you want to get them involved, it’s best to remove the tin can rim and sand down the edges first so that our little DIY-ers won’t hurt themselves.
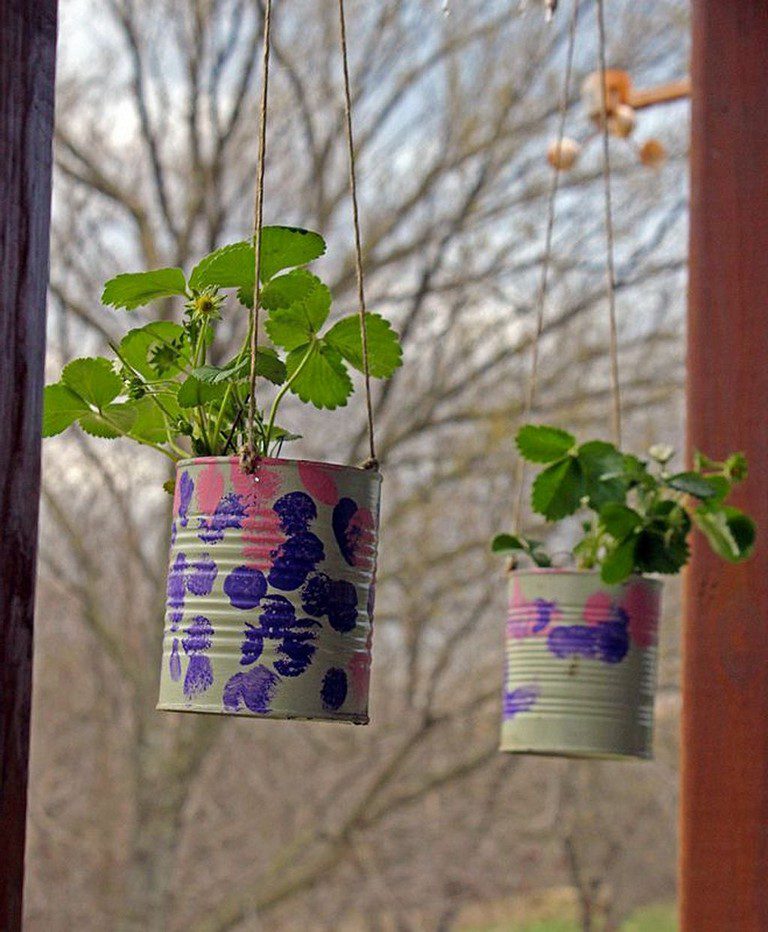
Now, prepare some paint and have the little DIY-ers start fingerprinting the tin cans in whatever design they desire. Next, you can punch a few holes in the cans and thread rope to hang them up or simply place them on the steps of your porch.
Hanger And Tin Can Planter
Furthermore, we have a planter idea that repurposes not only old tin cans but also old clothes hangers and drying racks as well. If this multi-item repurposing planter draws your attention, gather some hangers, a drying rack, some tin cans, and let’s get started.
Start by painting the tin cans. While the tin cans are drying, bend the hangers in half. When they have thoroughly dried, attach the bent ends of the hangers to the tin cans and hang them on the drying rack.
DIY Bird Feeder
For all the animal lovers out there, you can create a bird feeder out of tin cans to attract wildlife to your backyard. To assemble one, instead of removing the entire top and bottom of the can, remove half of both sides as shown in the picture.
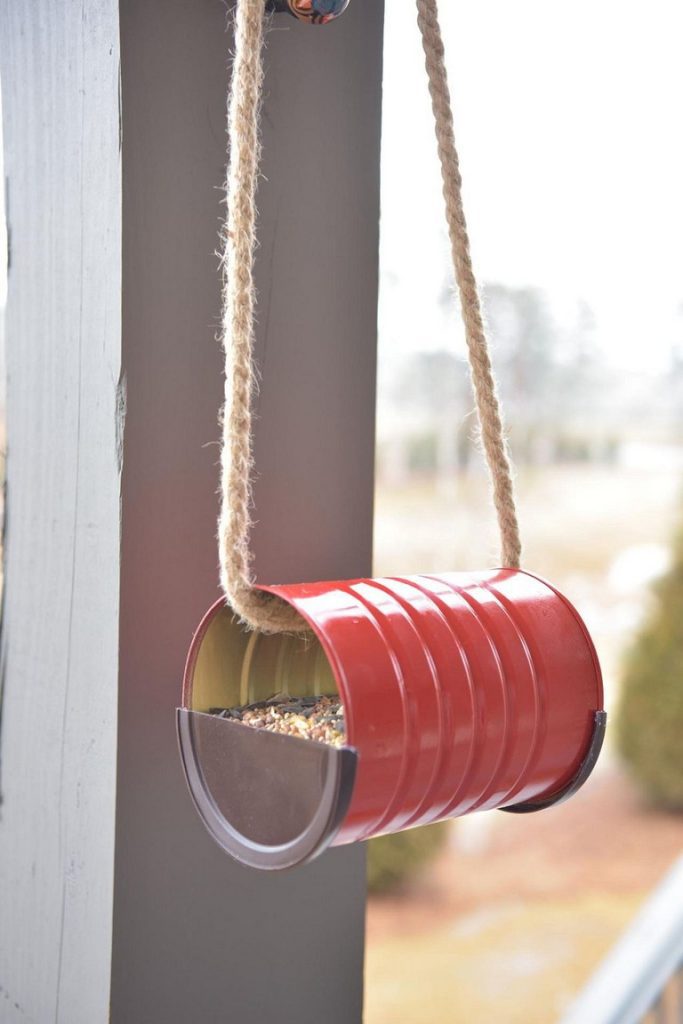
Then, paint the tin can in a bright and vibrant color to help attract the birds. After that, slip a rope through the tin can so that you can hang the feeder, but before you hang it, fill it with bird food.
Bowling Pins
Aside from repurposing old tin cans into holders, planters, or decorations, you can also make them into a fun activity that you can enjoy with friends and family; you can repurpose them into “bowling pins.” This way, you can bring the bowling alley to your own home!
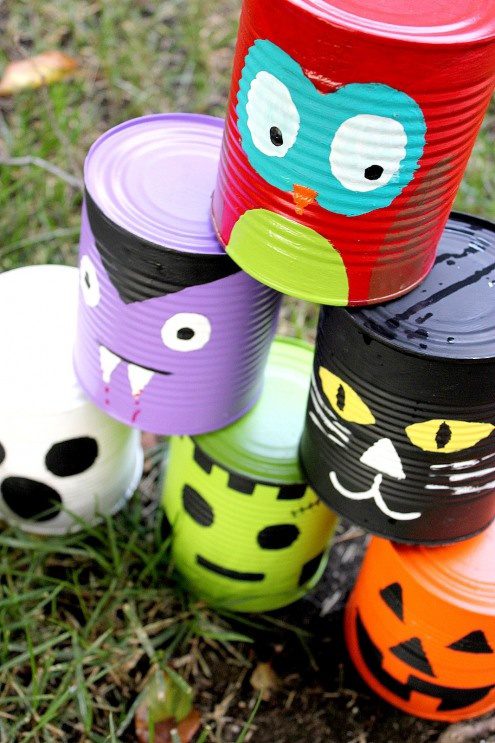
To make your own “bowling alley,” you’ll need six tin cans and a ball. Start by decorating the tin cans. This user decorated theirs in a Halloween theme, but you could go any direction you’d like. If you’re a huge Marvel fan, decorate your tin cans as the Avengers.
Kid’s Throwing Game
In addition to bowling, you can use tin cans to create this fun game that challenges children’s aiming. For this, you’ll need tin cans of different sizes and shapes and something to prop them up on. This tactile user gathered branches to hold the game up.
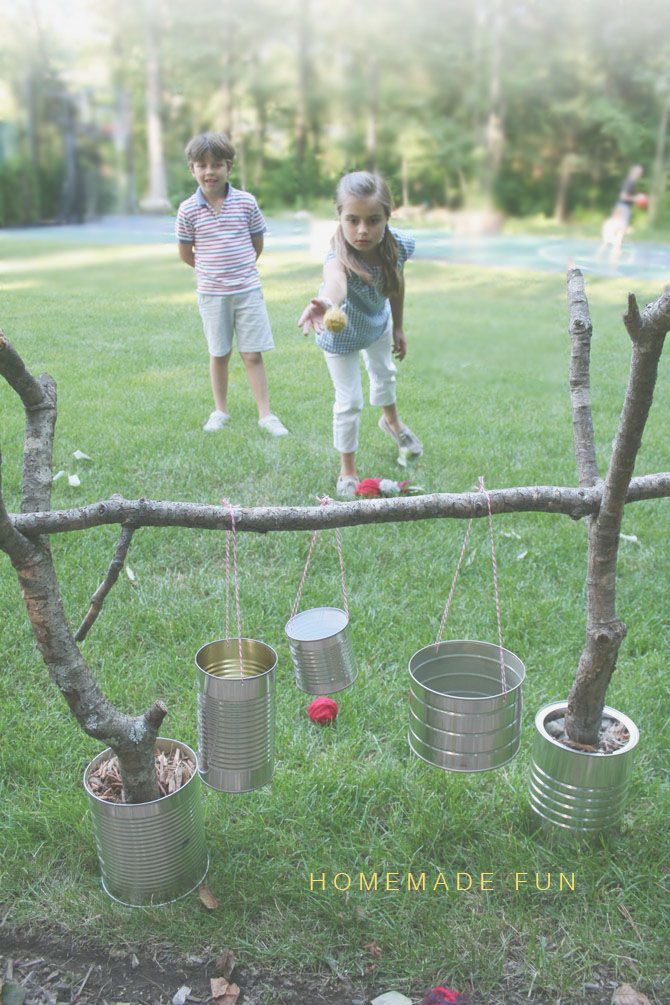
Poke holes in the top of the cans so that you can string twine through them to hang them up. Then, hang them on a branch and make sure they’re not touching the ground. Now, have your kids stand three to four feet away, and have them try to throw balls into the tin cans.